Using Reportable Fields
A guide on using Reportable Fields with Hosted Payment Forms
Reportable Fields in PayConex let you capture custom information during transactions and have that data saved in transaction history, available in reports, and retrievable via RSAPI. Unlike Hosted Payment Form Custom Fields (refered to as Non-reportable Custom Fields below), Reportable Fields are stored with the transaction and can be used for auditing, reporting, and integrations.
You can configure up to 25 optional Reportable Fields. Each field supports up to 50 alphanumeric characters.
1. Adding Reportable Fields
-
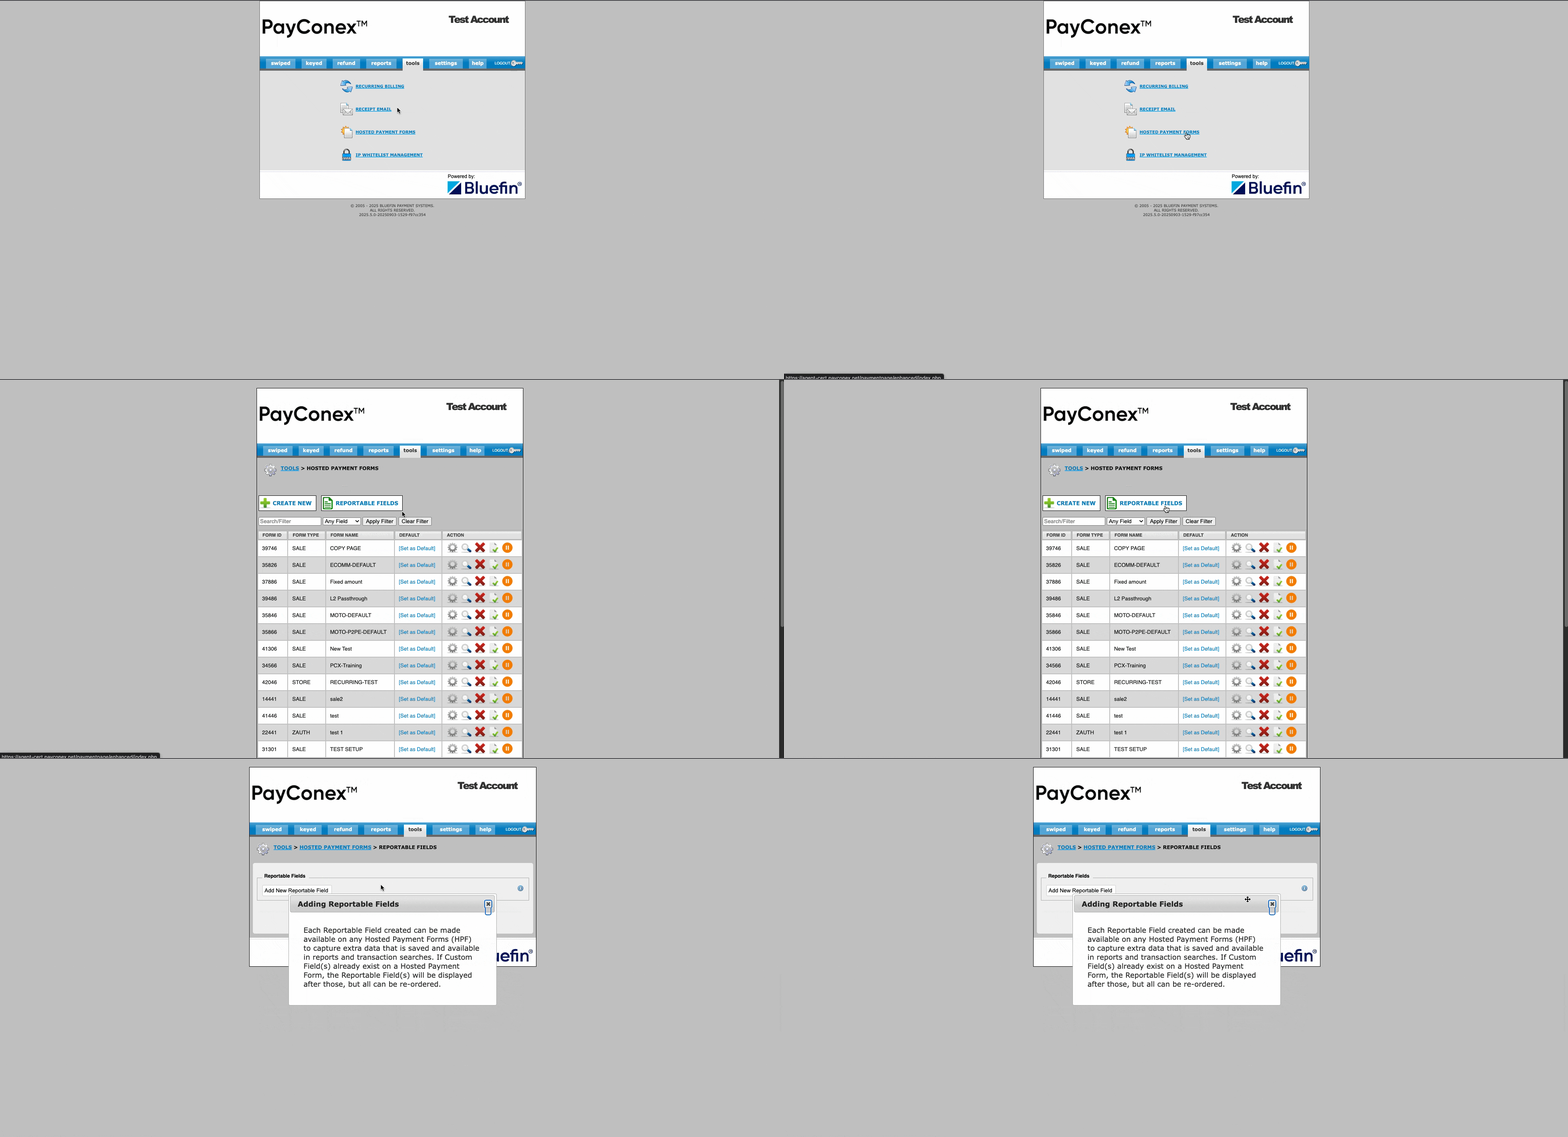
Log into your PayConex account and go to:
Tools → Hosted Payment Forms → Reportable Fields

-
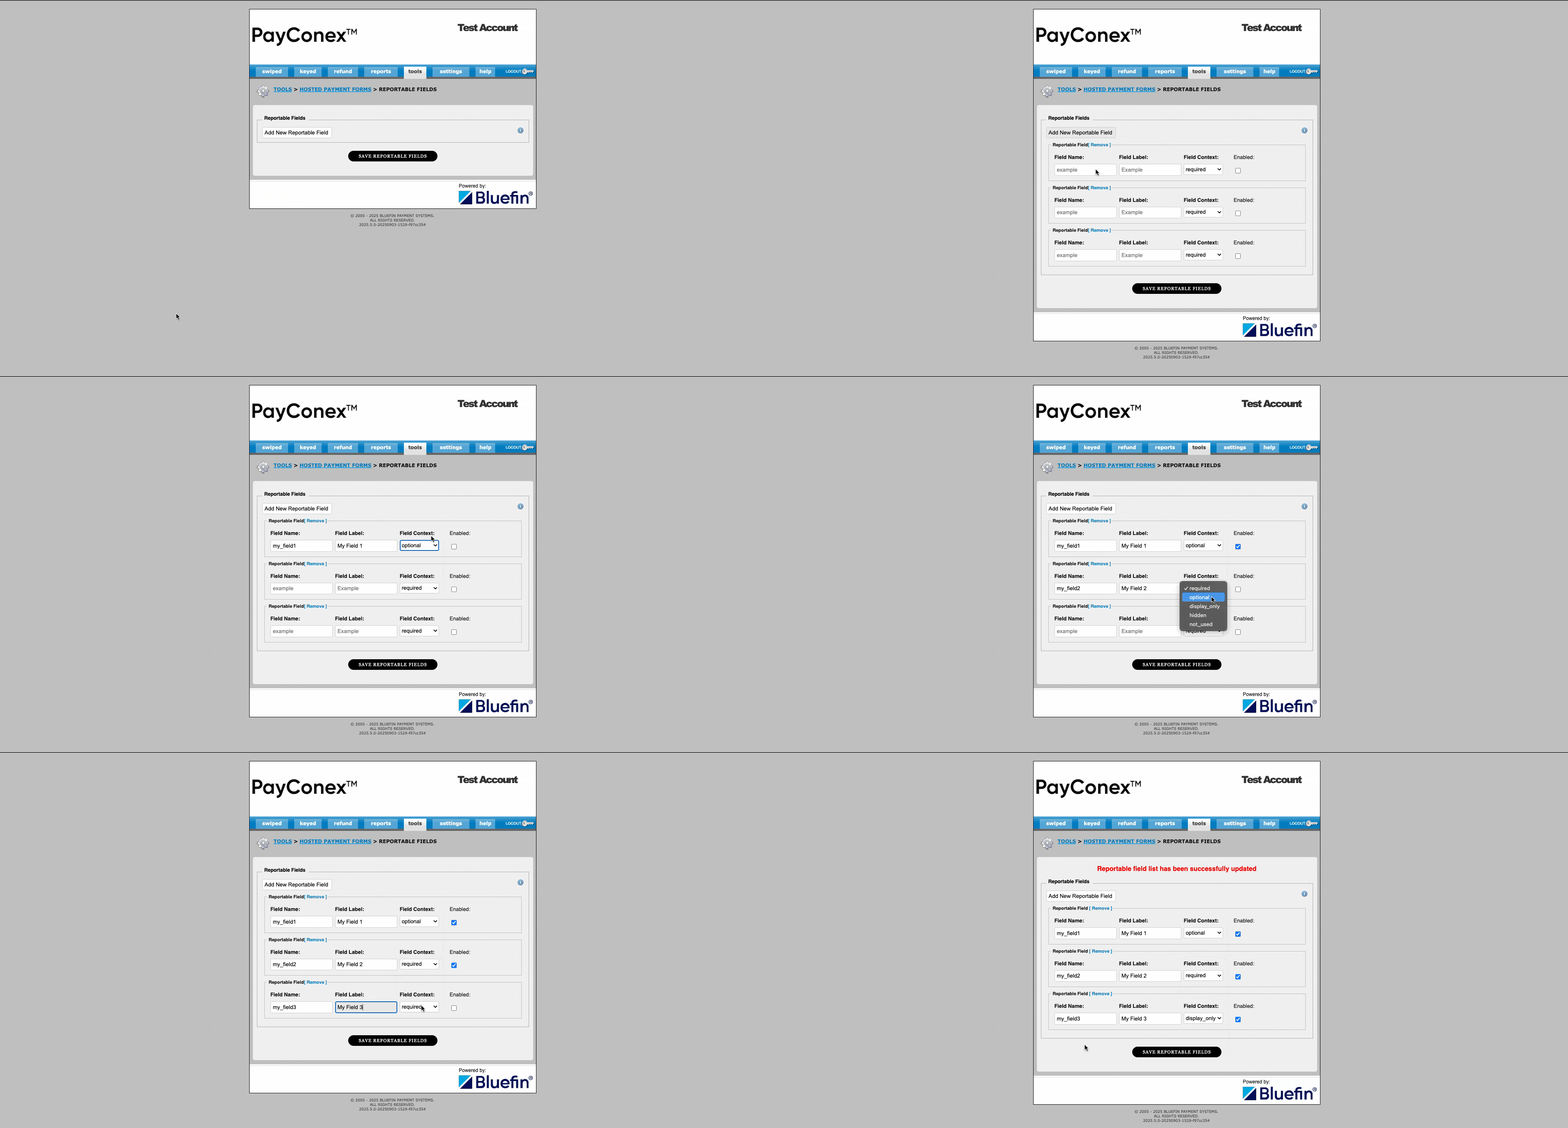
Click Add Reportable Field.
-
Enter values for:
-
Field Name – used as the parameter name and column header in reporting.
-
Field Label – the name displayed on the Hosted Payment Form.
-
Field Context – controls the behavior of the field:
- Required – must be completed before form submission.
- Optional – customer may leave it blank.
- Display only – populated via URL, visible but uneditable.
- Hidden – populated via URL, not visible to the customer.
- Not used – disabled.
-
-
Check Enabled to activate the field across Hosted Payment Forms.
-
Save the fields.

- Repeat as needed (up to 25).
Tip
You can add multiple fields at once to save time.
2. Using Reportable Fields in Hosted Payment Forms
- Go to Tools → Hosted Payment Forms.
- Create or edit a form.
- Scroll to the Custom Fields section and click Display.
- You will now see the Reportable Fields you created.
- Save and preview the form.
- Reportable Fields appear along with other non-reportable custom fields.
- You can drag-and-drop to reorder them within the Custom Fields section.
When a payment is submitted, Reportable Field values are captured and stored with the transaction.
3. Viewing Reportable Fields
- Transaction Search – Reportable Fields can be searched directly in a dedicated tab.
- Transaction Details – All configured Reportable Fields and their submitted values appear at the bottom of the transaction record.
Note
If a Reportable Field is deleted from the account then it is no longer accessible with your transactions. Take care to make sure that if you are deleting fields that there will be no negative impact to your systems.
4. Including Reportable Fields in Reports
- Go to Reports → Custom Reports.
- Select Reportable Fields you’d like included.
- Save and run the report.
- Export as CSV or view online.
Note: If fields look “out of order” in CSV output, this usually reflects how they were ordered in the setup page. Values are always correctly matched to their fields.
5. Accessing Reportable Fields via API
By default, Reportable Fields are not included in API responses. To return them:
- Add
reportable_fields=1to your RSAPI request. - Example:
https://cert.payconex.net/api/rsapi/3.8/?account_id=000000000111&api_accesskey=abc123def456xyz&transaction_date=2017-08-28&tender_type=ALL&reportable_fields=1
- In the response, Reportable Field data is appended as additional columns.
6. Reportable Fields vs. Non-reportable Custom Fields
| Feature | Reportable Fields | Non-reportable Custom Fields |
|---|---|---|
| Stored in transaction history | ✅ Yes | ❌ No |
| Available in reports | ✅ Yes | ❌ No |
| Accessible via API (RSAPI) | ✅ Yes (with reportable_fields=1) | ❌ No |
| Location in setup | “Reportable Fields” section | “Display Custom Fields” section of a Hosted Payment Form |
| Use case | Auditing, reporting, integrations | Quick pass-through identifiers (e.g., session ID in URL) |
Summary
- Configure up to 25 Reportable Fields to capture custom data.
- Place them on Hosted Payment Forms and reorder as needed.
- Review captured values in Transaction Search, Transaction Details, and Custom Reports.
- Include them in RSAPI responses with
reportable_fields=1. - Remember: Non-reportable Custom Fields are pass-through only and not reportable.
This ensures your business can capture, report, and integrate custom transaction data directly in PayConex.
Updated 5 months ago
