Processing Credit Card Transactions
Sale
- From the Main Menu, Press [1] Press [Enter] for Sale.
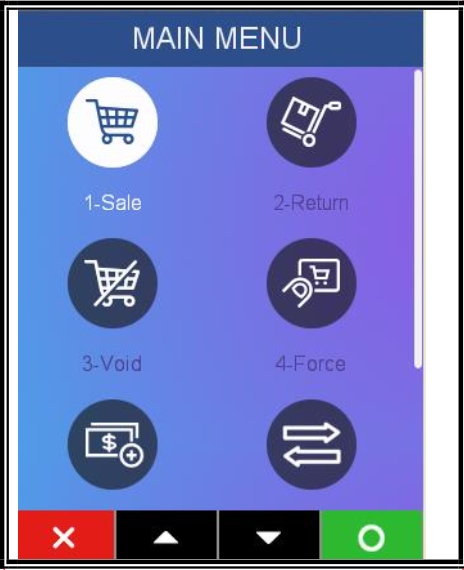
Default setting will be 1-Sale.
- Press [1] Credit or Arrow down and Press [Enter] for Sale.
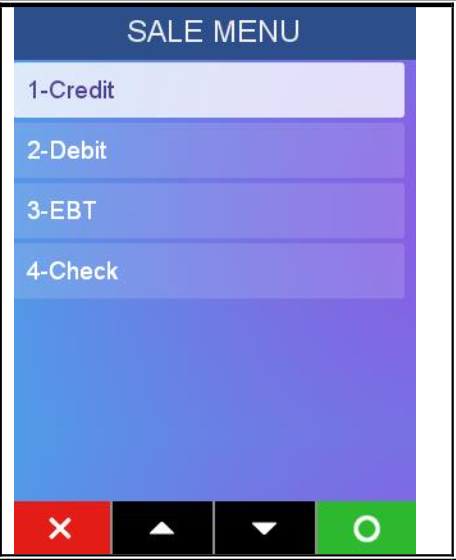
Default setting will be 1-Credit.
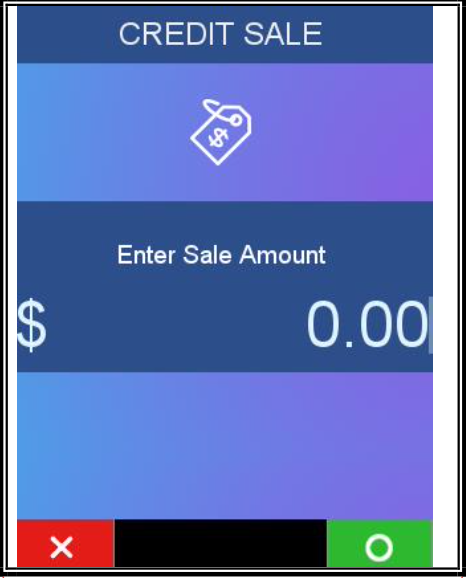
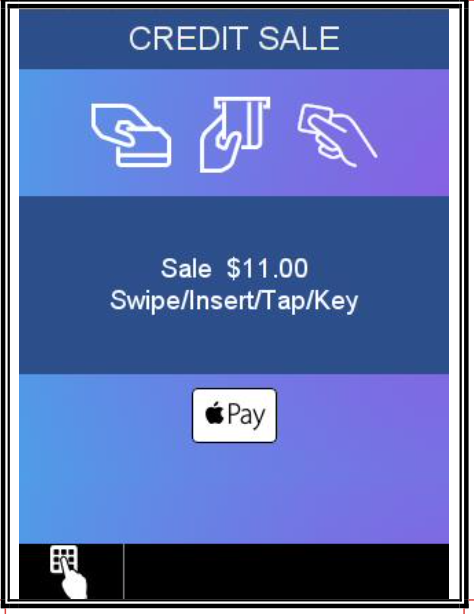
- Enter sale amount and press [Enter].
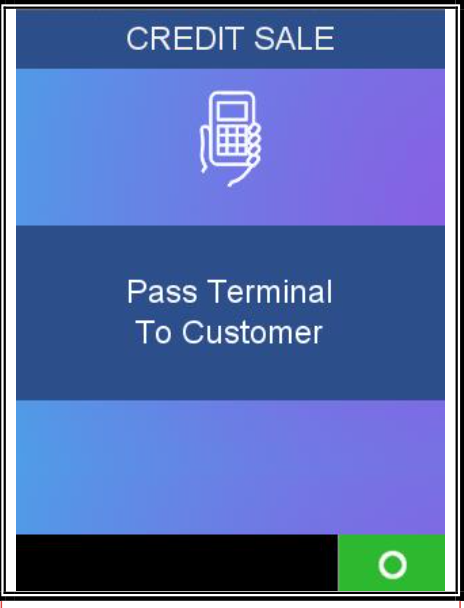
Optional prompt: PassTerminal
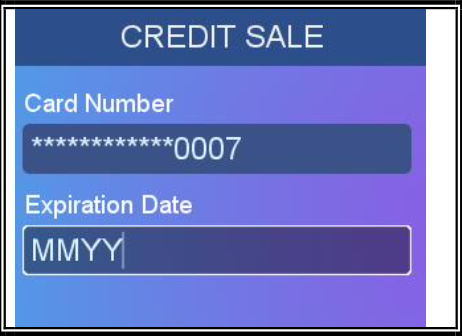
- Insert, Tap, Swipe card or Key card number and press [Enter].
If card is entered manually, enter expiration date in MMYY format and press [Enter].
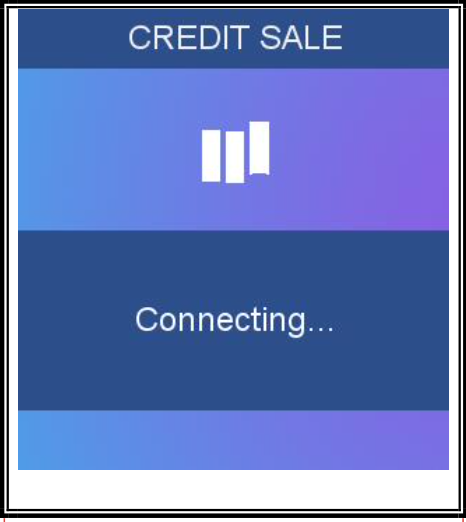
- Terminal connects to host and starts transmitting.
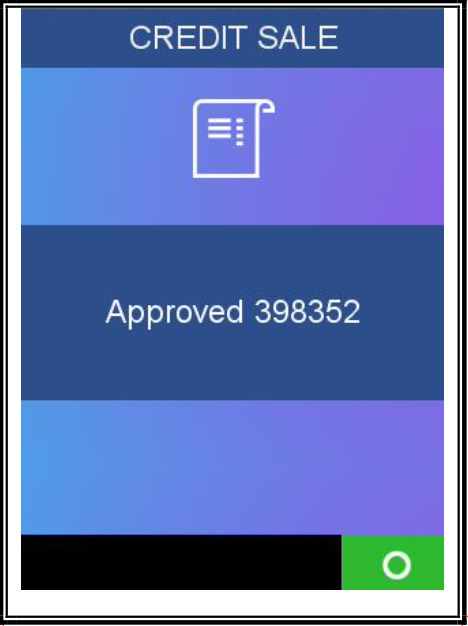
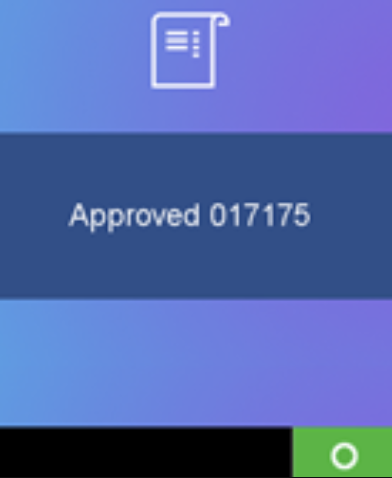
- Terminal displays Approval Code, if available. Terminal prints receipt(s) and returns to Idle.
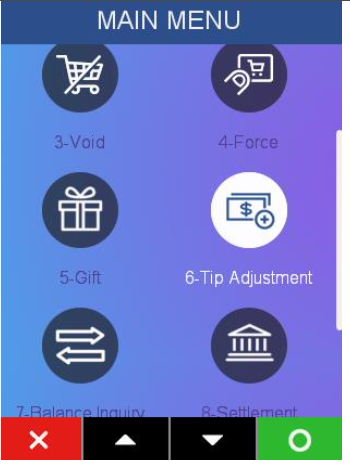
Void
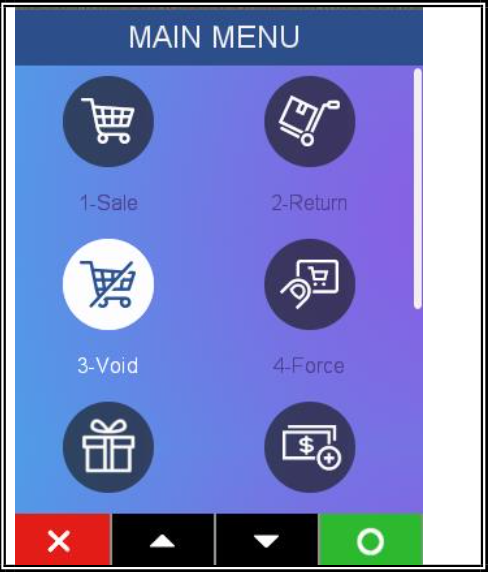
- From the Main Menu, Scroll to Void and press [Enter].
- Press [X] to select non Pre Auth Void.
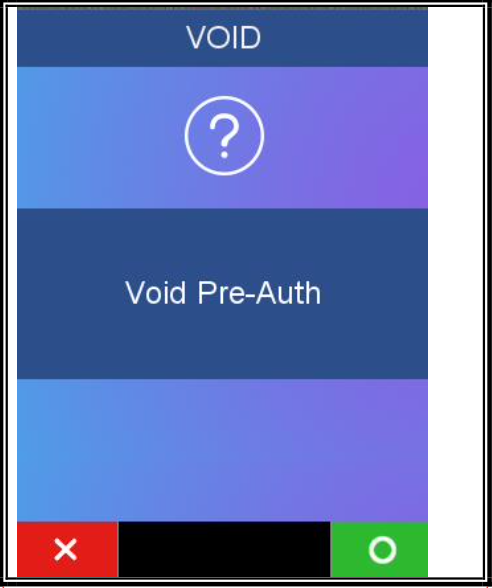
Screen only displays if Pre-Auth is enabled. If “Yes”, application will search Pre-Auth batch.
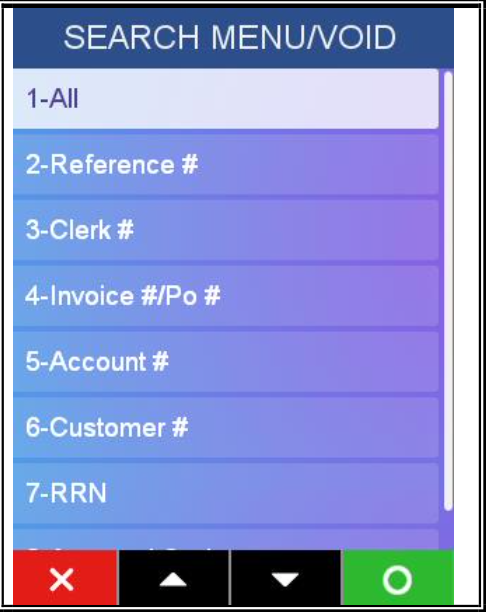
- Select All or One

Screen only displays if Yes was pressed in step above.
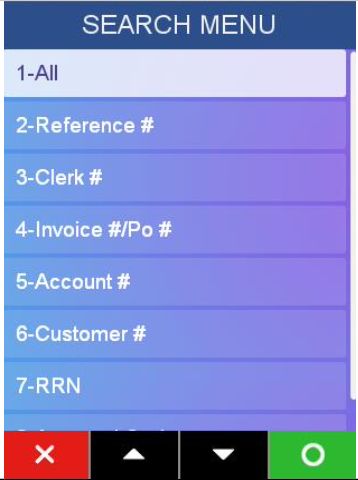
- Press the key that corresponds to the desired search option or Scroll to the option and press [Enter].
- When the transaction to void is found, press green [O] or [enter] key to Select.
Press [>] to select the next transaction in the list.
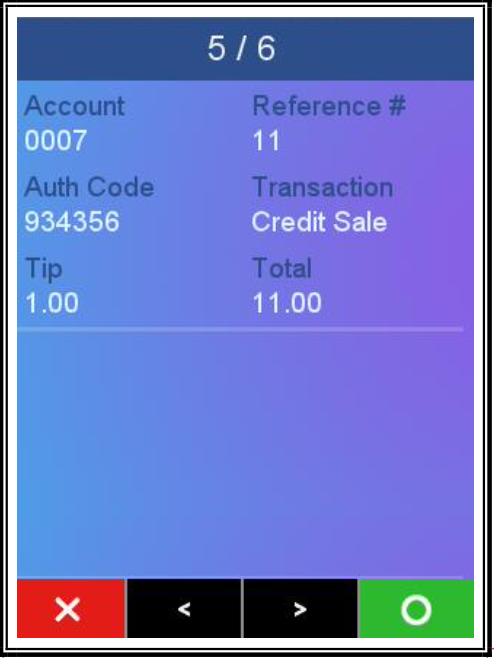
- Select “Yes” to confirm the Void or select “No” to cancel the Void and return to the Search Menu in step 3.
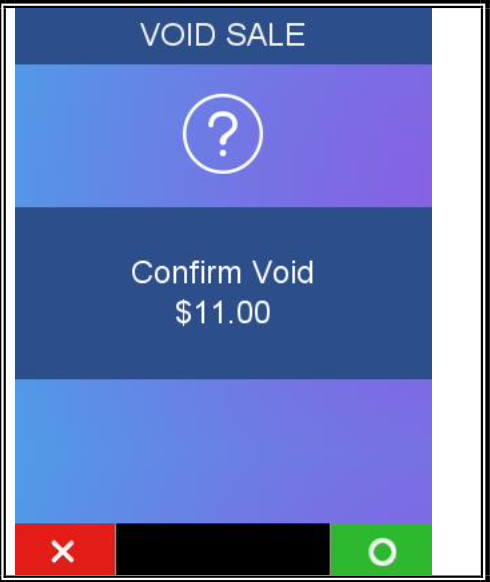
Title will be VOID RETURN if a return is being voided.
- Terminal connects to host and starts transmitting.

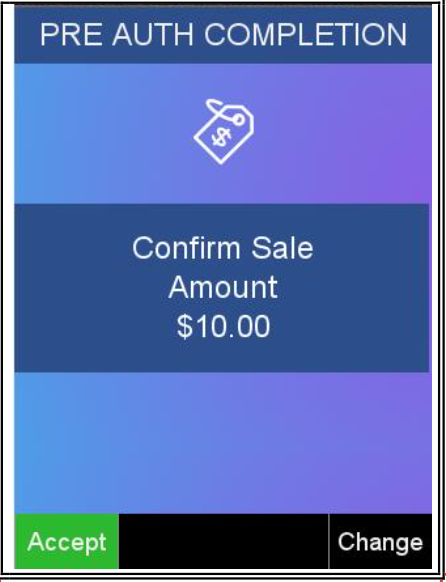
Pre Auth Completion
Pre Auth Completion is only supported in certain markets and with options associated with Retail
Credit, MOTO, or Ecommerce.
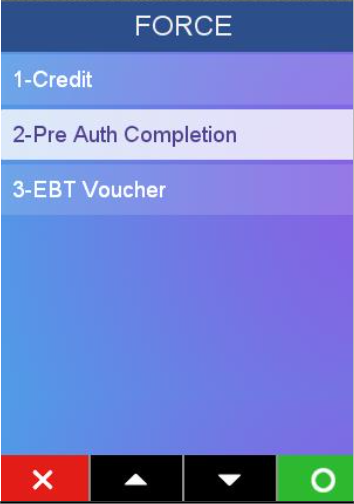
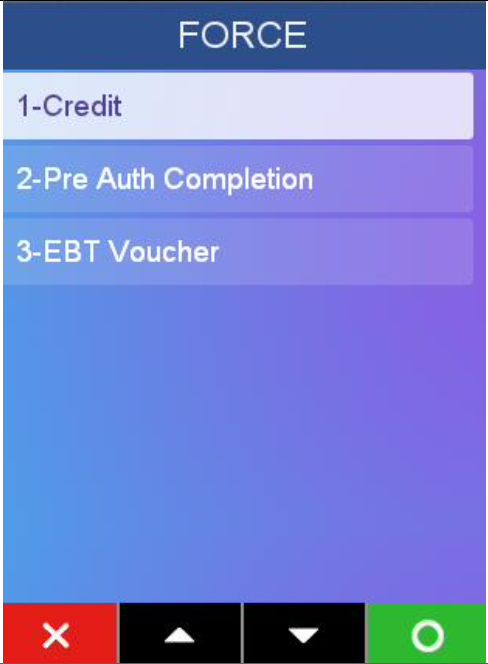
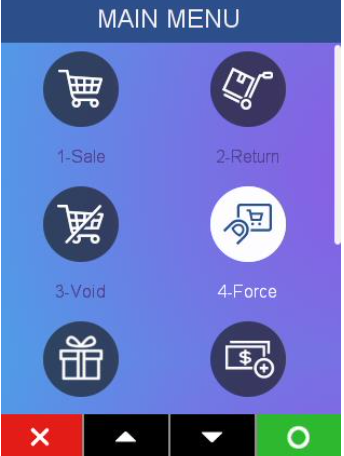
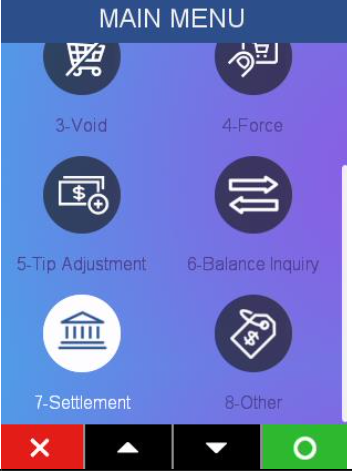
- From the Main Menu, click on Force.

- Press [2] or scroll to Pre Auth Completion and press [Enter].
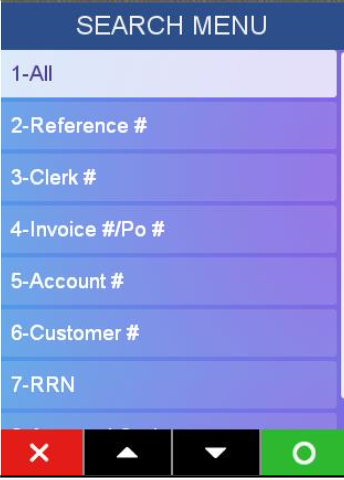
- Press the key that corresponds to the desired search option or Scroll to the option and press [Enter].
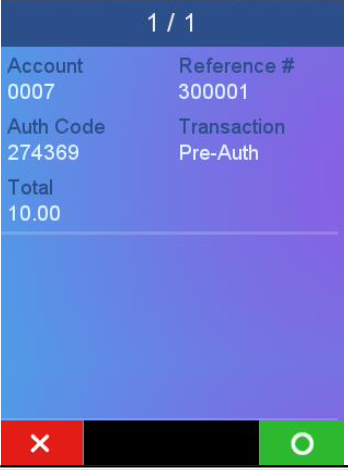
- To scroll through the transactions press [>] key. Press green [O] or [Enter] Key to Select once the transaction is located.
- Press [Accept] to confirm sale amount.
- Enter new sale amount Press [Enter].
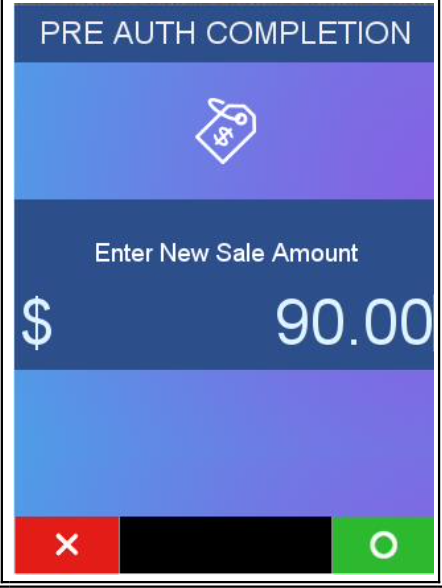
This is the final amount to complete the Authorization.
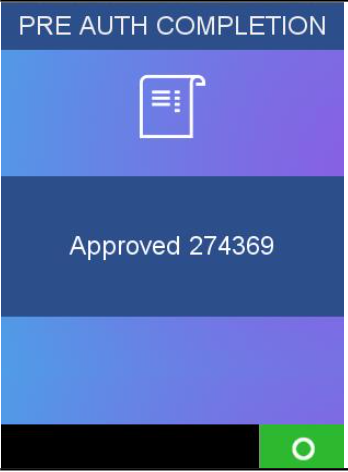
- Terminal displays Approval Code and prints receipt(s). Returns to Idle Screen.
Pre-auth transaction is removed from Pre-Auth batch and entered into regular batch.
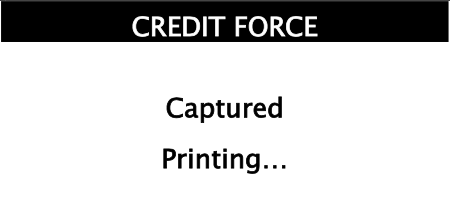
- Terminal stores transaction for transmission later and prints receipt(s) and returns to Idle Screen.

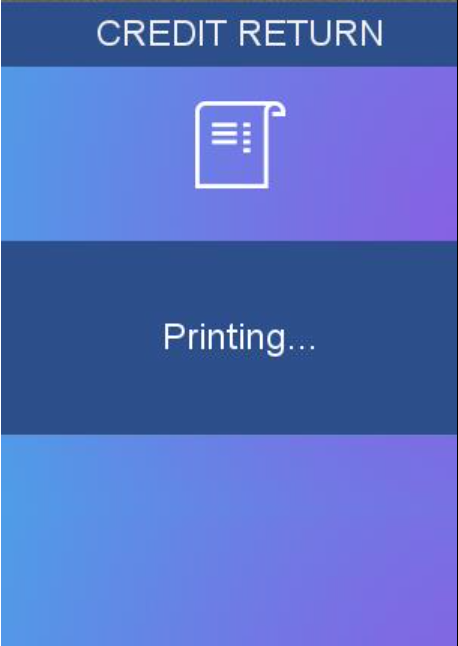
Displays until printing completes.
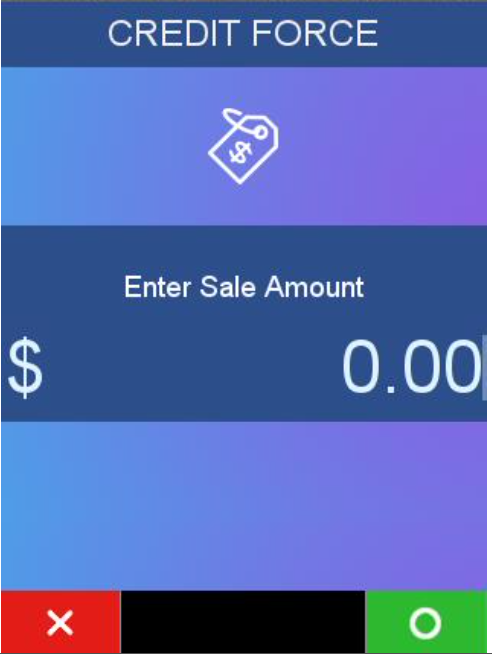
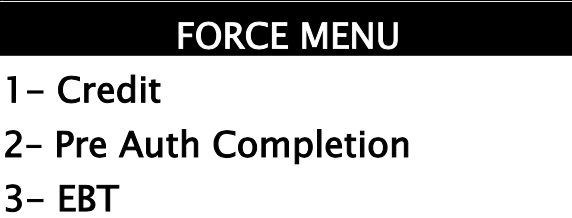
Force
- From Main Menu, scroll to Force and press [Enter].

- Press [1] or press [Enter] for Credit.
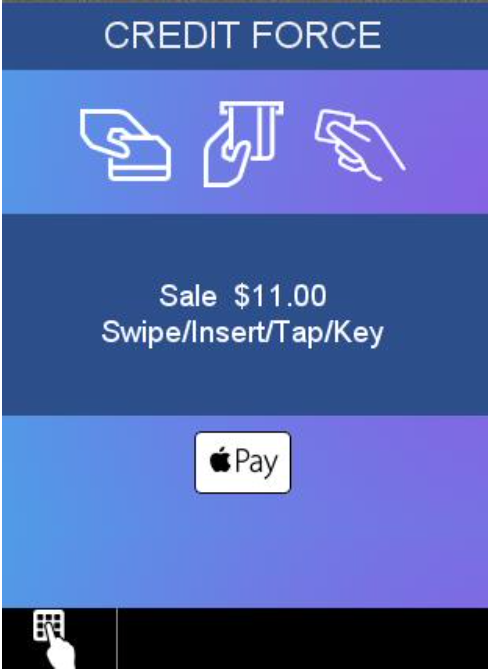
- Enter sale amount and press [Enter].
- Pass terminal to the customer.

- Swipe or insert card or Key card number and press [Enter].
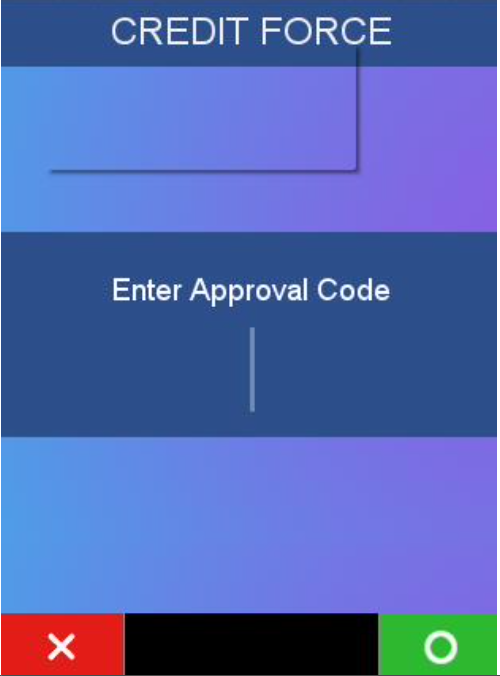
- Pass Terminal to Merchant.

- Enter Approval Code and press [Enter].
- Terminal connects to host and starts transmitting.

- Terminal displays Approval Code and prints receipt(s). Returns to Idle Screen.

- Terminal stores transaction for transmission later and prints receipt(s) and returns to Idle Screen.
EBT Force
The EBT Force transaction is a tool used to process and capture (online) a previously voice authorized Voucher, Food Stamp Sale or Cash Benefit EBT transaction. This transaction will not contain PIN data. EBT Force feature will always be on when Food Stamp Transactions and/or Cash Benefits are on. If EBT is disabled, the EBT Force option will not be available, nor will it show on the menu.
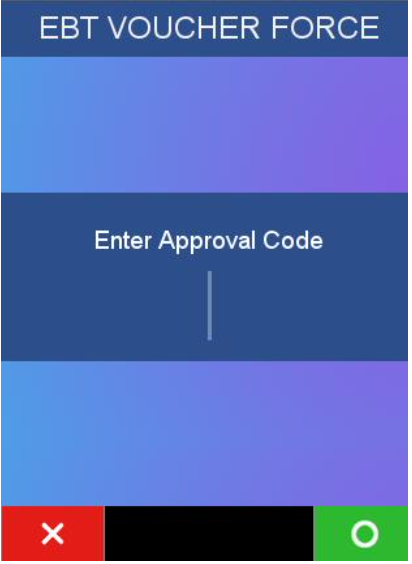
EBT Voucher Force Transaction Flow
Merchant will key the voucher number, not the customer.
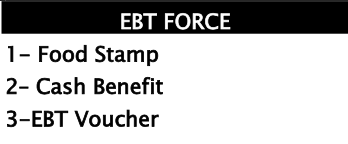
- Press [4] or Scroll to Force and press [Enter].

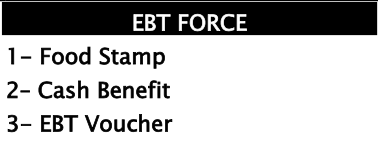
- Press [3] or scroll to EBT and press [Enter].
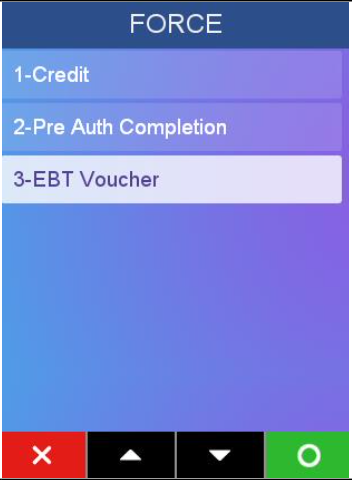
- Select Food Stamp, or Cash Benefit, or EBT Voucher.

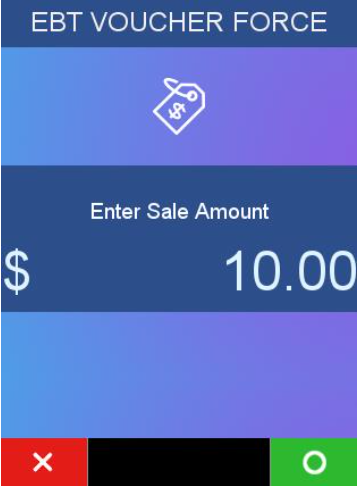
- Enter sale amount and press [Enter].
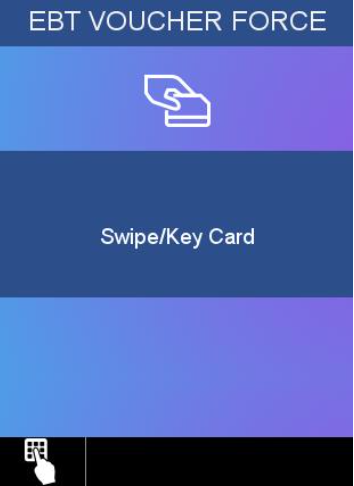
- Swipe Card or Key account number and press [Enter].
- Enter expiration date in MMYY format and press [Enter].

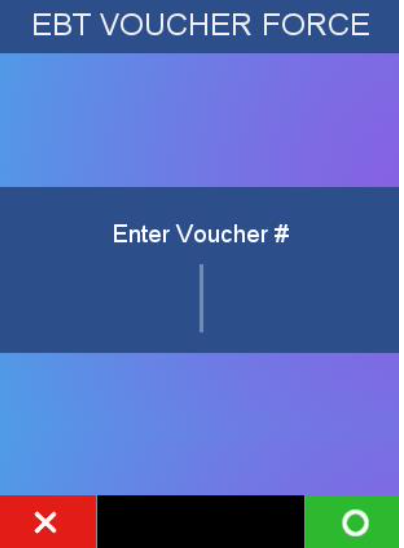
- Allow 1-15 A/N for entry and press [Enter].
- Enter Approval Code and press [Enter].
- Terminal connects to host and starts transmitting.

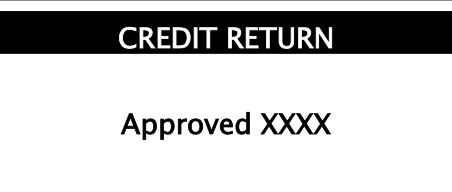
- Terminal displays Approved and prints receipt(s). Returns to Idle Screen.

EBT Food Stamp Force
- Press [4] or scroll to Force and press [Enter].

- Press [3] or scroll to EBT and press [Enter].
- Press [1] for Food Stamp Force or press [Enter] for Food Stamp.
- Enter sale amount and press [Enter].

- Swipe /Insert or Key card number and press [Enter].

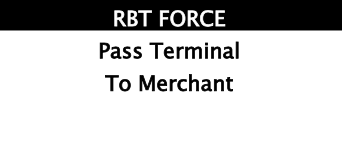
- Pass terminal to merchant.

- Allow 1-15 A/N for entry and press [Enter].

- Enter Approval Code and press [Enter].

- Terminal displays Approved and prints receipt(s). Returns to Idle Screen.

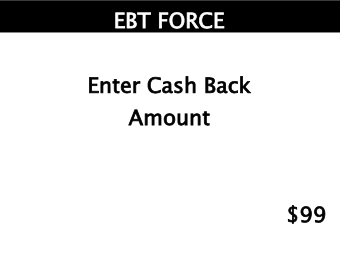
EBT Cash Benefit Force Transaction Flow
With the Cash Benefit Force, because the transaction has already been voice approved, the cashback
will be entered by the merchant because the amount cannot be changed from what was authorized.
- Press [4] or Scroll to Force and press [Enter].
- Press [3] or scroll to EBT and press [Enter].

- Press [2] for Cash Benefits Force.
- Enter sale amount and press [Enter].

- Enter the cashback amount (0.00 to 9999.99).
Entering 0.00 is considered a valid amount, or press [Enter] to bypass.
- Swipe /Insert or Key card number and press [Enter].

- Pass terminal to merchant.
- Allow 1-15 A/N for entry and press [Enter].

- Enter Approval Code and press [Enter].

- Terminal connects to host and starts transmitting.
- Terminal displays Approved and prints receipt(s). Returns to Idle Screen.

Return
The Return transaction applies a credit for the specified amount to the card account. It is swiped or
manually entered and sent to the host in most host capture systems.
- Swipe card or Key enter Card

Expiration DateExpiration date prompt will only display if card was manually entered.
Enter expiration date in MMYY format and press [Enter].

- Terminal connects to host and starts transmitting.

- Terminal displays Approval Code.
- Terminal displays Response and Returns to Idle Screen. Information sent back to ECR/POS for receipt printing.
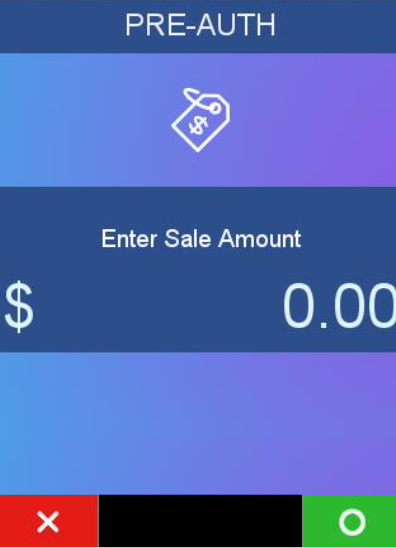
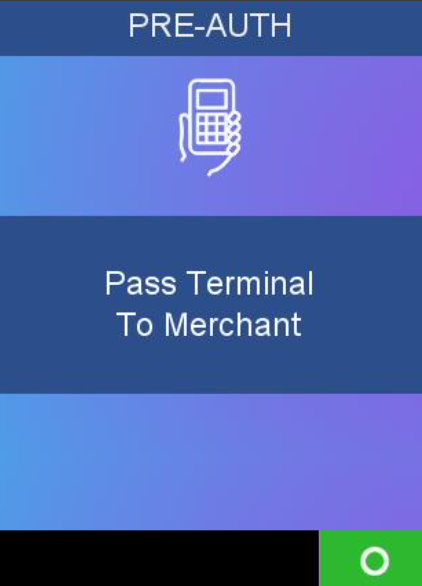
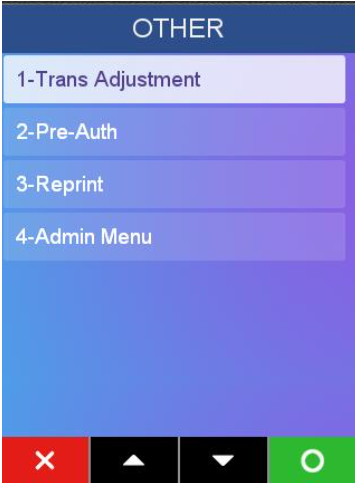
Pre Authorization
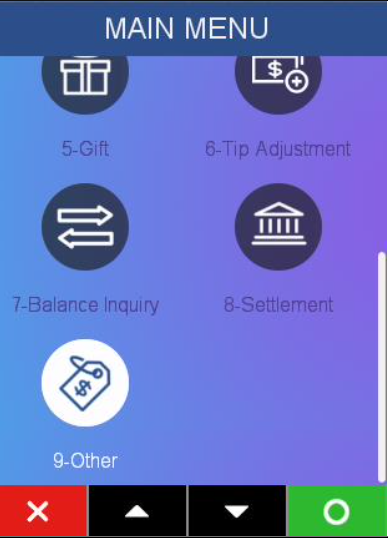
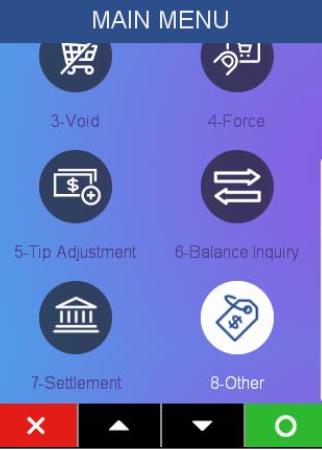
- From the Main Menu, scroll to Other and press [Enter].
- Press Pre-Auth.

- Enter sale amount and press [Enter], or enter “0” and press [ENTER], or press [ENTER] to bypass entry.
- Pass Terminal to customer.
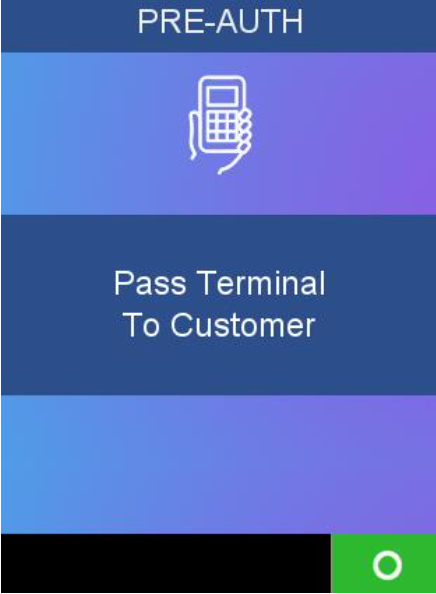
- Swipe card or key card number and press [Enter].

Expiration DateExpiration date prompt will only display if card was manually entered.
Enter expiration date in MMYY format, press [Enter].

- Pass Terminal to Merchant.
- Terminal connects to host and starts transmitting.

- Terminal displays Approval Code. Terminal prints receipt(s) and returns to Idle Screen.
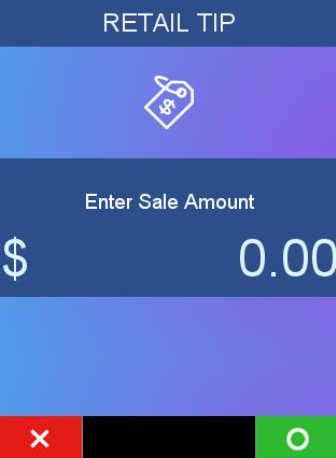
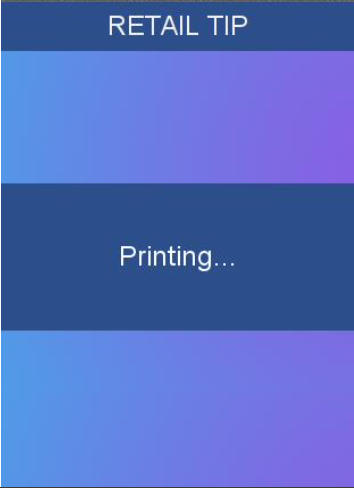
Tip
- Press [5] or scroll to Tip and press [Enter].
- Enter sale amount and press [Enter].
- Displays while receipt prints and then returns to the Idle Screen.
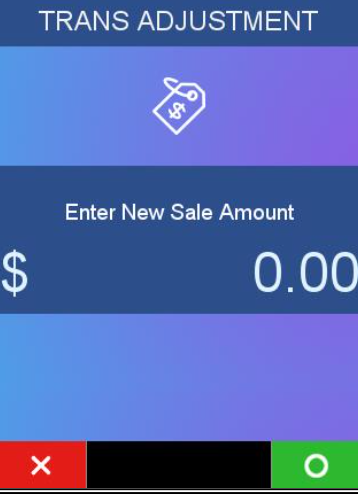
Transaction Adjustment (Host Dependent)
- Press [6] or Scroll to Trans Adjust and press [Enter].
- Press [1] or scroll to Trans Adjustment and press [Enter].
- Swipe card or press the key that corresponds to the desired search option or scroll to the option and press [Enter].
- Enter new Sale/Return Amount and press [Enter].
- Enter new Tip Amount and press [Enter] or press [Enter] to bypass.

- Cardholder presses:
(ACCEPT) or [Enter] to confirm the tip, and total sale
amount (sale amount plus tip and any surcharge amount),
or
(CHANGE) to return to the Enter New Sale/Return Amount
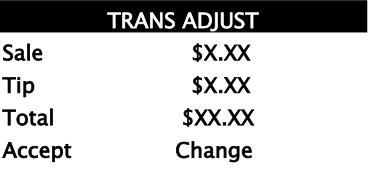
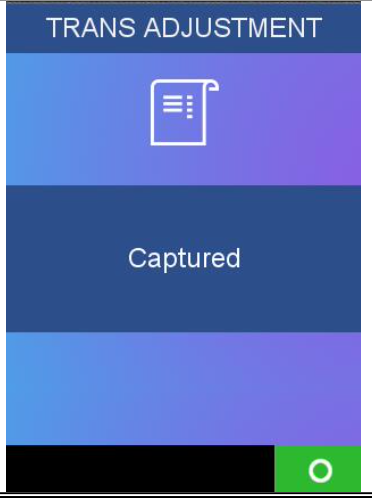
- Terminal displays Approval Code or Captured, and prints receipt(s). Returns to Idle Screen.
Settlement
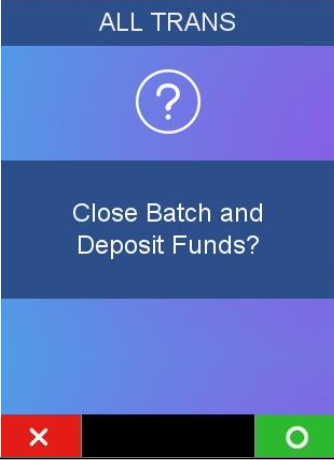
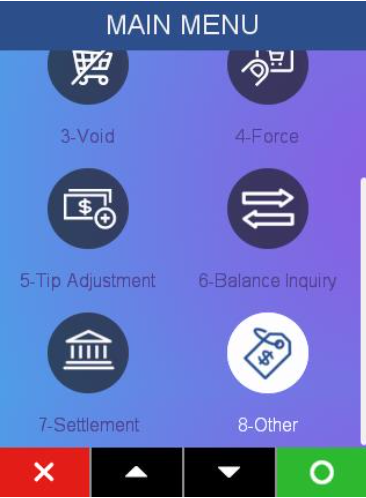
- From the Main Menu or Idle Screen press [8] or scroll to 8-Settlement on the Main Menu and press [Enter].
- Select “Yes” to continue settlement or select “No” to cancel settlement and return to Idle Screen.
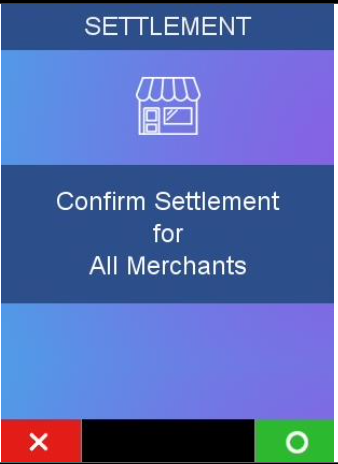
- Select “Yes” to continue settlement. On “Yes”, go to screen 6 or 7.
Select “No” to enter another merchant and return to step 3.
- Terminal connects to host and starts transmitting and receiving.

- Terminal displays two digit response code. When all batches are settled, return to Idle Screen.
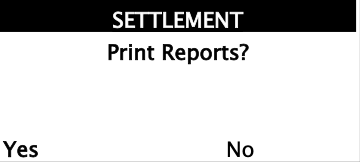
- Select “Yes” to print reports or select “No” to return to Idle Screen or to step 3.
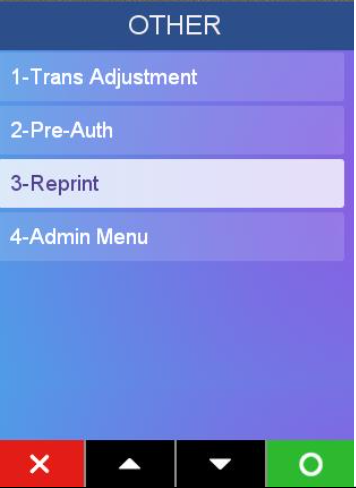
Reprint
- Press [8] or scroll to Other to select.
- Press [3] for Reprint or scroll to Reprint and press [Enter].
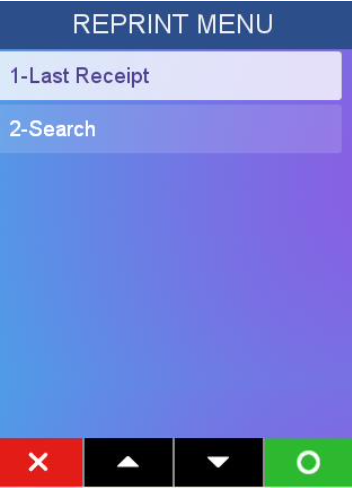
- Press [1] to reprint last transaction or press [2] to Search for the transaction to reprint.
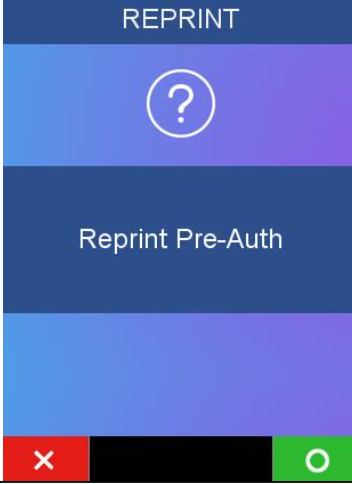
- Select if the transaction is a Pre-Auth -or- select if the transaction is not a Pre- Auth.
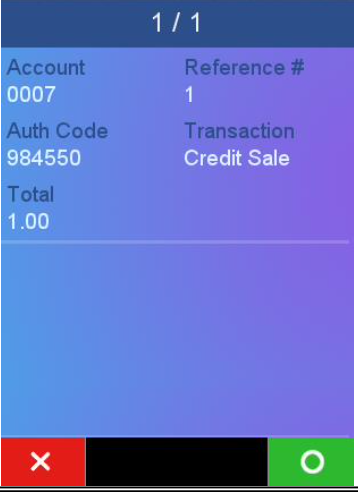
- Swipe card or press the key that corresponds to the desired search option or scroll to the option and press [Enter].

- Scroll through the transactions by pressing the [>] key to advance [,} key to move back. When the transaction to complete is found, press the green [O] or [Enter] key.
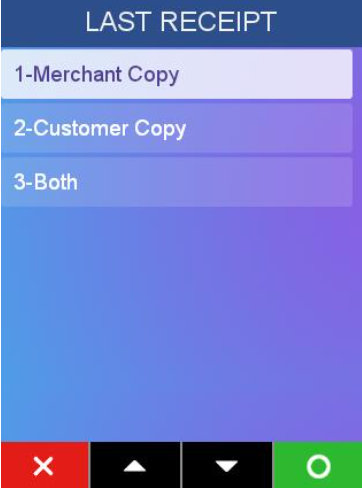
- Select [1] to reprint merchant copy only or select [2] to reprint customer copy only -or- select [3] to reprint both copies.
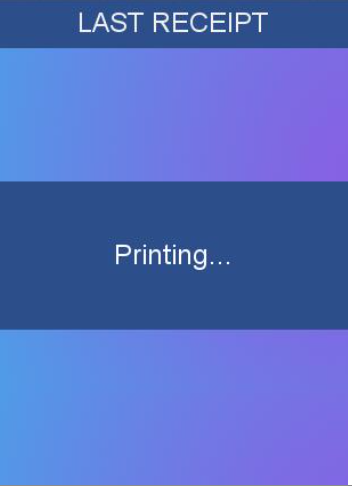
- Receipt Prints.
Updated 3 months ago