Administration
Partners Restricted Capabilities
Client Merchant Communications
P2PE Manager automatically sends email notifications to your clients for each of the scenarios outlined below.
| Email Notification | Explanation & Frequency |
|---|---|
| Welcome Email | When a new user is added to P2PE Man- ager, login credentials are sent in email along with a link to set up a password. |
| Password Reset / Forgotten Password | When a user forgets their password, an email is sent with a link to set up new password. |
| Shipment | An email is sent when a device is shipped. |
| Shipment Overdue | An alert is sent to the Custodian when a device shipment is not received within 14 days of it’s ship date. |
| Device State Changes | Notification that the device’s state has changed. Refer to Device State Definitions. |
| Upcoming Attestations | 10 days prior to the device audit date a notification is sent. |
| Past Due Attestations | If an attestation is missed, 10 days after the device audit date an alert is sent. |
| Completed Attestations | Confirmation of completed attestation. |
| Action Needed | Notification that action is needed when the following issues are detected: - Device firmware issue detected - Device sends clear-text card- holder data - Device sends corrupt data |
Customizing Email Templates
Partners and Sub-Partners can modify email templates as needed. From Manage > Email


Templates click override next to the template of your choice. This creates a copy of the template that can be customized as all fields in the template can be modified.
Adding Data Tokens
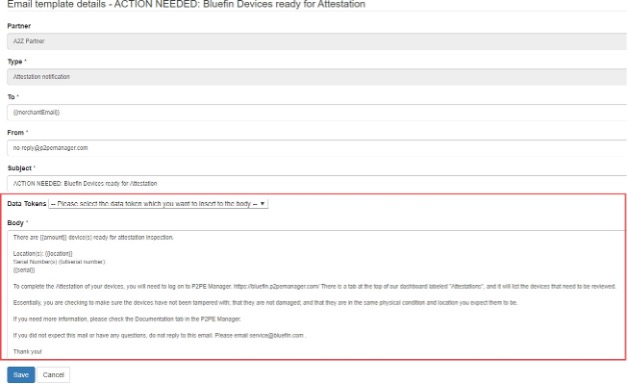
You can include Data Tokens - these are data parameters that will populate with data from within your system. To include a data token, place your cursor in the Body field precisely where you want to add a token. Then, make a selection from the Data Tokens drop-down list.
The data tokens that display in the list are dynamic and depend on the email template selected.
Deleting Email Templates
Partners and Sub-Partners can delete the email templates that are created by overriding core templates.
Editing Your Own Partner Record
To edit your partner record, go to Manage > Partner. You can edit the fields based on your preference. Refer to Adding a Partner Record (Sub-Partner) for a details about each field.
- For the optional section API Security, refer to the Developer’s portal for more information.
- To tokenize data using ShieldConex refer to Tokenization Configuration at the bottom of the page. Select a Provider (ShieldConex), Authorization Type (Basic or HMAC) and enter the appropriate ShieldConex template reference number (from your ShieldConex Partner account).
- Once these settings are selected, they apply all of your sub-partners and clients.
Adding a Partner Record (Sub-Partner)
A sub-partner is another organization that resells devices and services. For example, a Bluefin partner that is a payment gateway provider might need to setup a sub-partner record for one of their resellers. This would enable the reseller to set up merchants (or “clients” as they are called in P2PE Manager).
To set up a sub-partner under your partner record, do the following from the Manage tab:
- Click Partners in the left column.
- Click Create.
- Enter the information requested for the required fields.
| Field | Description |
|---|---|
| Parent Partner | Select partner from the drop-down list when applicable. |
| Name | Required. Enter the partner’s name |
| Status | Required. Select the partner’s status |
| Verification Phrase | Optional |
| Allow Client(s) To Order Equipment | Optional. Select the option if you want to allow your individual merchants or locations to order their own devices. NOTE: Do not select this option if you want to control who can order devices. |
| Inherit Primary Contact from Parent Partner | Optional. Select the option if you want the primary contact from the parent partner to automatically be the contact for the sub-partner. |
| Contact Person | Required. Enter: First Name, Last Name, Email address, Phone and P2PE User Name. Best Practice: Use first initial and last name and email address for the user name. (EXAMPLE: jdoe@y- ourcompany.com.) NOTE: This information is automatically used to create a Partner Supervisor user. Select the Active checkbox to enable the contact person. |
| Force users to use two-factor authentication | Optional checkbox. You can enable two-factor authentication. When it is enabled, it will affect all users who belong to the Client or Partner record. |
| Send welcome email | You can send new users a welcome email. This option is selected by default |
| Location | Required. Select the Location Type |
| Mail Address | Optional. |
| Remember Devices | Optional. Select an option from the drop-down list. |
| Attestation Period | Optional. Select an option from the drop-down list. |
| Contact Support Override? | IMPORTANT: This field is restricted to Partner Supervisors Only. Optional. Select the checkbox to customize the Contact Support email address that displays on the Contact tab for subpartners and clients. Enter the Support Email address when prompted. |
- Click Save when you’re done.
Adding a Client / Merchant
To add Clients (Merchants) do the following from the Manage tab:
- Click Clients in the left column.
- Click Create.
- Enter the information requested for the required fields.
| Field | Description |
|---|---|
| Direct Partner | Required. Select the partner from the list. |
| Name | Required. Enter the client’s/merchant’s name. |
| Active | Optional. Select the checkbox to enable the client. |
| Mid | Optional. |
| Contact Person | Required. Enter the First Name, Last Name, Email address, Phone and User Name. Best Practice: Use first initial and last name and email address for the user name. (EXAMPLE: [email protected].) NOTE: The Active checkbox for the contact person is selected for you. |
| Location | Select the Location Type. Required. Enter the Location Name, Address, City, Country. |
| Mail Address | Optional. |
| Remember Devices | Optional. Select an option from the drop-down list. |
| Force users to use two-factor authentication | Optional checkbox. You can enable two-factor authentication. When it is enabled, it will affect all users who belong to the Client or Partner record. |
| Send welcome email | You can send new users a welcome email. This option is selected by default. |
| Contact Support Override? | Optional. Select the checkbox to customize the Contact Support email address that displays on the Contact tab for subpartners and clients. (Enter the Support Email address when prompted.) |
| Attestation Period | Optional. Select an option from the drop-down list. |
- Click Save when you’re done.
At the time a client record is created, a client admin user is also created. To add additional users, refer to Adding a User.
Editing a Client’s Contact Person
If the primary contact for a client location needs to be changed, you can preserve the chain of custody in P2PE Manager and update the contact person.
Do not Edit the Contact Field. Instead, click Update Contact Person.
To update the contact person, do the following:
- Navigate to Manage/Clients.
- Select the Partner from the drop-down list.
- Select the appropriate Client from the list. (Click the edit icon.)
- Scroll to the bottom of the page and then click Update Contact Person.
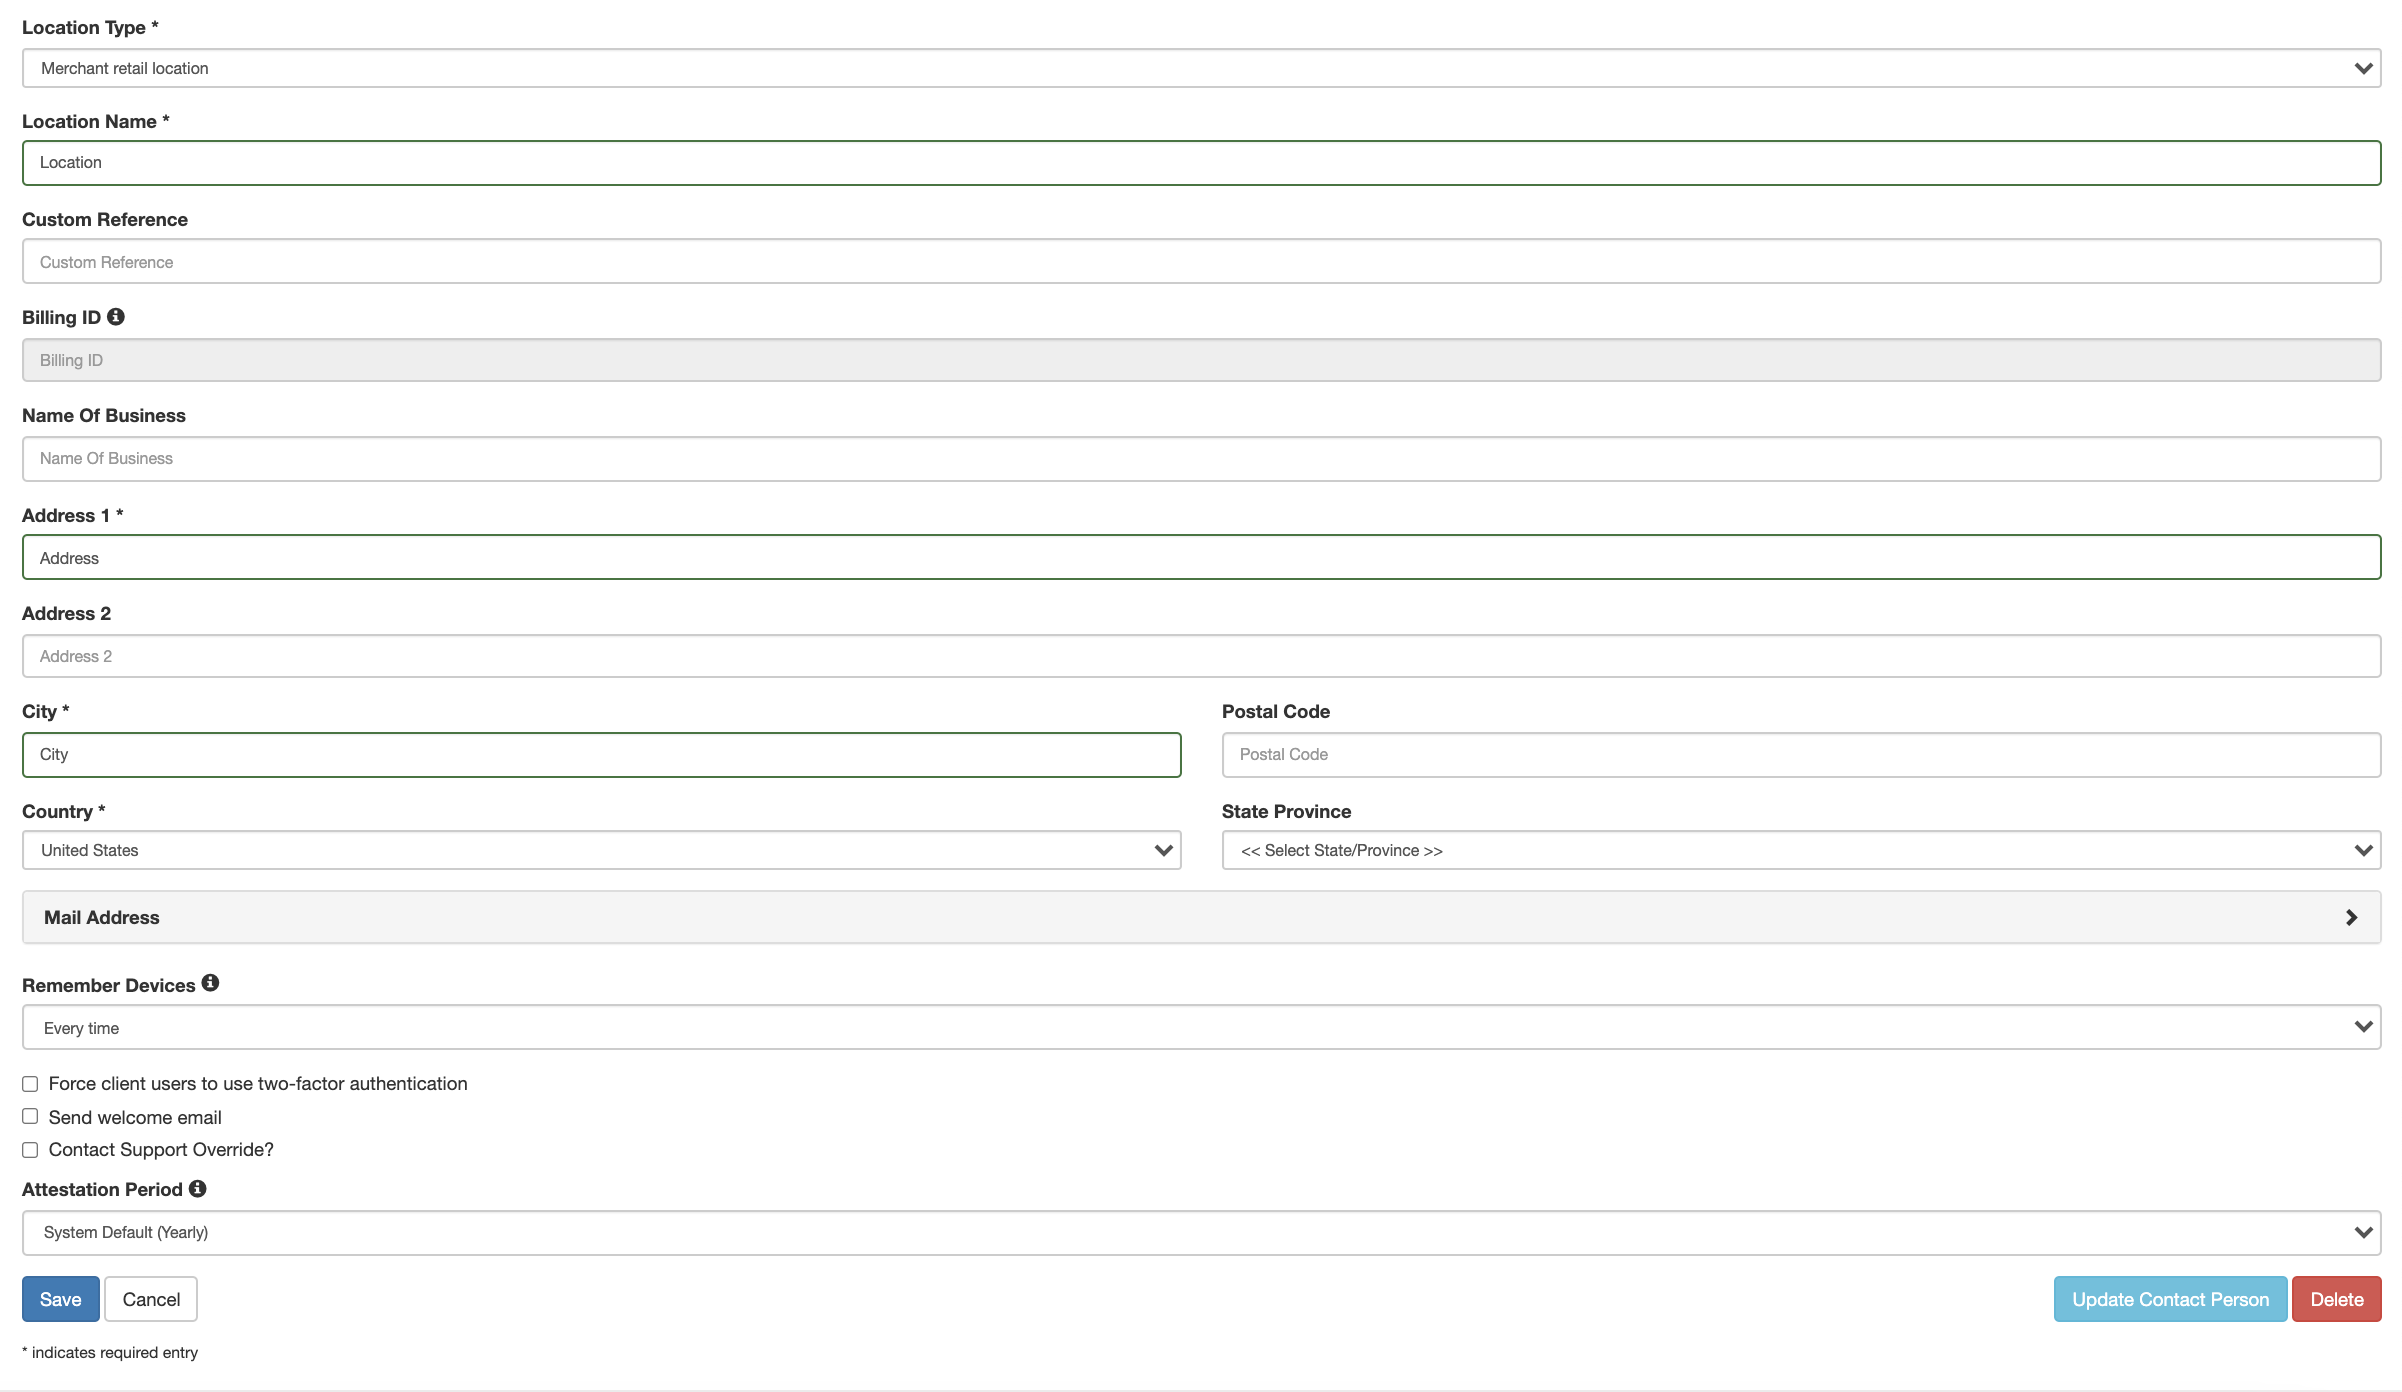
- Select the new contact person from the drop-down list.
- Click Update when you’re done.
If the new contact person is not listed, you must create their user record first.
Client Import

You can create client records in a CSV file and batch upload them.
Download and use the Sample CSV to create client records.
To import clients via batch, do the following from the Manage tab:
- Select Client Import in the left column.
- Download the Sample CSV and build your file.
| Fields | Description |
|---|---|
| DirectPartner | Required. |
| ClientName | Required. |
| LocationName | Required. |
| LocationType | Required. Options: BF Fulfillment location, Corporate Headquarters, Field Office, KIF, Manufacturer, Manufacturer long time storage, CSR Location, Merchant Long time storage location, Merchant Retail Location, Merchant short term storage & distribution, Partner Location, Regional Office, Vendor Fulfillment Location |
| LocationNameofBusiness | Optional. |
| LocationCountry | Required. |
| LocationAddress1 | Required. |
| LocationAddress2 | Optional. |
| LocationCity | Required. |
| LocationState | Optional. |
| LocationPostalCode | Optional. |
| UserName | Required. |
| UserRole | Optional. |
| FirstName | Required. |
| LastName | Required. |
| Required. | |
| Phone | Required. |
- Required. Click Choose File and navigate to the file you want to upload.
- Click Upload.
Managing Users
Administrative Functions
Administrative functions from the Manage tab are restricted to Client Administrators.
Select Manage and then click Users in the left column. A list of users displays.

Use the filters at the top to sort the list by partner, client, and status.

Adding a User
- Select Manage > Users and then click Create.
- Enter the user’s information.
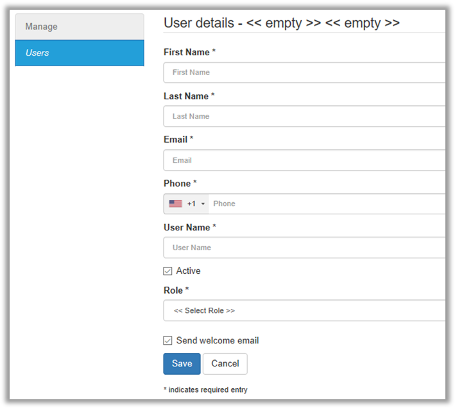
- Check the Active check box.
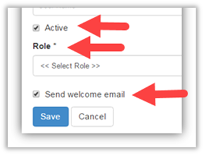
- Select a Role.
- Click Send welcome email. (The user will receive an email with a link to access the system. They will be prompted to update their password.)
- Click Save when you’re done.
Updating a User
To update a user’s information, click edit (the pencil icon) next to the appropriate name. Edit the fields as needed and click Save when you’re done.
Deactivating a User
To deactivate a user, deselect the Active checkbox.
Resetting a User’s Password
To reset a user’s password, do the following:
- Select Manage > Users.
- Locate the user in the list and click Edit.
- Select the checkbox next to Send welcome email. (The user will receive an email with a link to access the system. They will be prompted to update their password.)
- Click Save.
Resetting your password
Users can also reset their own passwords from the login screen by clicking Forgot password.
Managing Your Account Settings
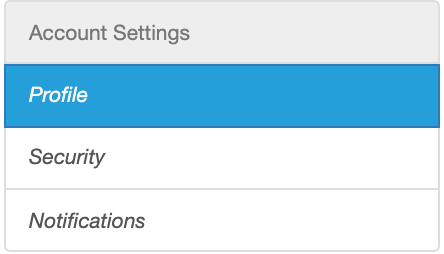
Your Account Settings include:
- Profile: Update your name, email address or your default login landing page (NOTE: Landing Page options are based on your user role.)
- Security: Update your password and set up two-factor authentication
- Notifications: Enable and select notifications you wish to receive.
To access your account settings, do the following:
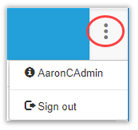
- In the top right corner, click the menu icon and select your name.
- Select an option in the left column based on your preference.
- Follow the prompts to update the information based on the option selected.
Managing Your Notifications
Depending on your user role, you can choose to receive some or all the following email notifications.
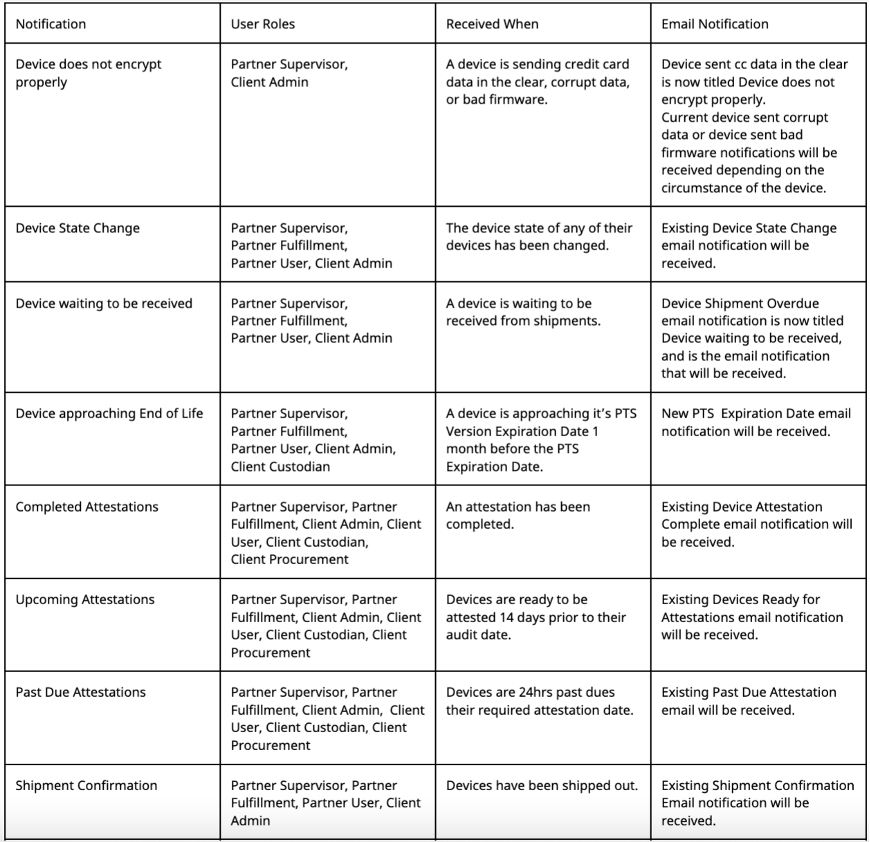
Notification User Hierarchy
• Root Partners who choose to receive notifications will receive them for all their Partners and Clients.
• Sub-Partners who choose to receive notifications will receive them for all of their Clients.
• Clients who choose to receive notifications will receive them for their own devices.
To enable all or selective notifications, do the following:
- Select the Notifications in your Account Settings
- Click on the slide button under Notifications so that it turns blue
- Check the box next to all or only the notifications you wish to receive
To disable all Notifications and save your notification selection, do the following:
- Select the Notifications in your Account Settings
- Click on the slide button so that it turns grey
Resetting Your Password (Forgotten Password)
If you forget your password, do the following:
- Navigate to the P2PE Manager Login page
- Click on Forgot Password
- Enter your username
- Click Restore
- Check email for further steps.
- Click on the Reset Password link sent your email
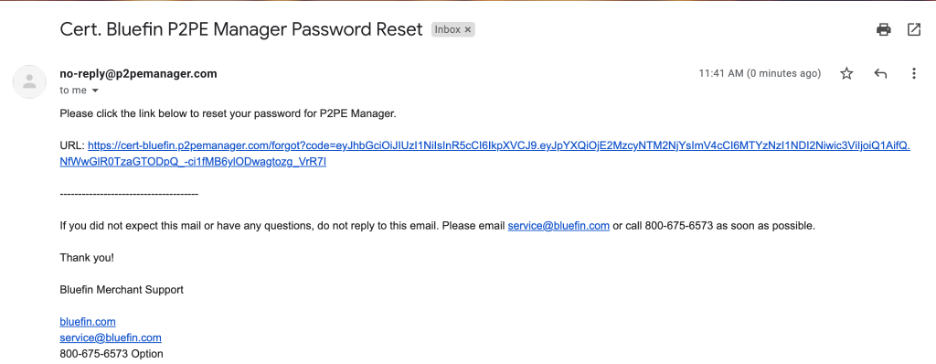
- Enter and confirm new password
- Click Reset
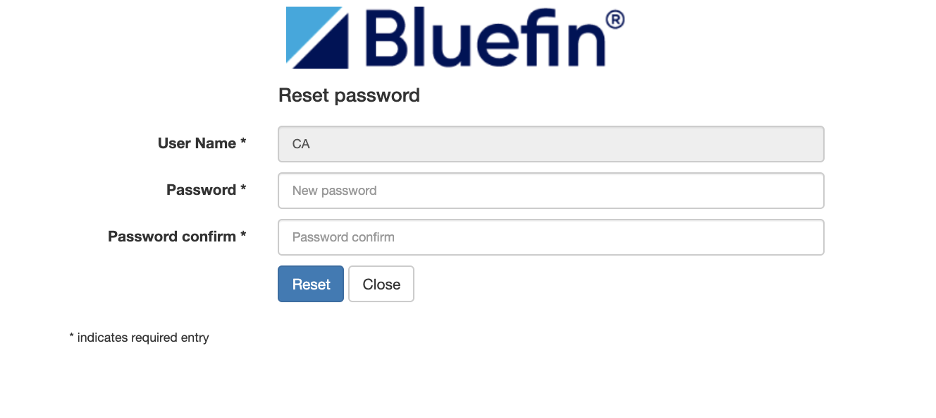
- You’re password has been reset
Adding Locations
You can use locations to “partition” a client.
Example: Locations could be based on physical location (Atlanta Office, Chicago Office) or internal departments (Front Desk, Cafeteria, Gift Shop).
If a merchant wants location-based information to remain confidential, then separate clients should be created so users in one location cannot see information about another location.
Decisions about adding a location or creating a separate client do not have to consider whether a separate merchant ID or gateway ID is tied to these entities.
To add a location, do the following from the Manage tab:
- Select Locations in the left column and then click Create.
- Complete the information requested.
| Field | Description |
|---|---|
| Partner | Required |
| Client | Required |
| Location Type | Required. Select an option from the drop-down list. |
| Location Name | Required. Enter a name for the location to easily identify it. This name will be used in reports. |
| Name of Business | Optional |
| Address | Required. Street address, City, Postal code, Coun- try, State Province |
| Mail Address | Optional |
| Contact Person | Required. Enter First Name, Last Name, Email, Phone |
Contact Person
The contact person does not have to be the device custodian.
- Check Active to enable the location.
- Click Save when you’re done.
Removing Locations
To remove a location, click the edit icon next to the location of your choice and then deselect Active. Click Save when you’re done.
Editing Locations
To edit a location, click the edit icon next to the location of your choice and then make your changes. Click Save when you’re done.
Updated over 3 years ago
