
Via PayConex Portal UI, PayConex administrators have the ability to manage forms by going to Tools -> Hosted Payment Forms.
It is important to note that this page walks you through managing payment form configuration with direct URL access enabled so it is intended for merchants with no technical background in order to get started.
View your forms
The Hosted Payment Forms page lists the forms available to the selected account. The management design shows:
- form name;
- form ID;
- type, such as E-Commerce or Donations;
- status; and
- an actions menu for each form.
Use Search to filter by a form's name or ID. Use the column controls and page controls to browse larger form lists.
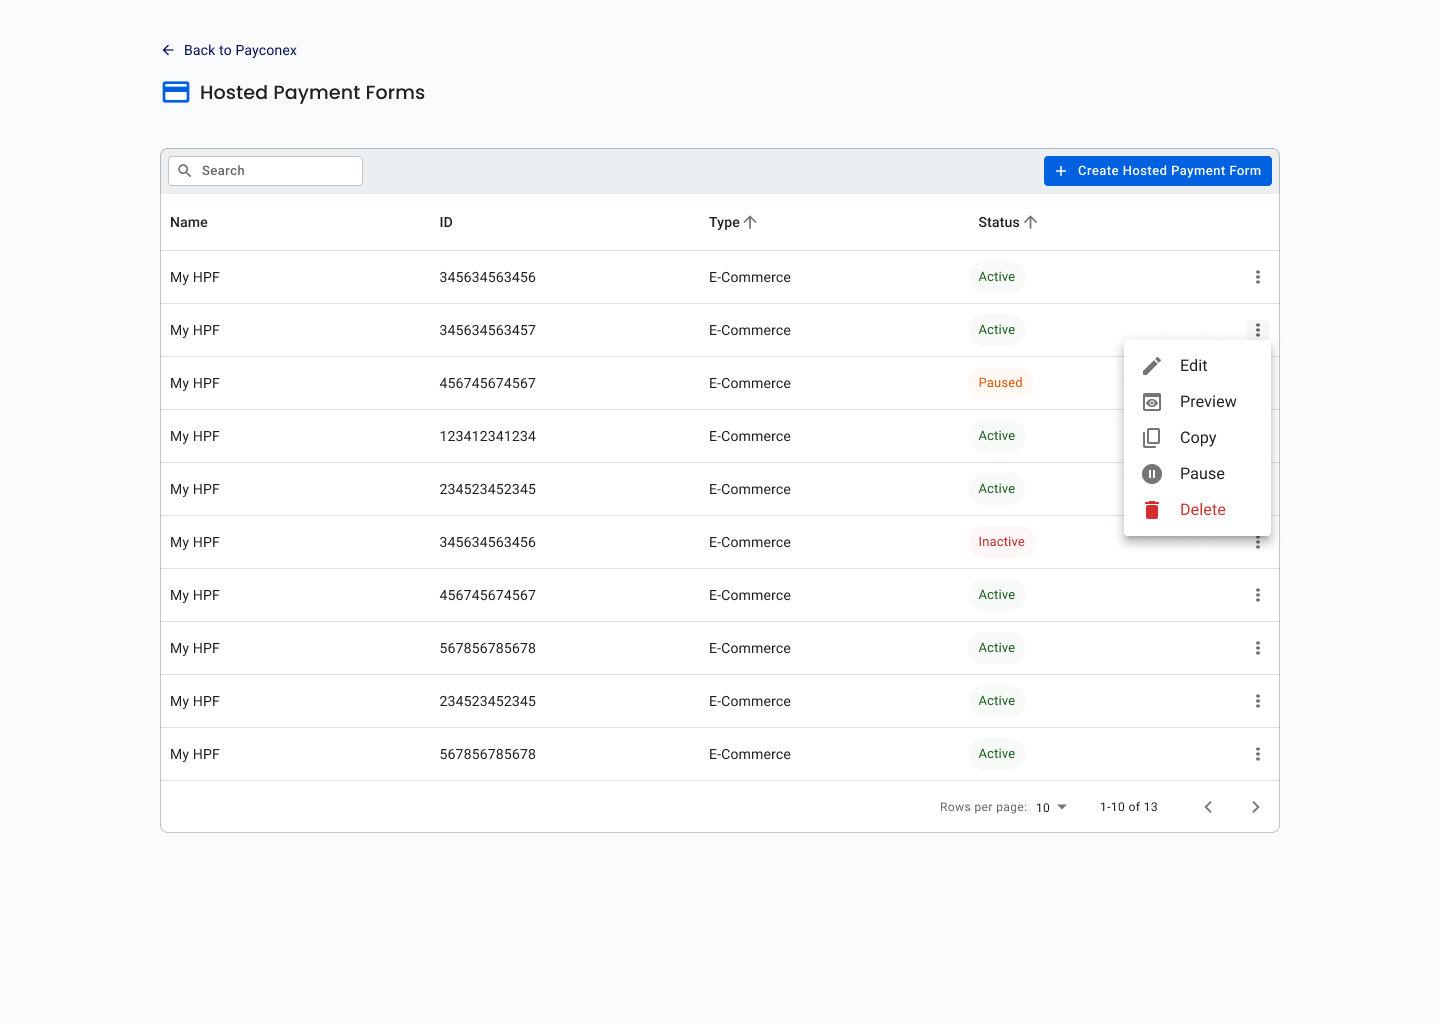
Hosted Payment Forms list with search, status, and row actions
The management list provides access to creation and form-level actions. Exact status labels and available actions can vary by form state and permissions.
Create a form
- Select Create Hosted Payment Form.
- Choose how the form will be used:
- E-Commerce for a purchase or general payment form.
- Donations for preset or customer-selected donation amounts.
- Complete the configuration flow.
- Review the live preview as you work.
- Select Finish & Save after all required settings are valid.
The configuration flow is organized into four groups:
- Form Details
- Payment Options
- Style Options
- Confirmation and Security
See Create and configure a Hosted Payment Form for each option.
Manage an existing form
Open a form's actions menu to work with an existing configuration. The PayConex Portal supports the following actions, although availability can depend on the form and account permission level:
- Edit — Open the configuration with its current values.
- Preview — Open the hosted page for testing. Product requirements restrict Preview to forms with Direct URL Access enabled.
- Copy — Duplicate the settings into a new form with its own ID.
- Pause / Resume — Stop or allow new checkout use without removing the form from the list.
- Delete — Remove the form from normal use and from the management list after confirmation.
Pausing a form
Pause a form when you need to temporarily prevent its public page from accepting payments while retaining the configuration. The API represents this state with the boolean paused property.
A paused form remains visible to administrators, but customers should not be able to complete payments with it. Resume the form before issuing a new checkout link or initializing a new instance.
This is primarily the use case for Direct URL Access, but it can also be used when disabling all of its child payment form instances.
Deleting a form
Deleting is intended for forms that are no longer needed. The configuration API returns 204 No Content after a successful delete. Development requirements describe deletion as preserving historical transaction information while removing the form from list and retrieval results.
Deleting a form affects its existing public URLs associated with its payment form instances. Confirm that no active campaign, QR code, email, or integration still directs customers to it.
Save and validation behavior
Required settings are validated before the form can be saved. The configuration experience is designed to show field-level validation and preserve the entered form state when an API or network error prevents saving.
If you attempt to leave with unsaved changes, PayConex asks you to confirm before discarding them. After a successful save, the success view can provide the form URL, a copy action, a preview action, and a path back to the form list.
Account context
Forms belong to a PayConex account. Agent users who can access subaccounts may need to select the appropriate account before creating or editing a form. Payment processing, capabilities, and form visibility use that selected account context.