Overview
This section shows the visual appearance and steps to completing the Checkout Component from the customer's perspective for subsequent transaction processing. The user interface for this component is embedded within the SDK, allowing seamless integration into your eCommerce platform.
This component is hosted on Bluefin's servers and handle all payment data input through an HTML iframe, ensuring that no sensitive credit card data ever reaches your servers. This reduces PCI compliance scope and enhances security. The Checkout Component securely transmits payment details directly to Bluefin's system, mitigating risk while maintaining a smooth and user-friendly checkout experience.
Before looking at this section, the important sections for the merchant are:
Checkout Steps
Here is a walkthrough of the essential checkout steps for the customer. We cover each payment method that the Checkout Component embeds as they are all completely different from each other in terms of the specific sensitive data being tokenized, checkout process, respective authentication methods, and testing & go live. For more details, see Checkout Component Workflow.
FlexibilityThe merchant is not subjected to directly handling the checkout data for any of the payment methods. Bluefin services simplify the transaction processing by only requiring the merchant to use the PayConex™ token.
The Checkout Component SDK removes a dependency to directly integrate with a payment method web API such as Google Pay and Mastercard Click to Pay.
Credit/Debit Card
Selecting Payment Method
First, the customer selects the desired payment method that was previously set up by creating a configuration and instance to meet the customer's needs. See allowedPaymentMethods.
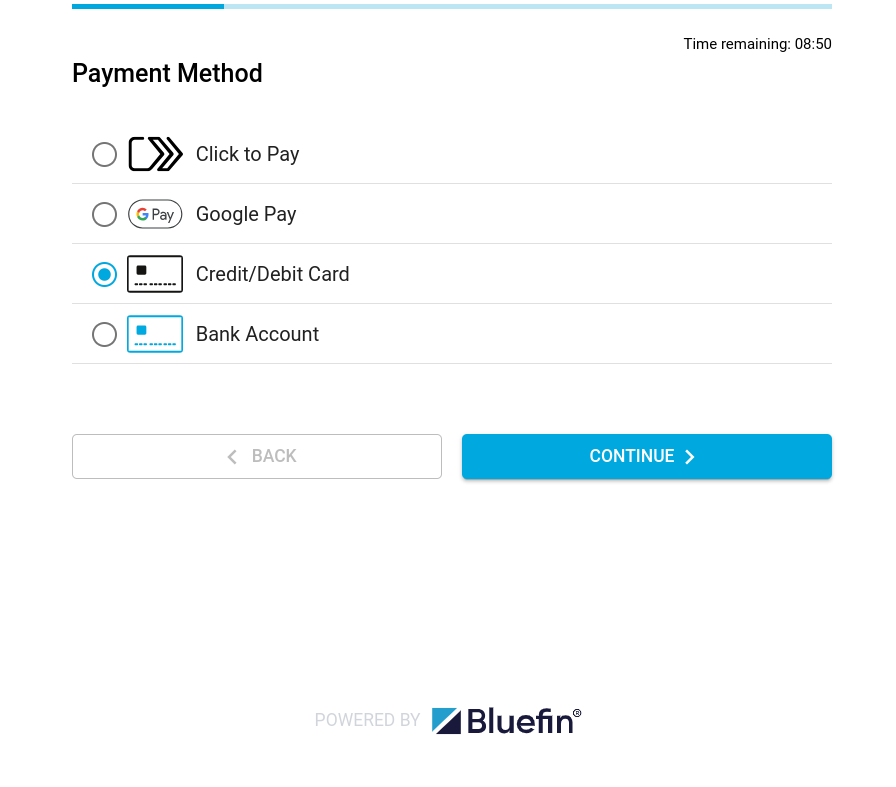
Checkout Component: Payment Method
Filling Out Billing Information
Next, the customer is prompted with the optional or required billing information fields for the purchase. This step is usually the same for each payment method.
NoteThe merchant sets up whether these fields are required or not. However, the first name and last name are always required. Note that the merchant can pre-fill these fields during instance creation in the case of returning customers.
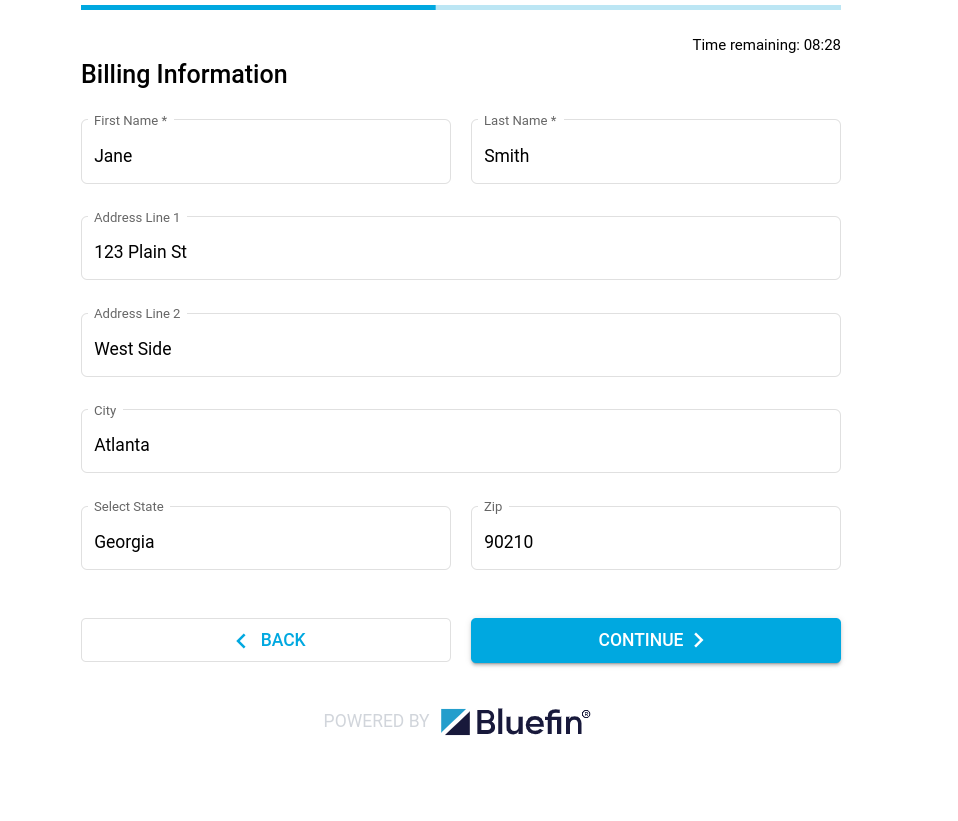
Checkout Component: Billing Information
Inputing Sensitive Card Information
The customer then inputs their card information to be tokenized and used for transaction processing. If required, this is where 3DS authentication takes place. For more on implementing this authentication method, see Bluefin 3DS Support.
NoteThis step of the payment checkout can be further customized by the merchant during configuration or instance creation. See cardSettings.
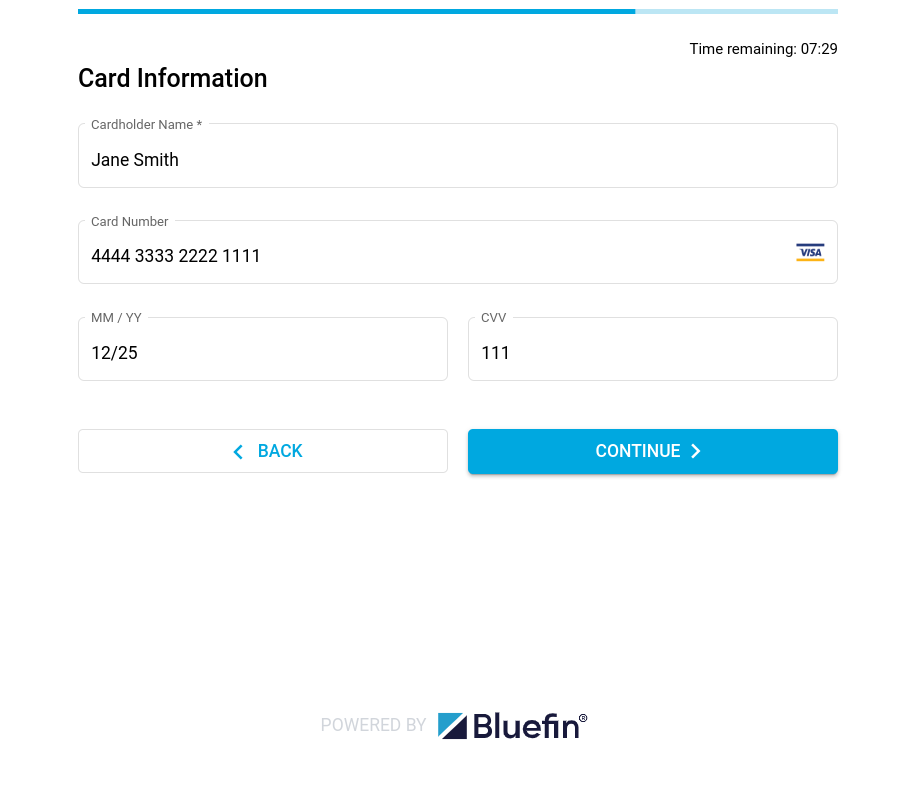
Checkout Component: Card Information
Review & Confirm
As with every payment method, the final step for the customer is to review and submit their payment information. The Checkout Component enables the customer to edit their billing or card information before submitting in case the customer changes their mind of using another credit card, they inputed the wrong one, or similar.
NoteNote that the payment method cannot be changed at this point.
After the customer hits submit, the checkoutComplete event is triggered and the merchant is to handle the checkout data and make a payment via the V4 API.
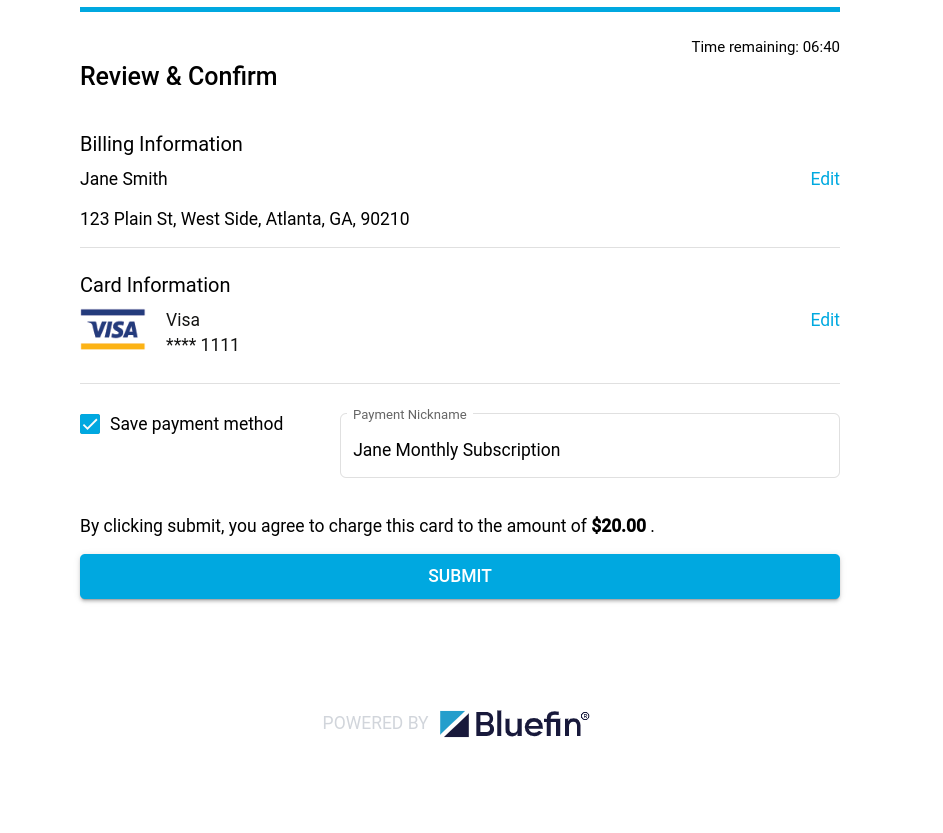
Checkout Component: Review & Confirm
Saved Cards
Other than recurring payments (such as subscription in the example above), Save payment method can be used for securely saving the card data on behalf of the customer for faster checkouts.
NoteThe merchant must ensure to process an authorization or sale transaction within 10 minutes (token's lifespan). Otherwise, the token cannot be used as a saved card and is ignored in the Checkout Component. For the merchant's guide as to how to use this feature, refer to Creating an Instance | bfTokenReferences.
This feature is primarily used with the
allowedPaymentMethodsbeing Bluefin'sCARDas Google Pay and Mastercard Click to Pay have their own implementation of saving card data and managing it.Prior to the checkout, it is up to the merchant to indicate to the customer whether they are using their card reference for MIT recurring payments or saved cards.
During the Review & Confirm step, the customer checks the Save payment method with the payment nickname that, in this case, represents the saved card name.
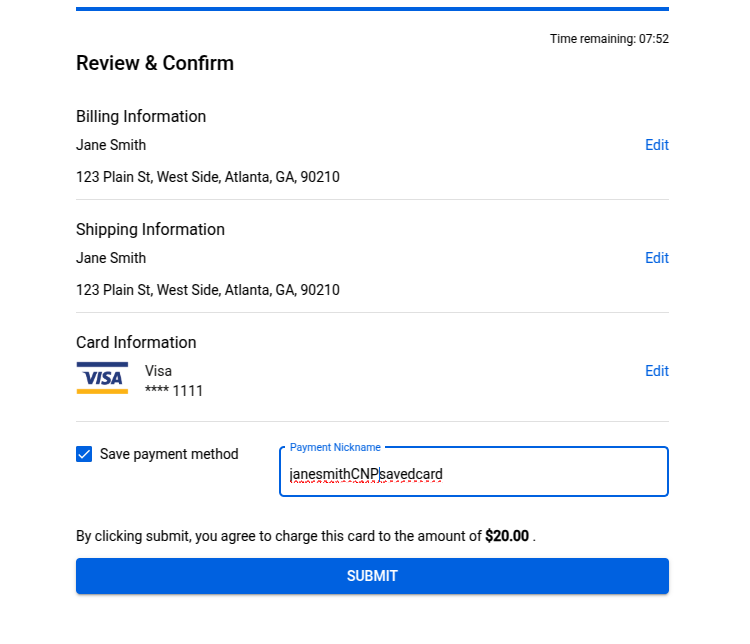
Saved Cards: Review & Confirm
During the next checkout process, the customer can now see their (set of) saved cards at the Payment Method step.
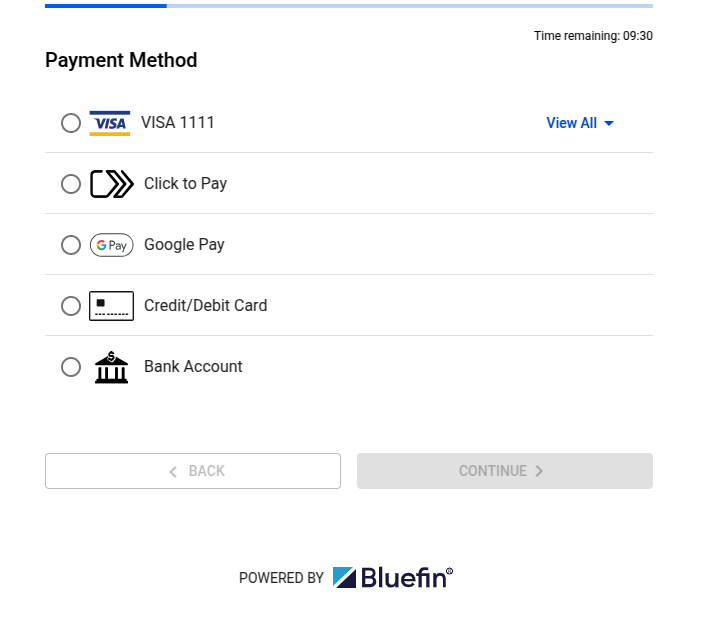
Saved Cards: Payment Method
If we click on View All, there is our saved card with its respective name/label.
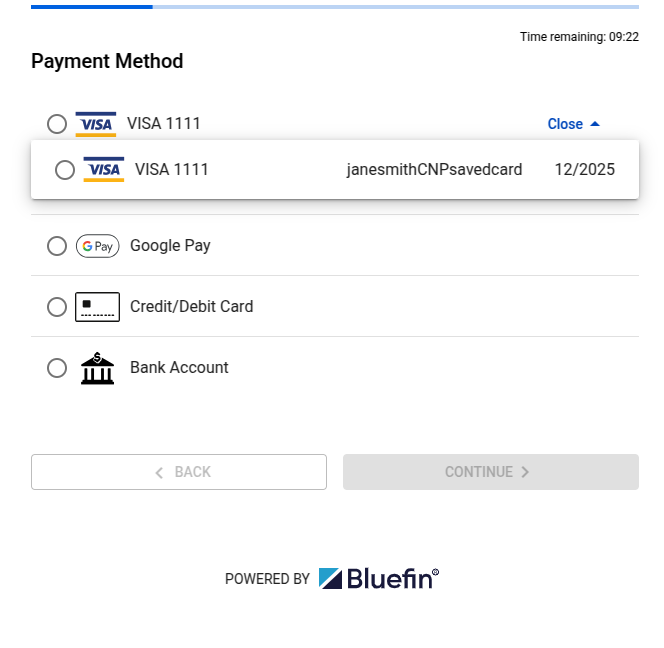
Saved Cards: View All and Selection
After the shipping and billing information (if required), the Checkout Component proceeds right to confirming the CVV.
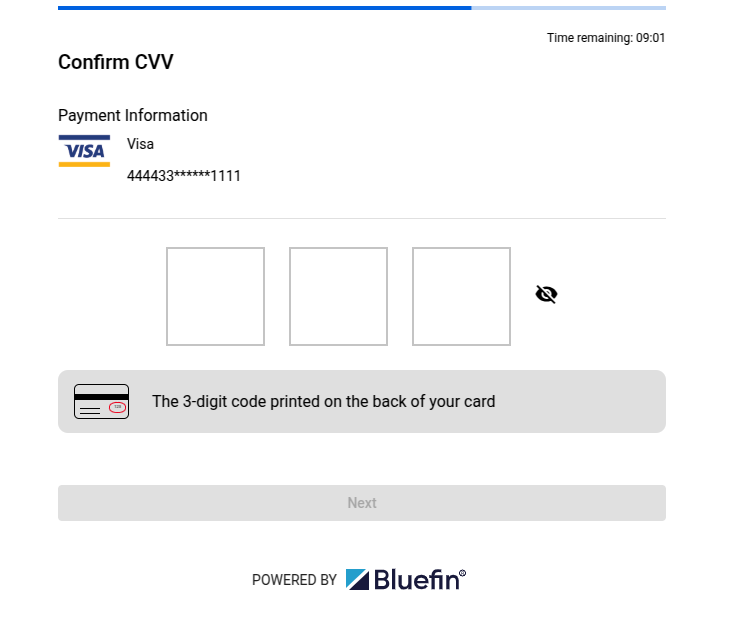
Saved Cards: Confirm CVV
Upon CVV confirmation, the customer is met with the standard Review & Confirm step.
NoteIn the certification environment, we can input just about any CVV since we are using Test Cards.
Testing & Go Live
To certify your integration with the Credit/Debit card payment method, you can use a list of test cards specific to the payment (back-end) processor that operate in its own testing environment.
PayConex™ itself does not have any built-in logic for approving/declining transactions based on AVS, CVV, or transaction amounts. The responses you get will come directly from the back-end processor testing environment.
Here is the list of available test cards depending on the payment processor for the PayConex™ V4 API:
- Chase Paymentech Test Cards
- Elavon Test Cards
- TSYS Test Cards
- FIS Express Test Cards
- First Data Rapid Connect Test Cards
In addition, we offer a comprehensive section on the Test Accounts, Cards, and Cases here: Test Accounts, Cards, and Cases.
NoteThe test cases within the documents above are not entirely exhaustive and are subject to change. This is because Bluefin® does not control the back end processors' testing environments.
If you are testing the 3DS authentication, please refer to 3DS Test Card Numbers and make sure you are up to speed with 3D Secure and Bluefin 3DS Support.
Go LiveOnce you have checked each item from the Integration Steps checklist, you are ready to go live.
Bank Account/ACH Payment Checkout
Selecting Payment Method
First, the customer selects the desired payment method that was previously set up by creating a configuration and instance to meet the customer's needs. See allowedPaymentMethods.
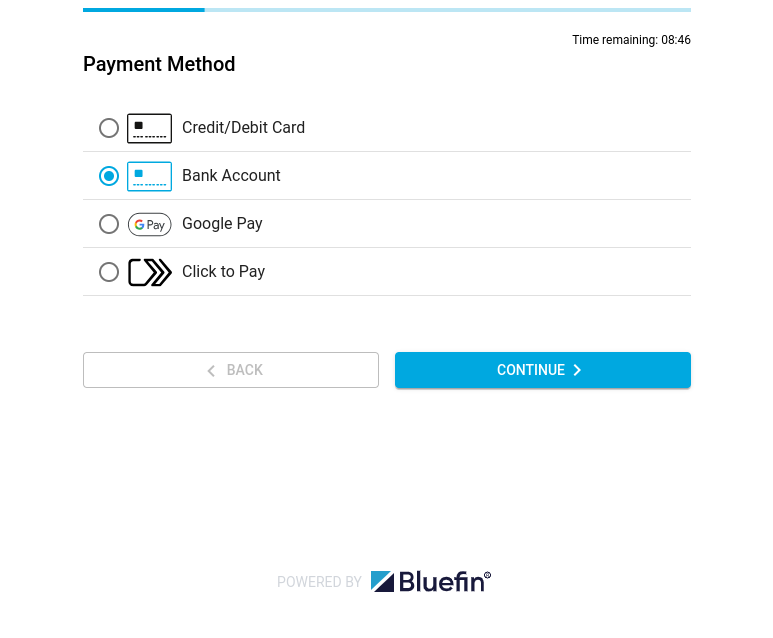
Checkout Component: Payment Method
Filling Out Billing Information
Next, the customer is prompted with the optional or required billing information fields for the purchase. This step is usually the same for each payment method.
NoteThe merchant sets up whether these fields are required or not. However, the first name and last name are always required. Note that the merchant can pre-fill these fields during instance creation in the case of returning customers.
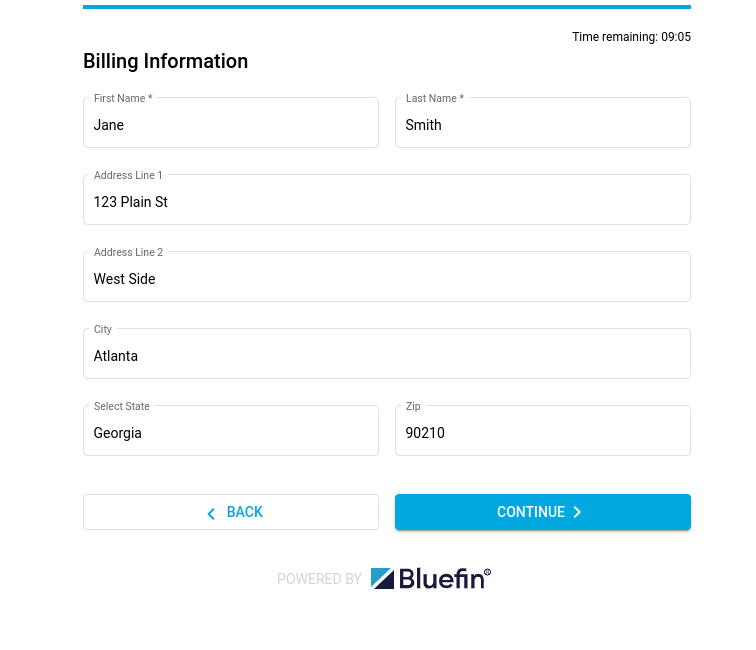
Checkout Component: Billing Information
Inputing Sensitive Bank Information
The customer then inputs their bank information to be tokenized and used for ACH transaction processing.
NoteThis step of the payment checkout can be further customized by the merchant during configuration or instance creation. See achSettings.
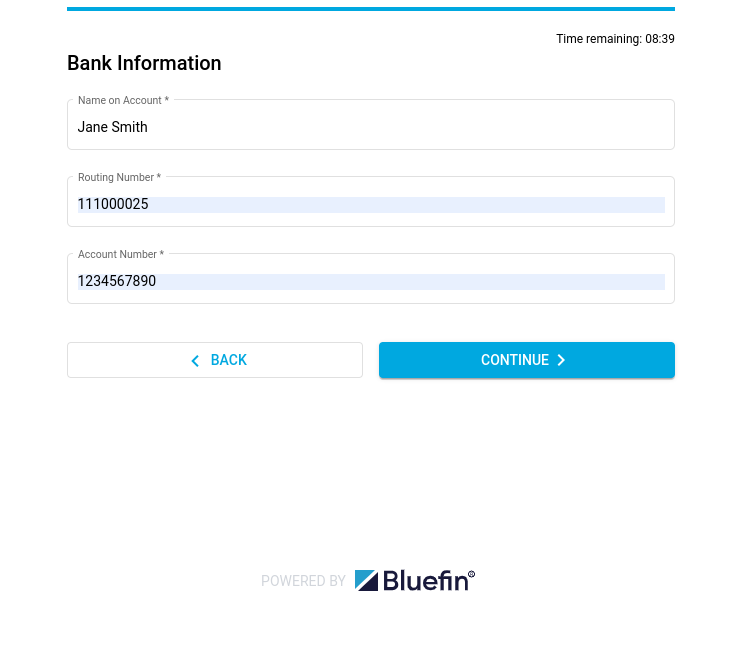
Checkout Component: Bank Information
Review & Confirm
As with every payment method, the final step for the customer is to review and submit their payment information. The Checkout Component enables the customer to edit their billing or bank information before submitting in case the customer changes their mind of using another bank account, they inputed the wrong one, or similar.
NoteNote that the payment method cannot be changed at this point.
After the customer hits submit, the checkoutComplete event is triggered and the merchant is to handle the checkout data and make a payment via the V4 API.
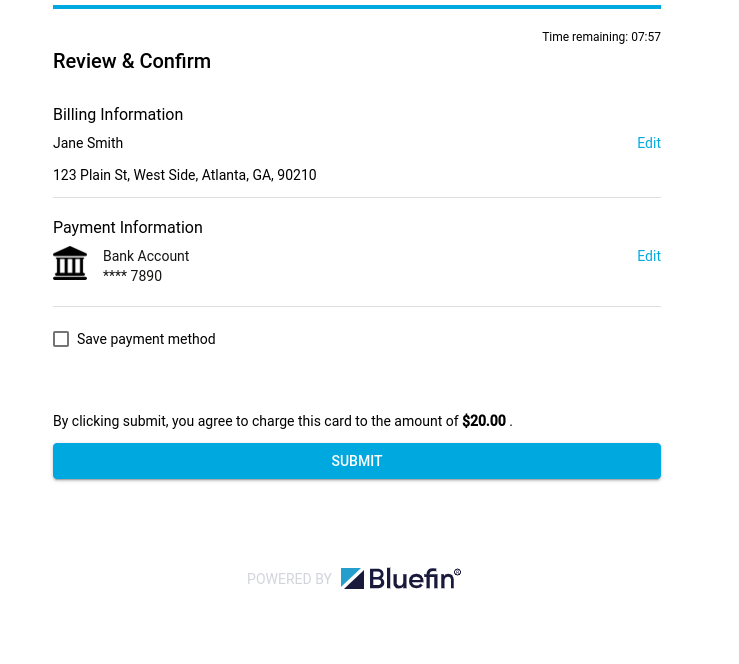
Checkout Component: Review & Confirm
Testing & Go Live
Processing test ACH cards is the same for all of our supported processors. For more information, see Test Accounts, Cards, and Cases.
For all of the account and routing numbers and Real-Time ACH Account Verification cards that we offer in the certification environment, please check out Test ACH Processing.
NoteACH transactions differ from credit card transactions in that there is no real-time decline mechanism. The transactions are updated over time to show funded or declined. For this reason test transactions will only ever be placed into a pending state in the test environment. If you need to test creating ACH transaction reports with various ACH transaction statuses please reach out to our integrations team at [email protected] for assistance.
Go LiveOnce you have checked each item from the Integration Steps checklist, you are ready to go live.
Google Pay
The Checkout Component embeds this payment method that requires involving a Google account during the checkout process, following its own workflow. It uses its own Google authentication method and form to enter and encrypt the sensitive information (in order to store a credit/debit card). Upon success, the form directs you to the Review & Confirm where you submit the Google Pay checkout response data for tokenization. The Checkout Component receives the PayConex™ token and the merchant is set for further transaction processing.
Shoppers get to experience a simpler checkout process whether they are buying from their Android devices, on the web, or in-store through POS terminals.
Compatibility and ReferencesFor more information on Google Pay™ availability, refer to:
- List of countries where you can use Google Pay
- List of supported browsers
- Adhere to Google Pay Acceptable Use Policy
For all the features that Google Pay offers, refer to Google Pay: Seamless online checkout.
NoteAfter selecting this payment method, the Checkout Component will spawn a browser pop-up window as a payment sheet to enter the GPay sensitive information.
Make sure that you apply your existing risk checks and controls for payment transactions to Google Pay transactions. Google Pay validation and fraud checks are not intended to replace your risk management processes. See googlePaySettings.
Selecting Payment Method and GPay Pop-up Window
First, the customer selects the desired payment method that was previously set up by creating a configuration and instance to meet the customer's needs. See allowedPaymentMethods.

Checkout Component: Payment Method - Google Pay
Adding Credit or Debit Card
This is the GPay step for saving your card.
NoteThis step of the payment checkout (along with billing and shipping information) can be further customized by the merchant during configuration or instance creation. See googlePaySettings.
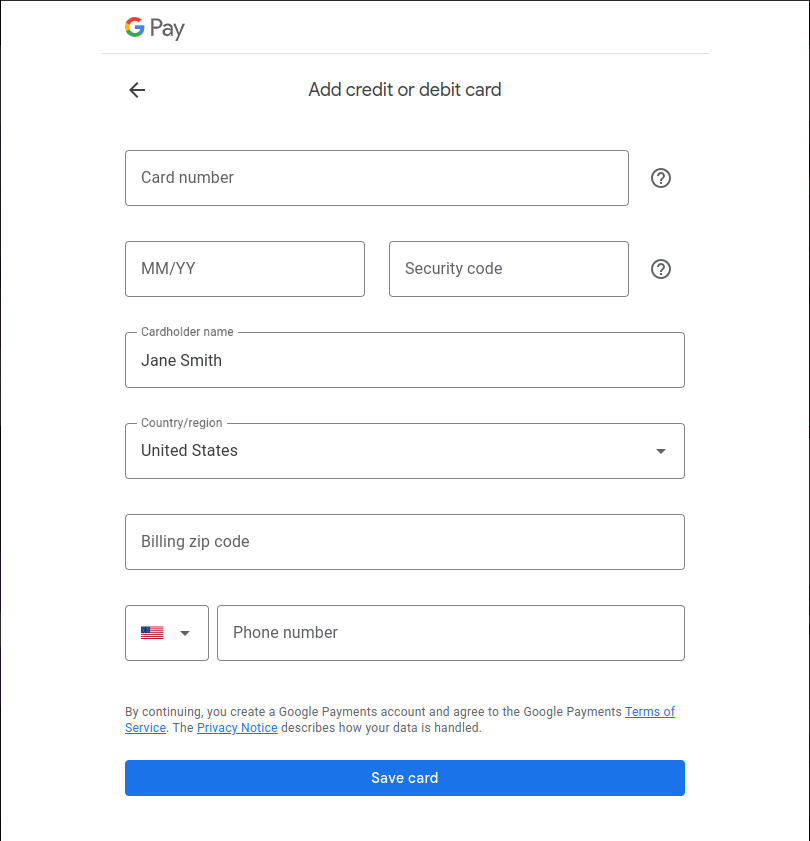
Checkout Component: Google Pay Adding Credit or Debit Card
Testing & Go Live
To test Google Pay while in the certification environment of your PayConex™ V4 integration, you have two different options:
- Login to a Google account and create a Google Pay wallet with valid card details.
- Follow the requirements and use a sample card from Google's test card suite.
For more information, see Google Pay's test environment setup for Web or for Android.
Before You Go LiveIn production, Google Pay will only be available if:
- The shopper is logged in to their Google account.
- The shopper has at least one valid payment method on their Google Pay account.
Once you have checked each item from the Integration Steps checklist, you are ready to go live.
Google Pay API and web integration | Google Developers
If you need a quick start for your first Google Pay integration, watch the following video: Google Pay API and web integration | Google Developers.
Mastercard Click to Pay
Similar to Google Pay payment method, the Click to Pay method integrates its own authentication method to verify the card holder's authenticity, following its own checkout workflow. Upon completion, the Checkout Component directs you to the Review & Confirm where you submit the encrypted Mastercard Click to Pay checkout response data for tokenization. The Checkout Component receives the PayConex™ token and the merchant is all set for further transaction processing.
Mastercard Click to Pay offers the following functionalities and security protections, as implemented by Mastercard:
- Encrypted payment information: Mastercard Click to Pay stores your payment information using an encrypted, virtual card number unique to you to protect your Mastercard details so you can shop online with peace of mind. Store multiple cards in one secure profile without sharing your payment details every time you check out. With Mastercard®, you’ll have your cards at your fingertips wherever Click to Pay is available.
- Sophisticated bot detection: Humans and bots behave differently. It may be subtle, but the right security technology can keep your profile safe. Mastercard Click to Pay uses the best security technology from Mastercard to distinguish you from malicious bots at checkout for more secure payment with your favorite merchants.
- Protection against fraud: As always, when you check out with a Mastercard, you're protected from unauthorized transactions with Zero Liability Protection and from identity theft with Mastercard ID Theft Protection™.
ReferencesThe bulletpoints above are extracted from the official Mastercard Click to Pay page. For more information, refer to Mastercard Click to Pay | Secure Online Payments & Checkout.
NoteThe Click to Pay settings are configured and further customized with clickToPaySettings at the time of configuration or instance creation.
Selecting Payment Method
First, the customer selects the desired payment method that was previously set up by creating a configuration and instance to meet the customer's needs. See allowedPaymentMethods.
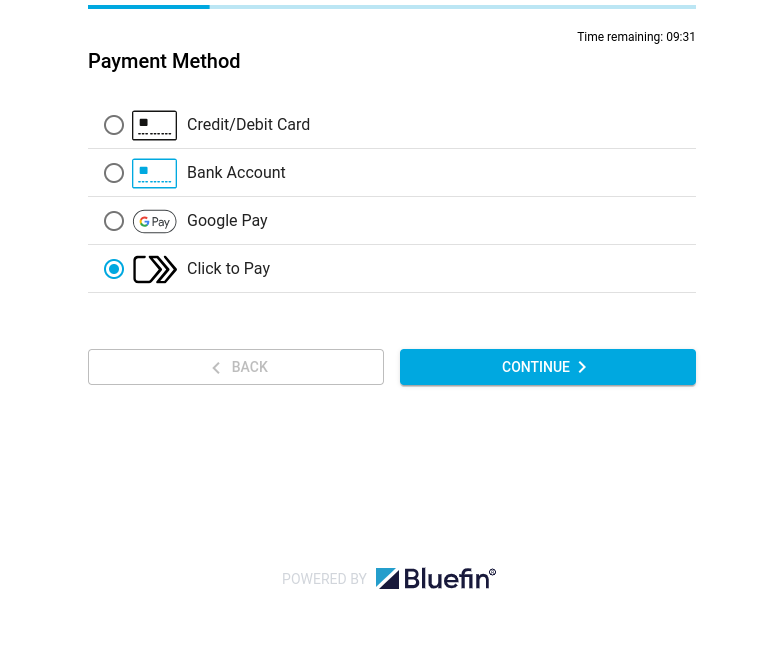
Checkout Component: Payment Method - Mastercard Click to Pay
Contact Information
As part of the Click to Pay workflow, you will be asked for Contact Information for code verification.
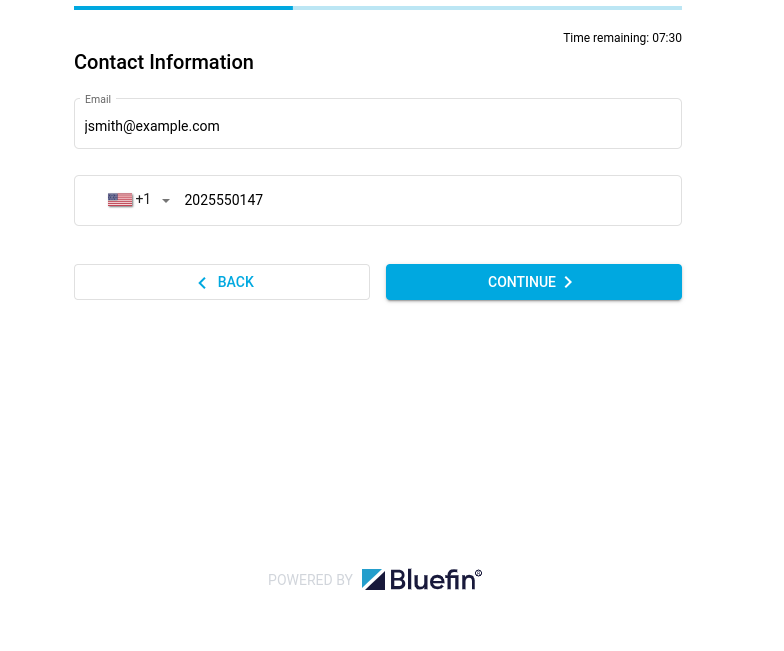
Checkout Component: Contact Information - Mastercard Click to Pay
Click to Pay Code Verification
To verify the card holder's authenticity and load the saved/linked cards, Mastercard Click to Pay asks for the verification code sent to the card holder's email address. Upon success, the checkout of Click to Pay continues until the Review & Confirm step where you submit the encrypted Mastercard Click to Pay checkout response data for tokenization.
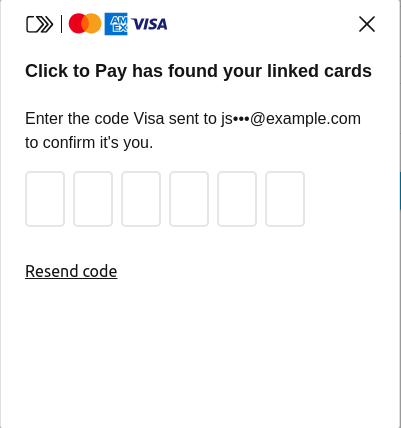
Checkout Component: Click to Pay Code Verification
Choose a card
Now, after the step above - you can also be directed to the Choose a card step if this is not your first time inputing your card information and you have previously enabled Mastercard Click to Pay to save the cards to your account. For more information, also check out Mastercard Click to Pay Terms of Use.
After clicking on one of your saved cards, the checkout process jumps straight to Review & Confirm.
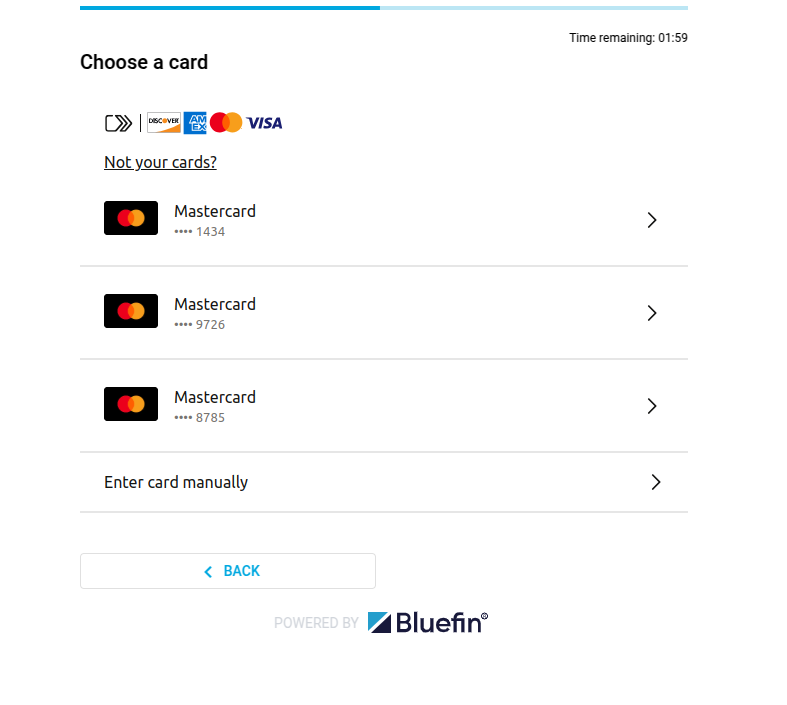
Checkout Component: Click to Pay Choose a card
Filling Out Billing Information
Next, the customer is prompted with the optional or required billing information fields for the purchase. This step is usually the same for each payment method.
NoteThe merchant sets up whether these fields are required or not. However, the first name and last name are always required. Note that the merchant can pre-fill these fields during instance creation in the case of returning customers.
Checkout Component: Billing Information
Inputing Sensitive Card Information
The customer then inputs their card information to be tokenized and used for transaction processing. Mastercard Click to Pay also allows for saving your encrypted card information for later use. As stated above, Mastercard Click to Pay stores your payment information using an encrypted, virtual card number unique to you to protect your Mastercard details so you can shop online with peace of mind.
NoteThis step of the payment checkout can be further customized by the merchant during configuration or instance creation as allowed by Mastercard Click to Pay settings. See clickToPaySettings.
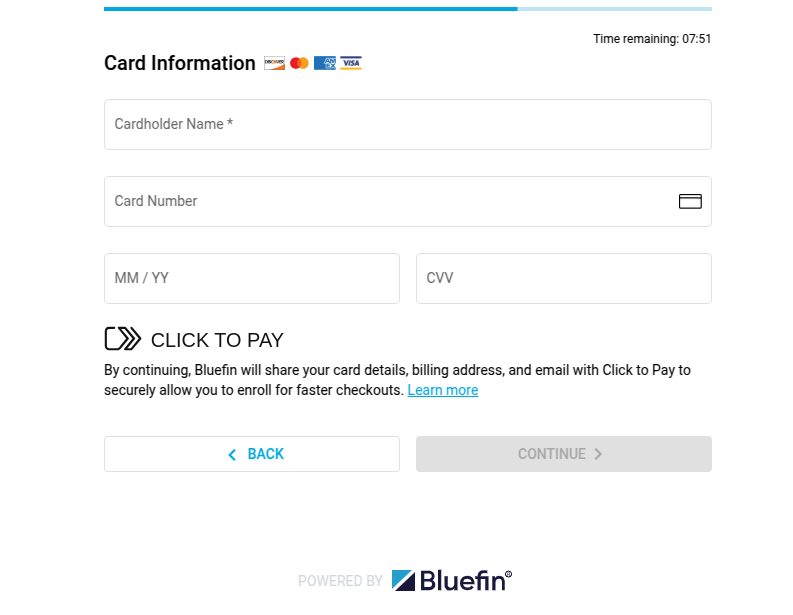
Checkout Component: Card Information
Review & Confirm
As with every payment method, the final step for the customer is to review and confirm their payment information. The Checkout Component enables the customer to edit their billing or card information before submitting in case the customer changes their mind of using another credit card, they inputed the wrong one, or similar.
NoteNote that the payment method cannot be changed at this point.
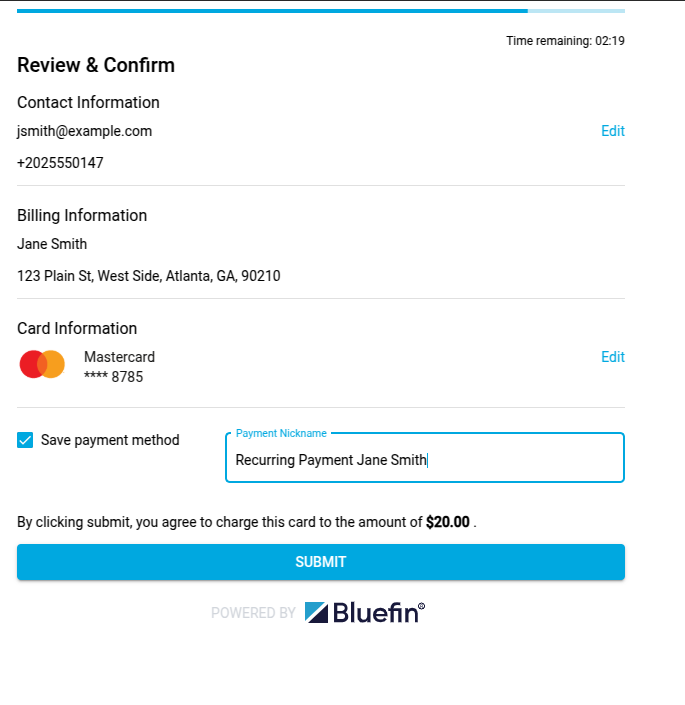
Checkout Component: Review & Confirm
Review your payment
This is the case when you have previously saved your card/s. After the customer hits CONFIRM, the checkoutComplete event is triggered and the merchant is to handle the checkout data and make a payment via the V4 API.
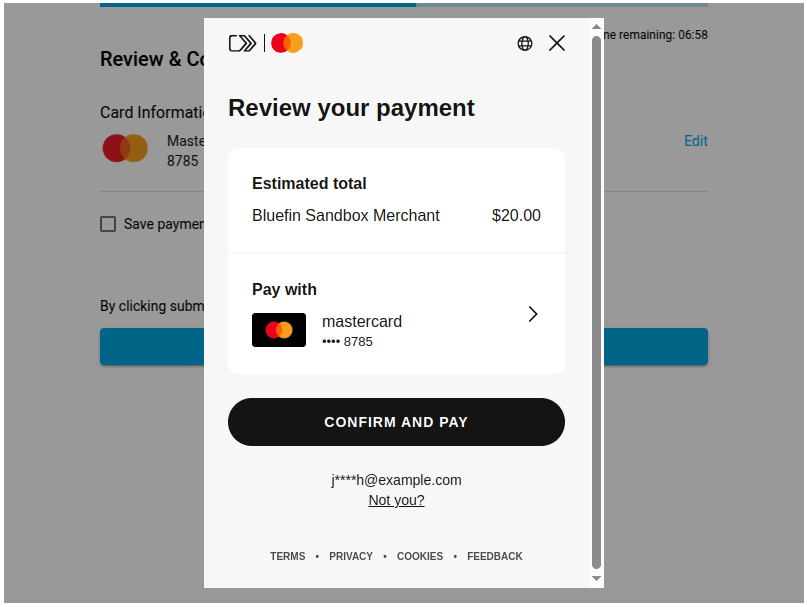
Checkout Component: Review your payment
Check out as a guest
This is the case when you didn't save your card/s previously and you can check out as a guest. After the customer hits CONFIRM, the checkoutComplete event is triggered and the merchant is to handle the checkout data and make a payment via the V4 API.
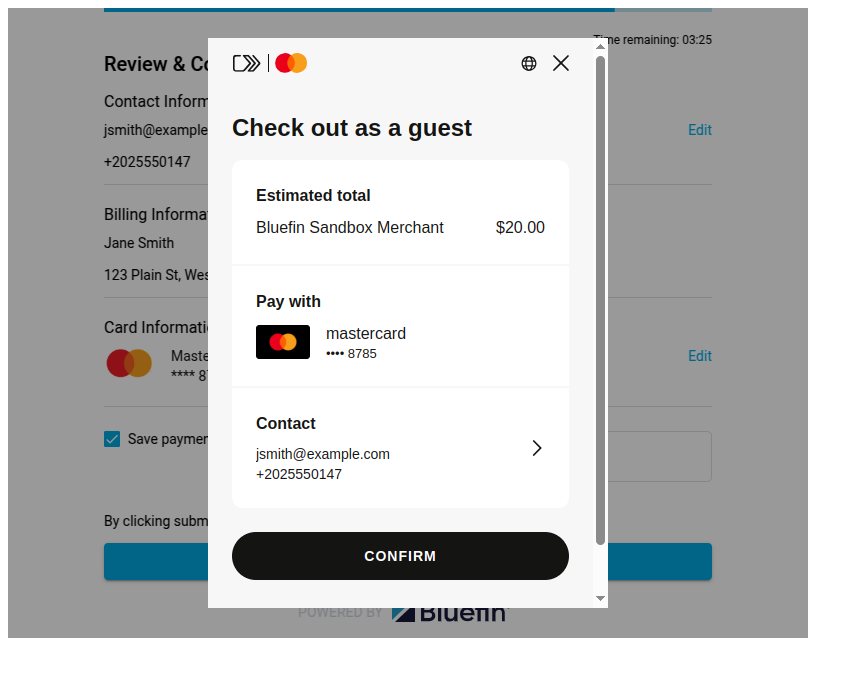
Checkout Component: Check out as a guest
Testing & Go Live
In the certification environment, the Checkout Component connects directly to the Mastercard sandbox, allowing you to thoroughly and securely test your integration.
The list of test cases and test cards for Mastercard Click to Pay can be found at Mastercard Checkout Solutions: Testing.
Digital Payment Application (DPA) IDIn certification, the
srcDpaIdfor testing is set up internally by Bluefin and provided to you on demand during your certification process.In production, a merchant is required to have a merchant account with Mastercard and be onboarded through Bluefin®, given that we are a payment service provider that supports Mastercard Click to Pay. Finally, the merchant account is set to register for and request a unique Digital Payment Application (DPA) ID through the Mastercard Developer Portal.
For more information, please contact our Bluefin® Integrations team via [email protected].
Go LiveOnce you have checked each item from the Integration Steps checklist, you are ready to go live.
Checkout Complete Event
The Checkout Component receives the tokenized data and the payment metadata specific to the payment method used during the checkout process. The Checkout Component SDK triggers the checkoutComplete event for the merchant to handle this data accordingly for subsequent transaction processing via the V4 API. For comprehensive samples of a variety of the response data, see Using the SDK.