Get started with integrating the PayConex™ Checkout Component for secure and versatile payment processing.
The PayConex™ Checkout Component is a comprehensive, customizable solution designed to provide a seamless and secure checkout experience for your web applications. This component has its own secure PCI-compliant environment, reducing the risks of any sensitive data being handled by the ISV/merchant.
This iframe-embeddable form supports multiple payment methods and extensive customer input options while leveraging Bluefin's ShieldConex® platform to ensure robust data security, safeguarding sensitive payment information.
With just a few API calls, developers can easily configure and integrate the Checkout Component using the PayConex™ V4 API and JavaScript SDK, enabling a versatile and secure payment gateway tailored to meet diverse business needs.
The setup steps below will help you get started.
HTTPS RequiredThe Checkout Component iframe must be hosted on an HTTPS domain.
For the visual display of this component, see Customer Checkout.
Setup Steps
1. Obtain API Credentials
-
Ensure your PayConex™ API key has the necessary permissions (
pcx:iframe:*orpcx:iframe:create,pcx:iframe:instance:*orpcx:iframe:instance:create).-
See our guide on API Key Management and how to grant these permissions.
-
2. Authenticate API Requests
- Prior to sending any API requests, make sure you have reviewed the documentation on API Authentication and decided on the authentication method.
NoteThe production environment supports HMAC Authentication only.
3. Create a Checkout Component Configuration
- Use the API endpoint:
POST /api/v4/accounts/{accountId}/payment-iframe. - Configure settings for different payment methods such as Card, ACH, Google Pay and Mastercard Click to Pay. These settings can also be overwritten for each instance creation in the next step.
-
For more information, see our guide on Creating a Configuration.
4. Initialize an Instance of the Checkout Component
- Make the request to
POST /api/v4/accounts/{accountId}/payment-iframe/{resourceId}/instance/init. - Obtain a bearer token for SDK initialization.
- For the request configuration, see our guide on Creating an Instance.
5. Load the Checkout Component on a Page
- Include the SDK script in your HTML file:
<script src="https://secure.payconex.net/iframe-v2/iframe-v2.0.0.min.js"></script>. - Initialize the component with the
initmethod using the bearer token. - To load the Checkout Component, see Checkout Component SDK.
6. Test and Validate
- Test the Checkout Component with various payment methods.
- Ensure that the iframe loads correctly and events are triggered as expected.
- If testing with the 3DS authentication, make sure to use the Test Cards for the certification environment.
7. Process a Transaction
- Next, integrate your application to process the tokenized card holder data that was returned by the Checkout Component.
- For practical examples, see our sample applications including NodeJS Use Case for Recurring Payments and Golang Use Case for Transaction Management.
The diagram below illustrates the quick-start procedure.
Also seeThis quick start with request examples can be found here Quick Start.
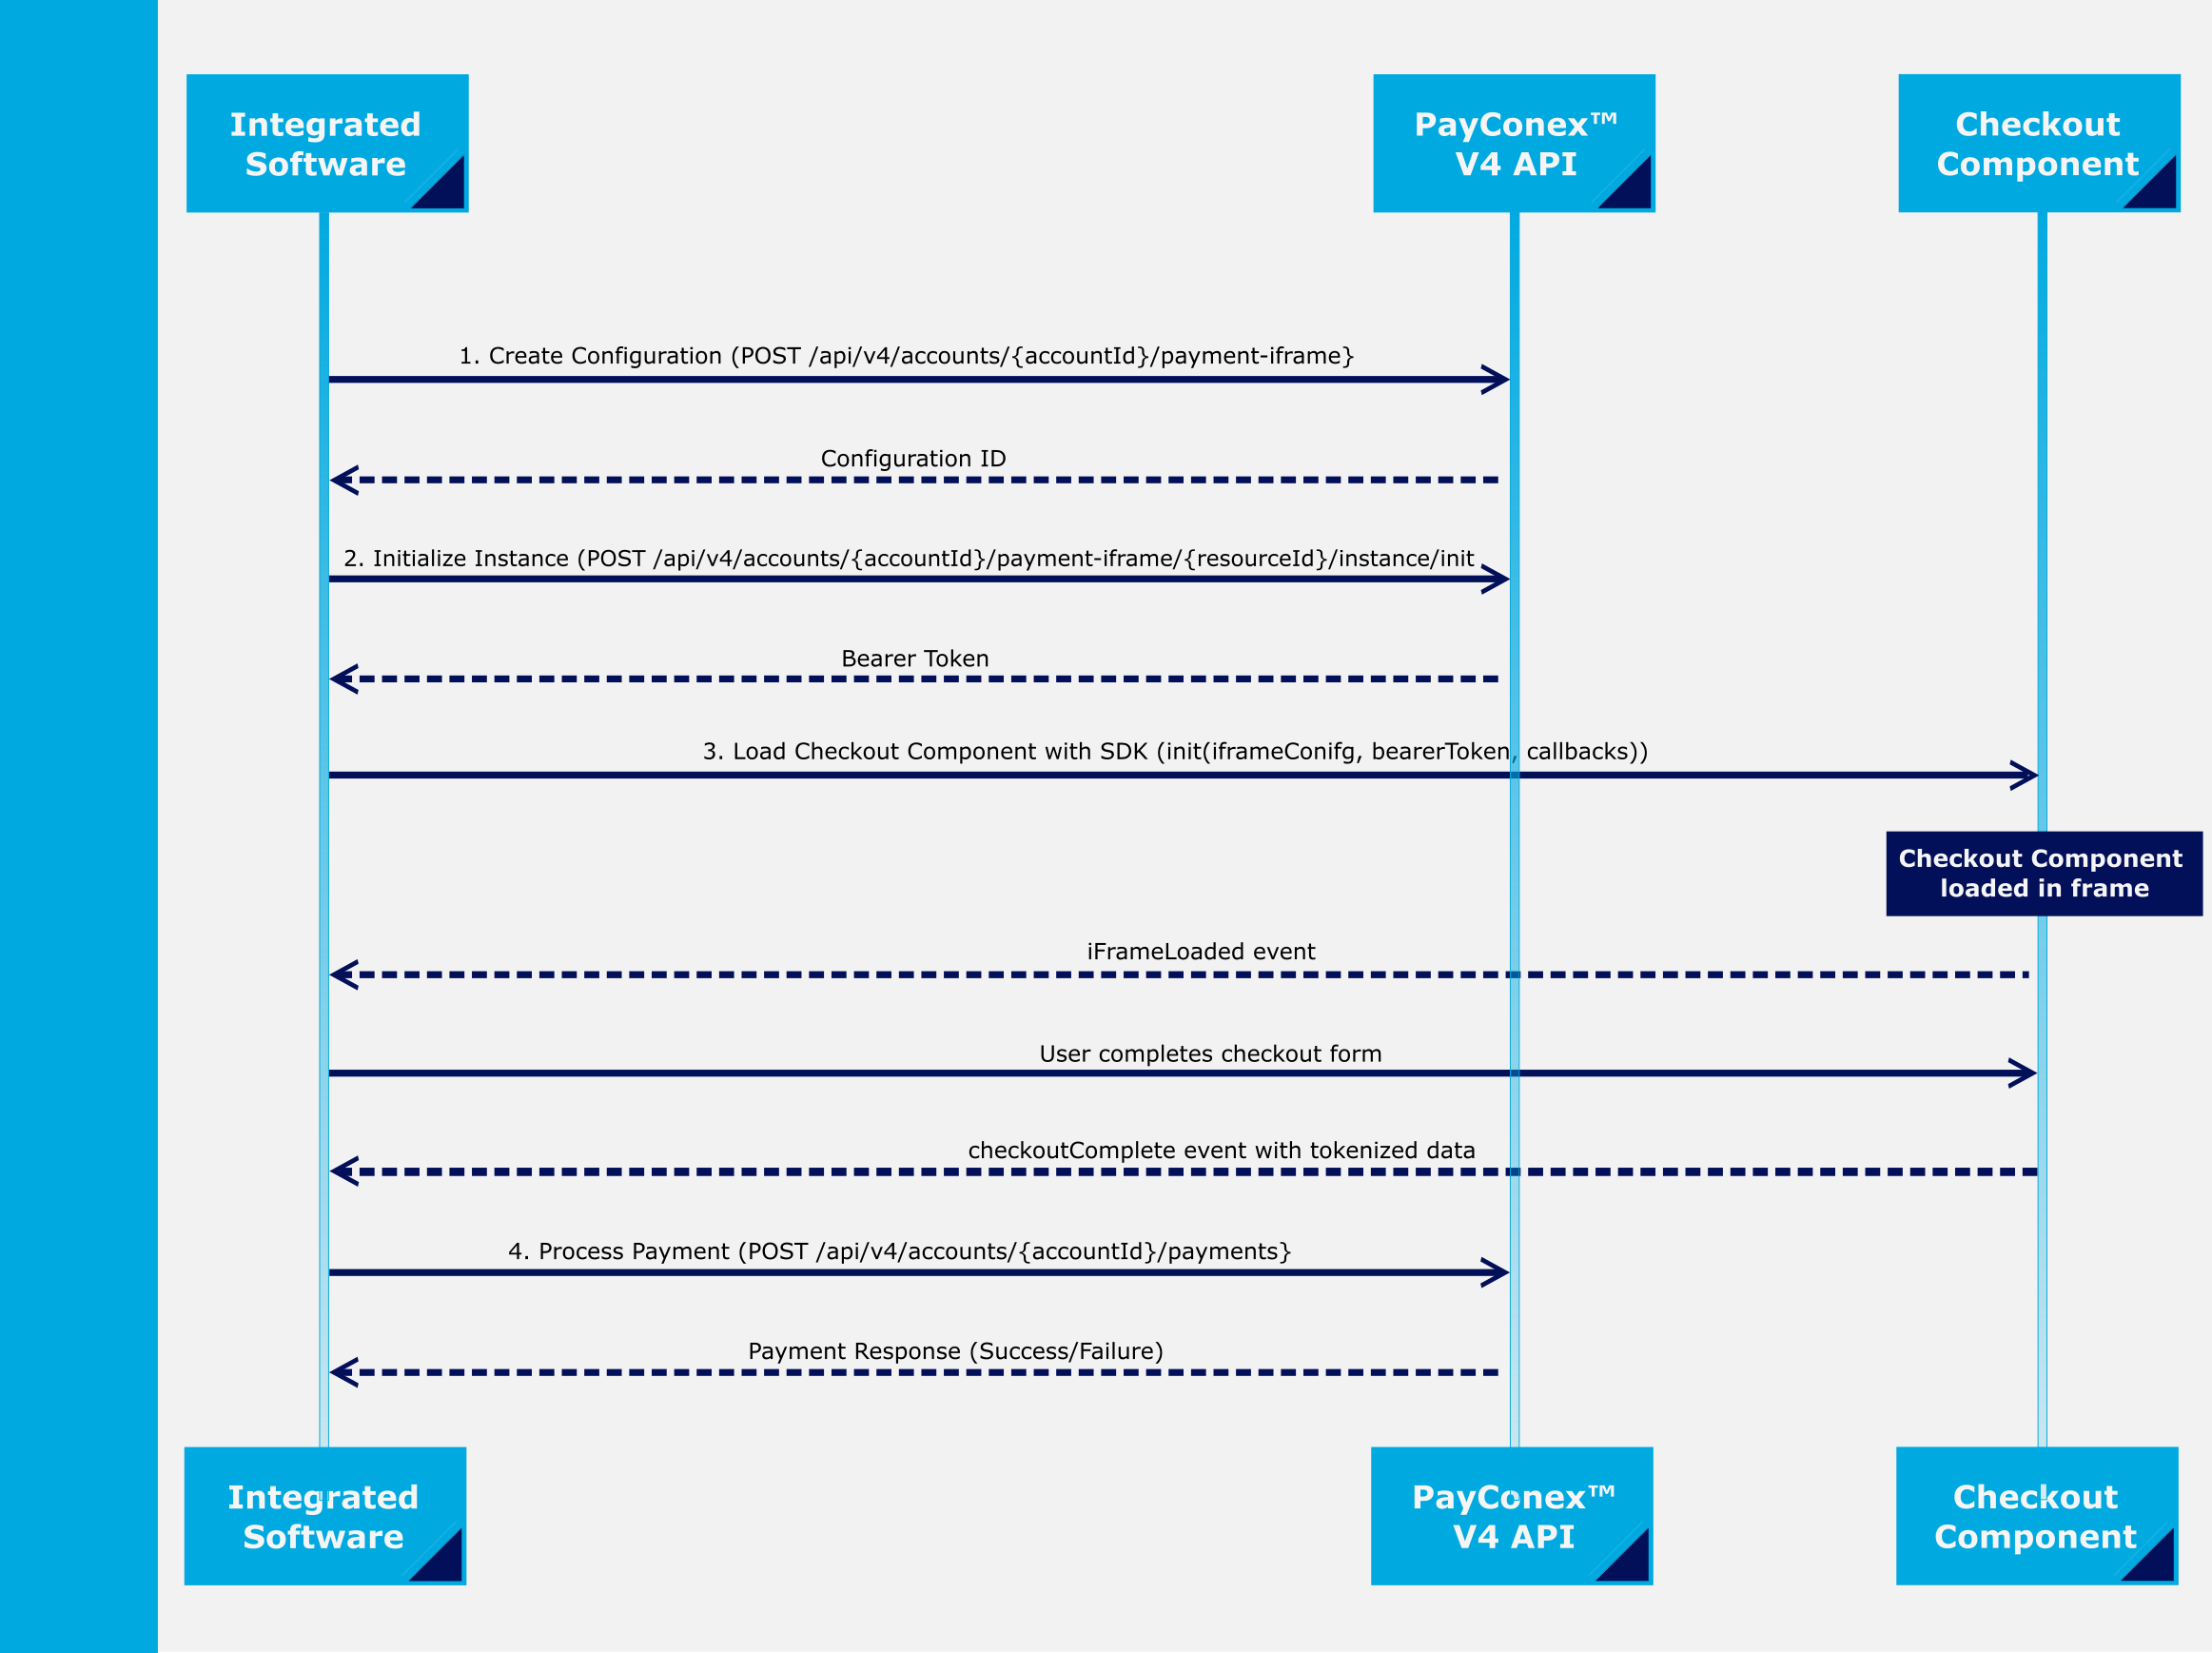
PayConex™ V4 API/SDK Quick Start