
A Hosted Payment Form configuration defines the default checkout experience. The configuration can be created in PayConex or through the Payment Form configuration API.
This page follows the merchant-facing configuration experience. API property names are included where they help developers map the UI to the V4 API.
1. Choose the form type and amount behavior
The form type determines how the checkout presents the amount.
E-Commerce
For pageType: "ecommerce", choose one amount model:
-
Set Amount
- Enter
fixedAmount; the customer cannot change it. - This setting maps to
ecommerceSettings.amountType: "FIXED"
- Enter
-
Entered Amount
- Configure
minAmountandmaxAmount; the customer enters an amount within that range. - This setting maps to
ecommerceSettings.amountType: "OPEN"
- Configure
Use amountLabel to describe the amount, such as Invoice amount, Registration fee, or Payment amount.
Donations
For pageType: "donation", the V4 API supports:
amountType: "LIST"with anamountsListof preset choices; oramountType: "CUSTOM"withminAmountandmaxAmountfor a customer-entered amount.
2. Select customer fields
Add only the information needed to complete and reconcile the payment. Standard customer settings include:
- name (
customer.captureName); - email (
customer.captureEmail); - phone (
customer.capturePhone); - individual billing-address fields (
customer.billingAddress); and - shipping-address capture (
customer.captureShippingAddress).
Name, email, phone, and billing-address fields use these states:
required— the customer must enter a value;optional— the field is shown but may be left blank; oromit— the field is not shown.
The shipping-address setting is a boolean in the configuration schema. When it is enabled, the checkout can collect the shipping address.
The State field is rendered as a selectable list where applicable. A required State value must be selected before submission; an optional State value may be left blank.
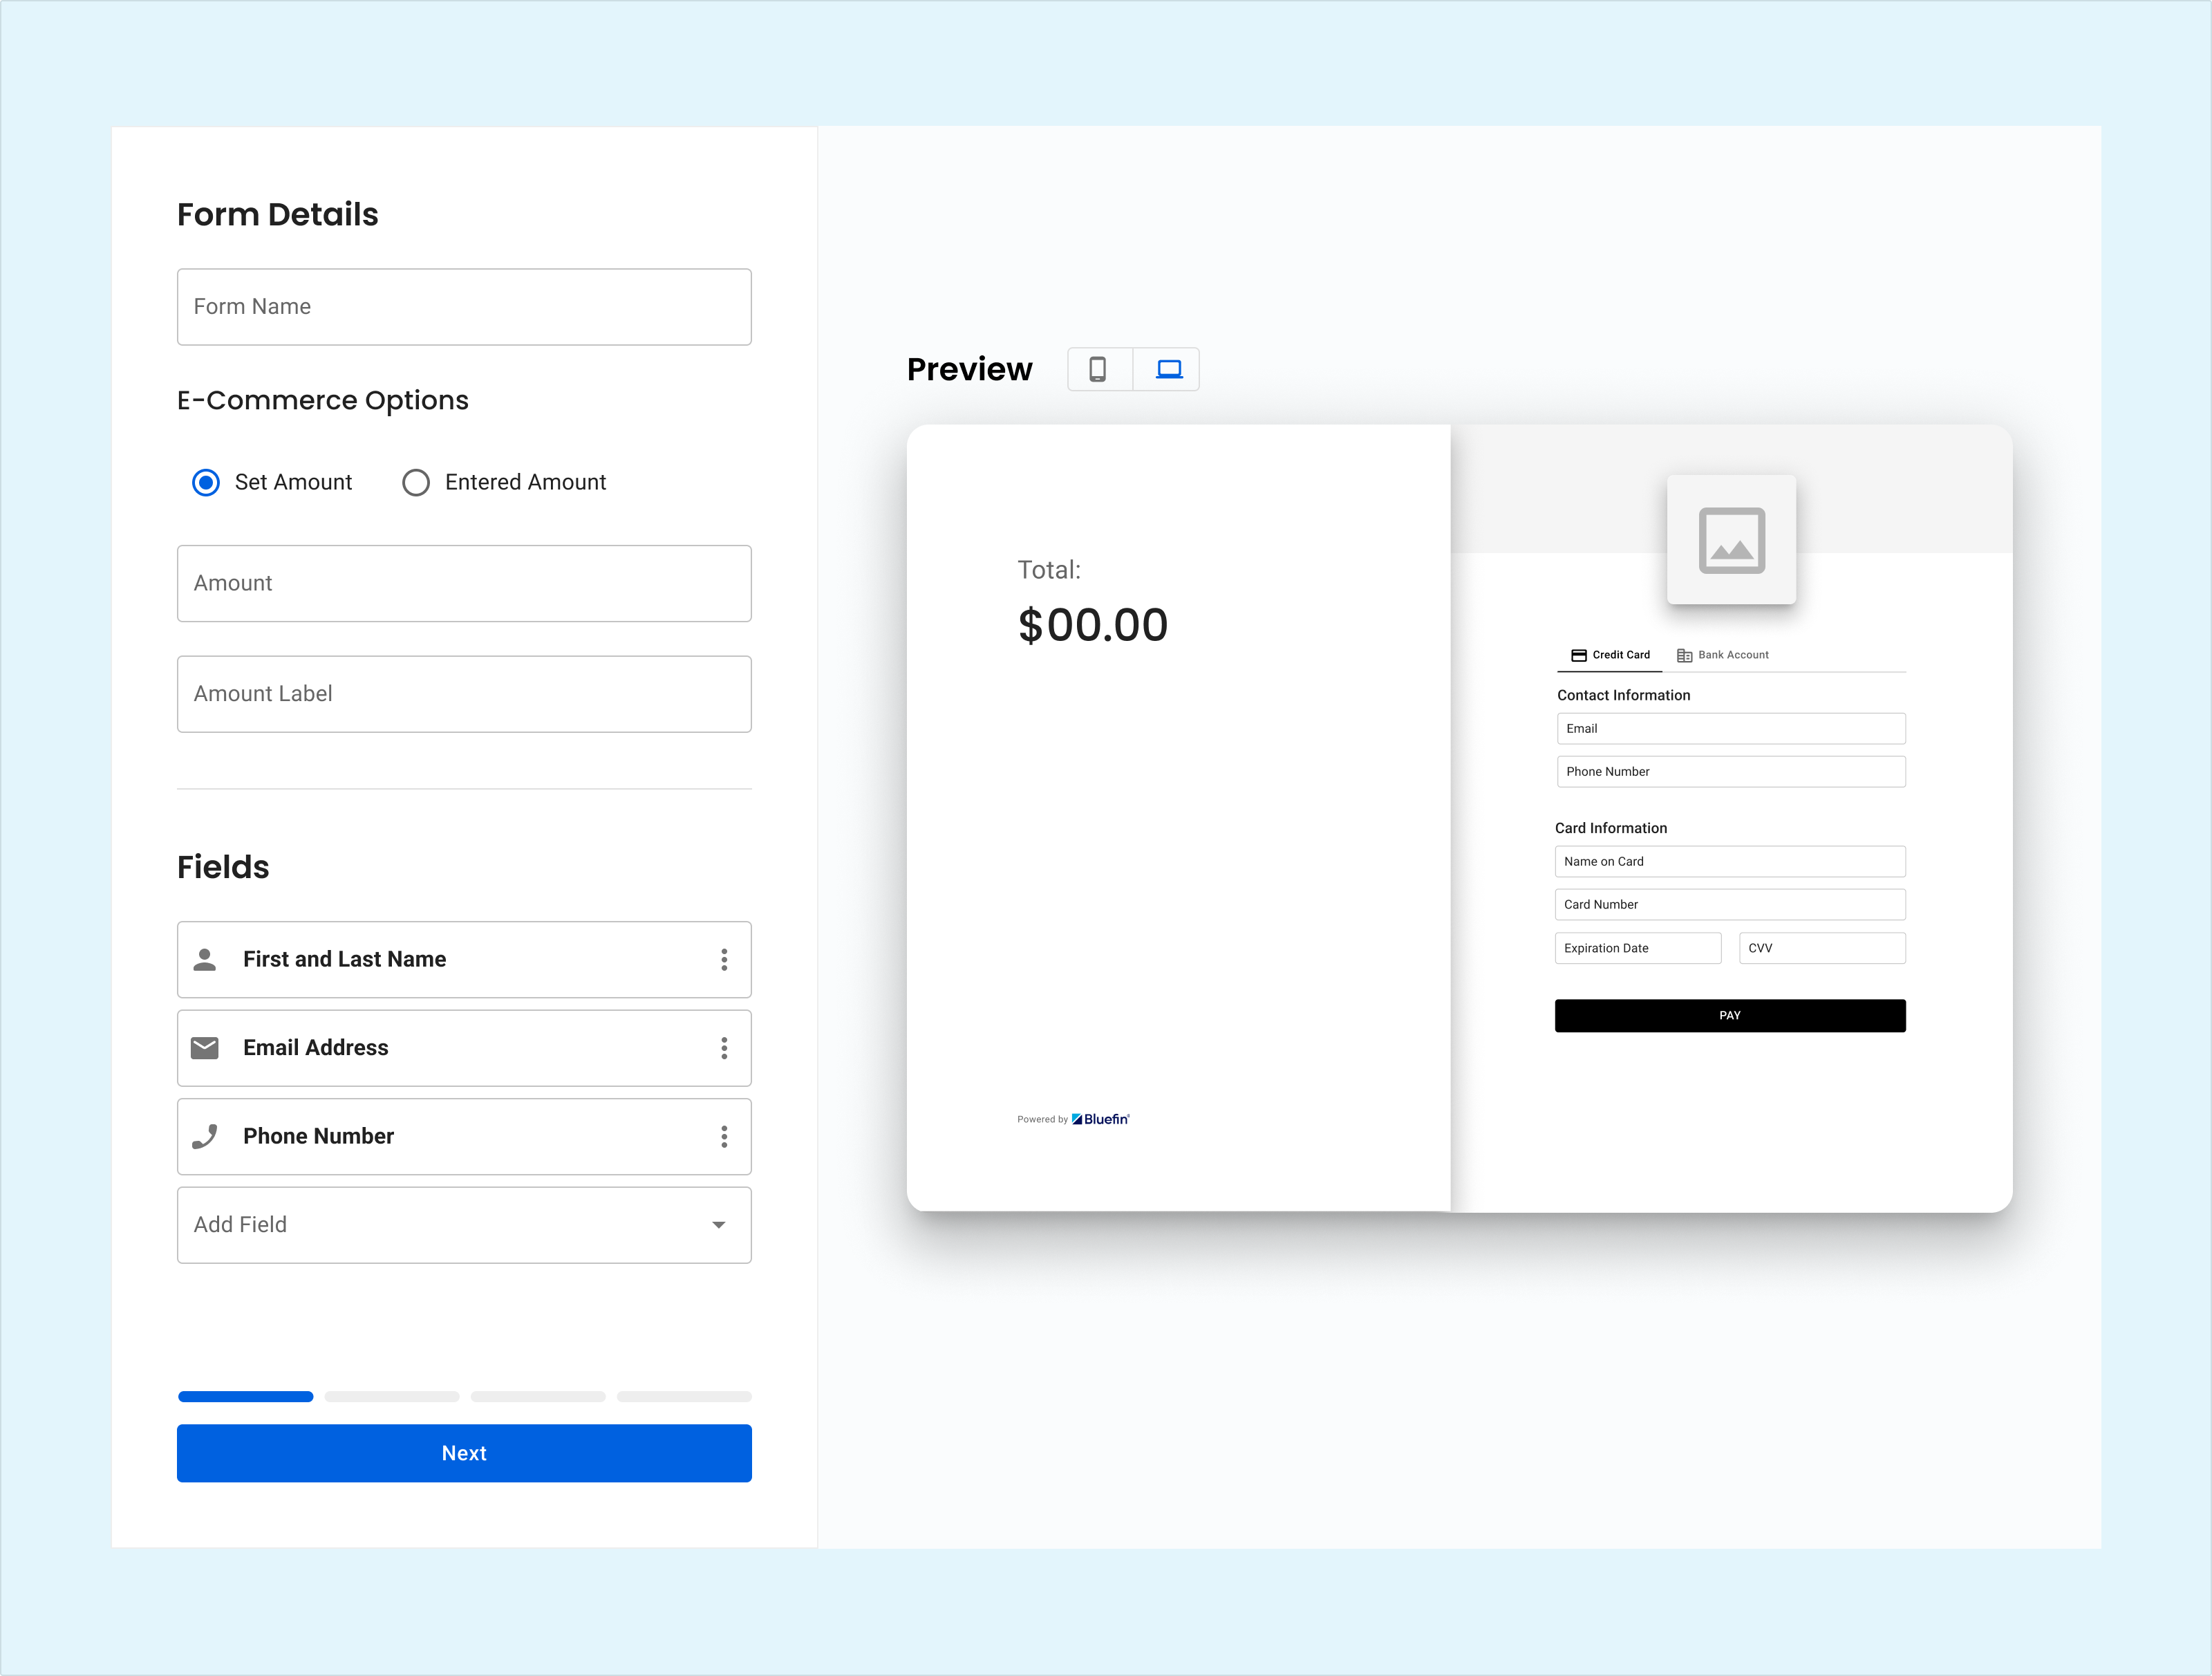
Form Details with amount settings, field list, and live preview
The live preview shows how configured fields and amount behavior affect the customer checkout.
timeout ValueNote that this setting can be set at the payment-configuration-level to define the default value for all the newly created instances but does not affect the payment configuration itself given that a payment configuration with direct URL access does not implement the timeout expiry and remains reusable for multiple payments until the configuration is paused or deleted. However, it does specify the real-time timeout value that determines when the session should expire before the page reloads.
3. Add custom fields
Custom fields collect merchant-specific information that is not covered by the standard customer fields. The API reference defines these field types:
textdropdownradio
Custom-field definitions can also specify a label, data type, placeholder, default value, selectable values, display order, alignment, whether the field is required, whether it is view-only, and whether it appears in reporting.
When attaching custom fields to a form:
- Put them in the order customers should see them;
- Provide selectable values for dropdown and radio fields;
- Supply an initialization value for any required, view-only field;
- Do Not request payment card numbers, CVV, passwords, or other sensitive authentication data; and
- Remember that removing a field from a form does not delete a reusable field definition from the account's custom-field library.
The configuration API attaches library fields by ID and display order:
{
  "customFields": [
    {
      "id": "cfo_24a0b06e74324d80a18b6dfef1472bb4",
      "order": 1
    }
  ]
}
4. Choose payment methods
Enable at least one payment method. The current Payment Form API supports:
- Credit Card (
CARD) - Bank Account / ACH (
ACH) - Google Pay (
GOOGLE_PAY)
Account capabilities still apply. ACH and Google Pay controls may be unavailable when the account is not enabled for them.
The configuration designs also show Click to Pay, but CLICK_TO_PAY is not an allowed value in the V4 API. It is therefore not documented as a supported Hosted Payment Form method in this draft.
Save payment method
savePaymentOption controls whether checkout offers to save the payment method:
| Value | Customer experience |
|---|---|
omit | No save-payment option is shown. |
optional | The customer can choose whether to save the payment method. |
required | Saving is required; the control is selected and cannot be changed. |
Saving a method can produce a bfTokenReference for future merchant-initiated use. Use this feature only when your customer disclosure, authorization, and downstream payment workflow support stored payment methods.
For the comprehensive documentation on subsequent payments, refer to Customer and Merchant Initiated Transactions and Customer/Merchant Initiated Transactions Use Case.
5. Apply branding and style
Branding is optional. The configuration supports a logo and cover image referenced by PayConex asset IDs, rather than arbitrary external image URLs.
The merchant UI validates the following design requirements:
- cover image: PNG, JPG, or WEBP, up to 2 MB;
- logo: PNG, JPG, or WEBP, up to 512 KB.
The exact API-wide upload formats, dimensions, and all asset error rules still require confirmation before publication.
Style settings include:
primaryColor— a three- or six-digit hex color;buttonTextColor— a three- or six-digit hex color;font— currentlyroboto; andfieldStyle—outlined,filled, orstylein the API definition.
The management design labels the third field style Standard, while the schema enum is style.
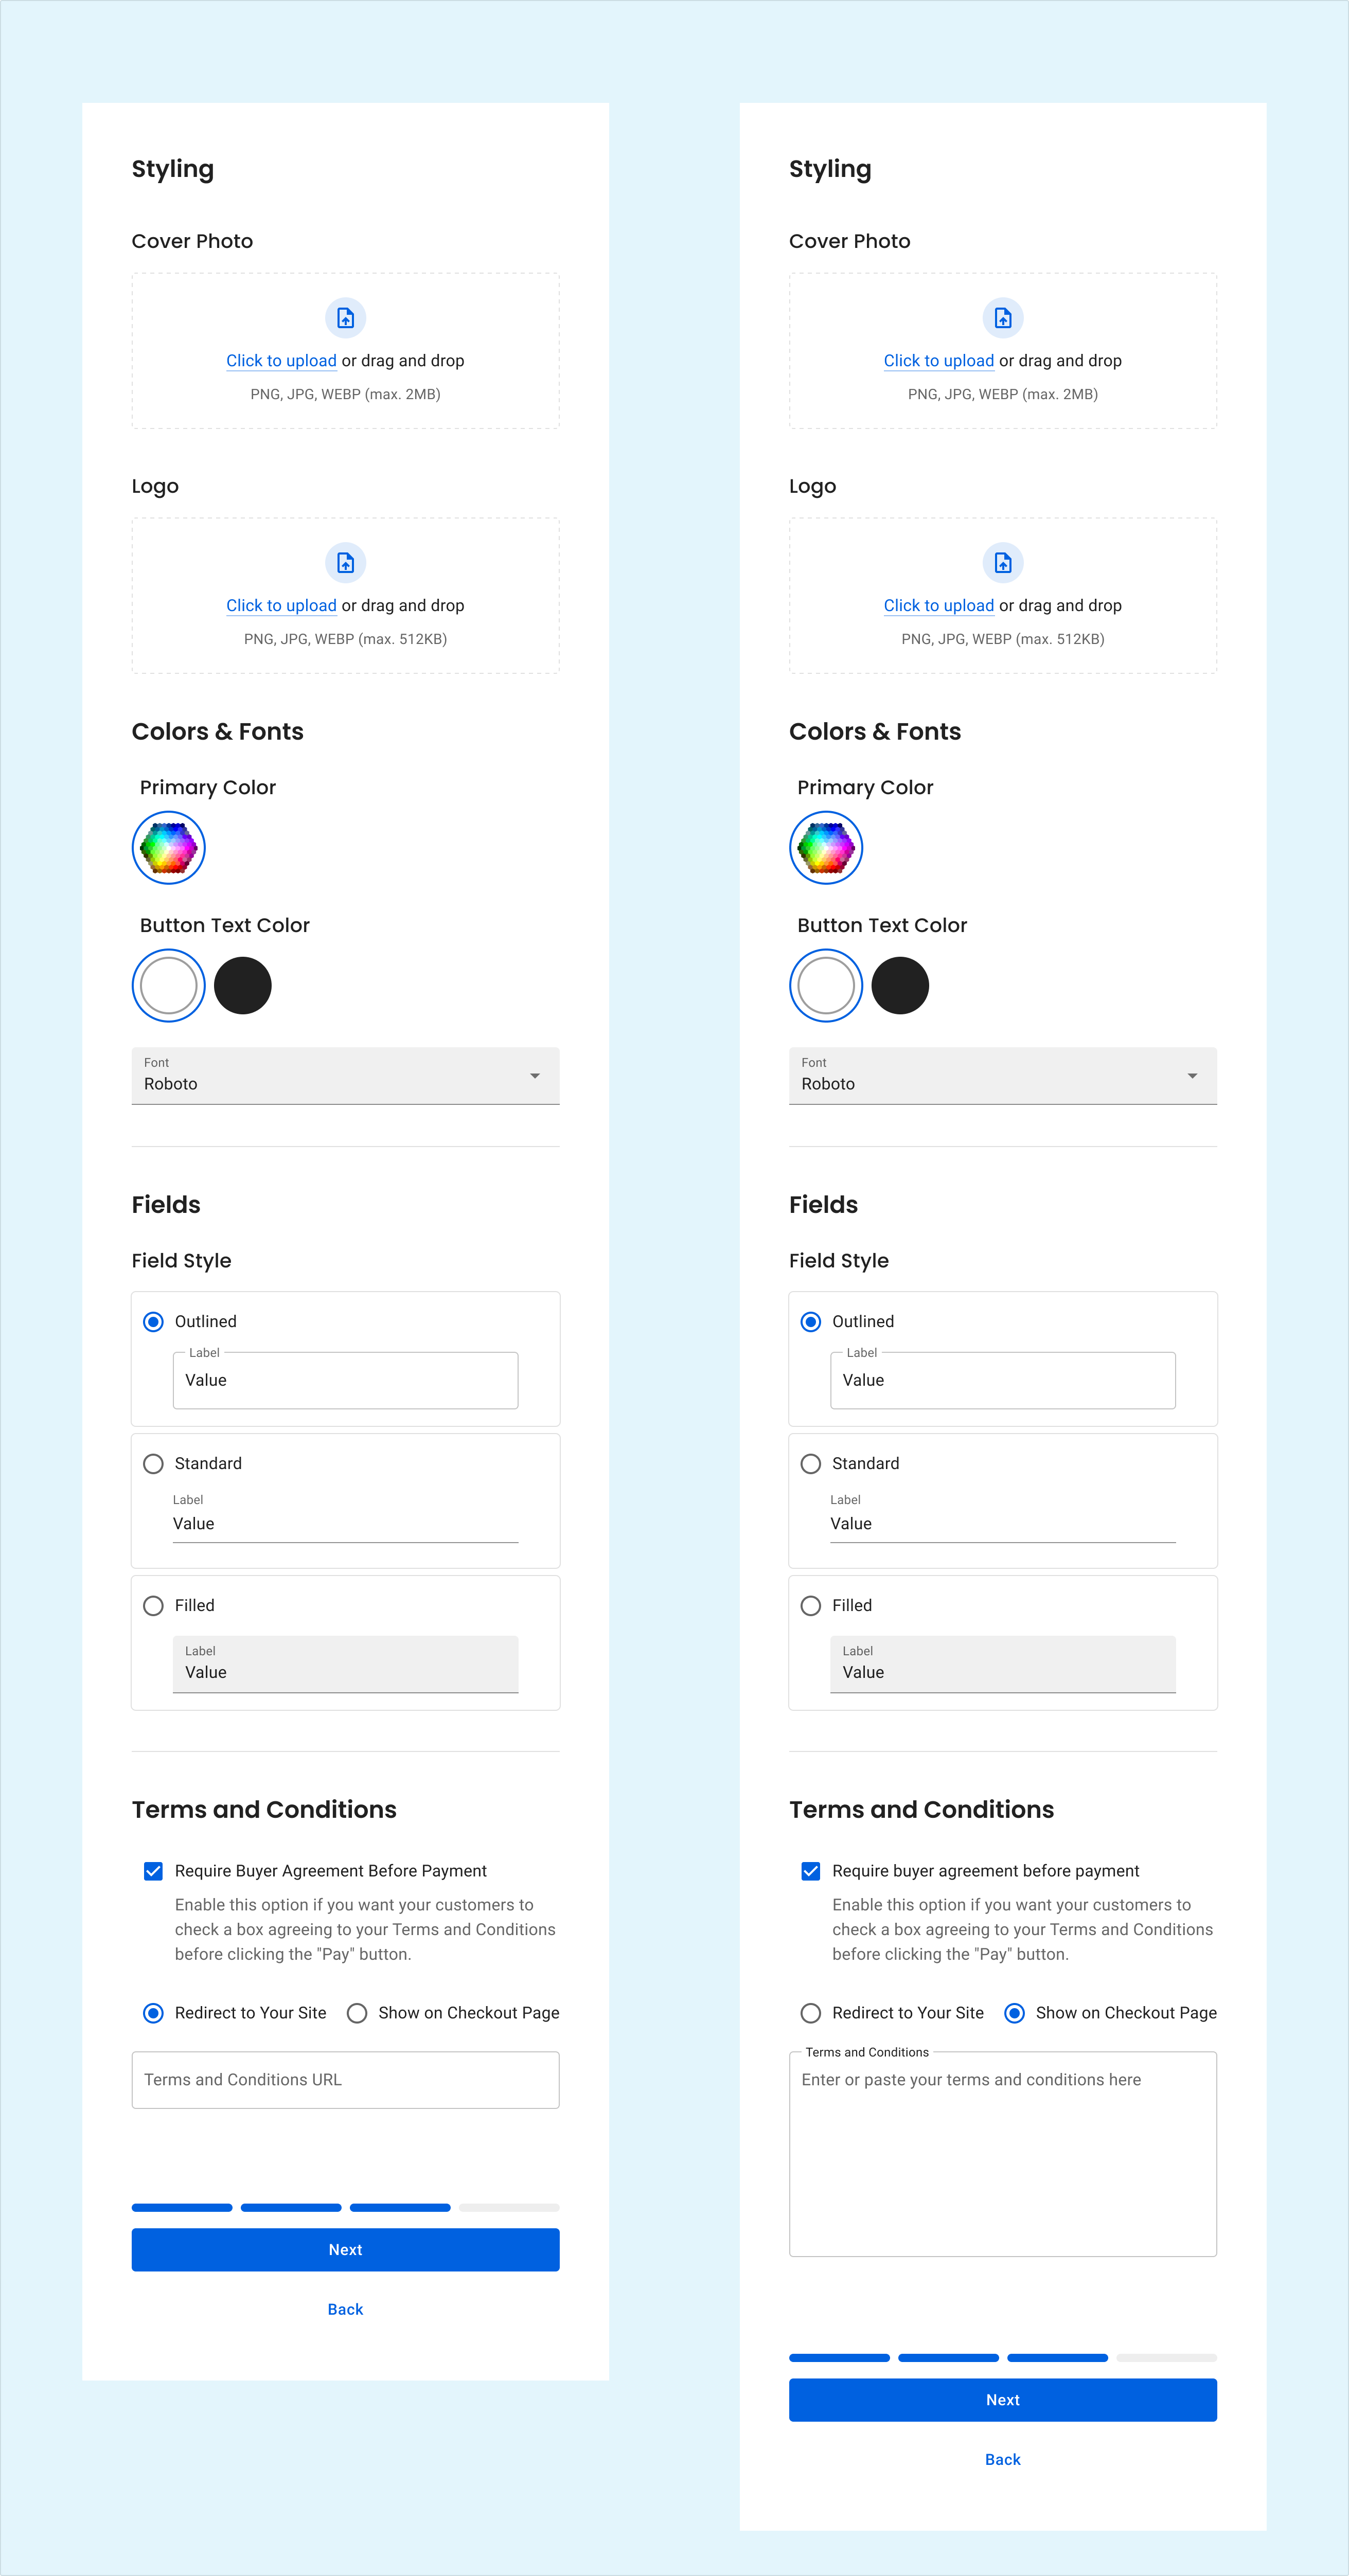
Brand image uploads, color and font options, field styles, and terms settings
Branding, field style, and terms settings update the hosted checkout presentation.
6. Configure terms and conditions
Use termsAndCond.required when the customer must agree before payment can be submitted.
The configuration supports two presentation patterns:
- provide
textto present terms in the checkout experience; or - set
redirectToUrland providetermsAndConditionsURLto send the customer to merchant-hosted terms.
If acceptance is required, provide the terms content appropriate to the selected presentation. The customer must accept before the Pay action becomes available.
7. Configure 3-D Secure
threeDSecure.useThreeDSecure supports required, optional, and omit in the API definition. Processor and account capabilities determine whether 3-D Secure is available.
When you use 3-D Secure, the threeDSecureInitSettings object contains transaction context needed by the authentication flow. Its required fields are:
transactionTypedeliveryTimeFramethreeDSecureChallengeIndicatorreorderIndicatorshippingIndicator
Do not copy 3-D Secure values from an unrelated transaction. Select values that accurately describe the purchase and fulfillment flow.
For the full guide on 3-D Secure, refer to Bluefin 3DS Support.
ACH Customer Authorization
The National ACH Association (NACHA) has introduced a rule that states payment originators must perform account validation for ACH transactions the first time an account number is used to make a WEB debit transaction.
Bluefin has worked to provide a flexible toolset that developers and merchants can utilize to meet or exceed these new requirements.
To learn more, please see our guide titled, Real-Time ACH Account Verification.
8. Choose access behavior
directUrlAccess accepts:
-
ENABLED— the saved form's public URL can load without a prior initialization call.- This option is more convenient for merchants with no technical background who need to get started as quickly as possible.
-
DISABLED— a customer must use an initialized instance URL- This option is intended for more technically involved merchants who prefer to manage their own integrations.
New forms are intended to default to disabled Direct URL Access. Enable it only when you need a reusable public link. The management UI displays a warning because public links can receive automated or unauthorized traffic.
9. Choose the completion experience
confirmationPage controls what happens after an approved payment:
- set
useCustomPagetofalseto use the PayConex confirmation experience and optionally providecustomTextStyle; or - set
useCustomPagetotrueand provideconfirmationUrlto redirect the customer to your site.
The property name useCustomPage is ambiguous when compared with the UI wording. The runtime tickets consistently describe true as redirecting to confirmationUrl; this draft follows that behavior and records the naming ambiguity as a documentation gap.
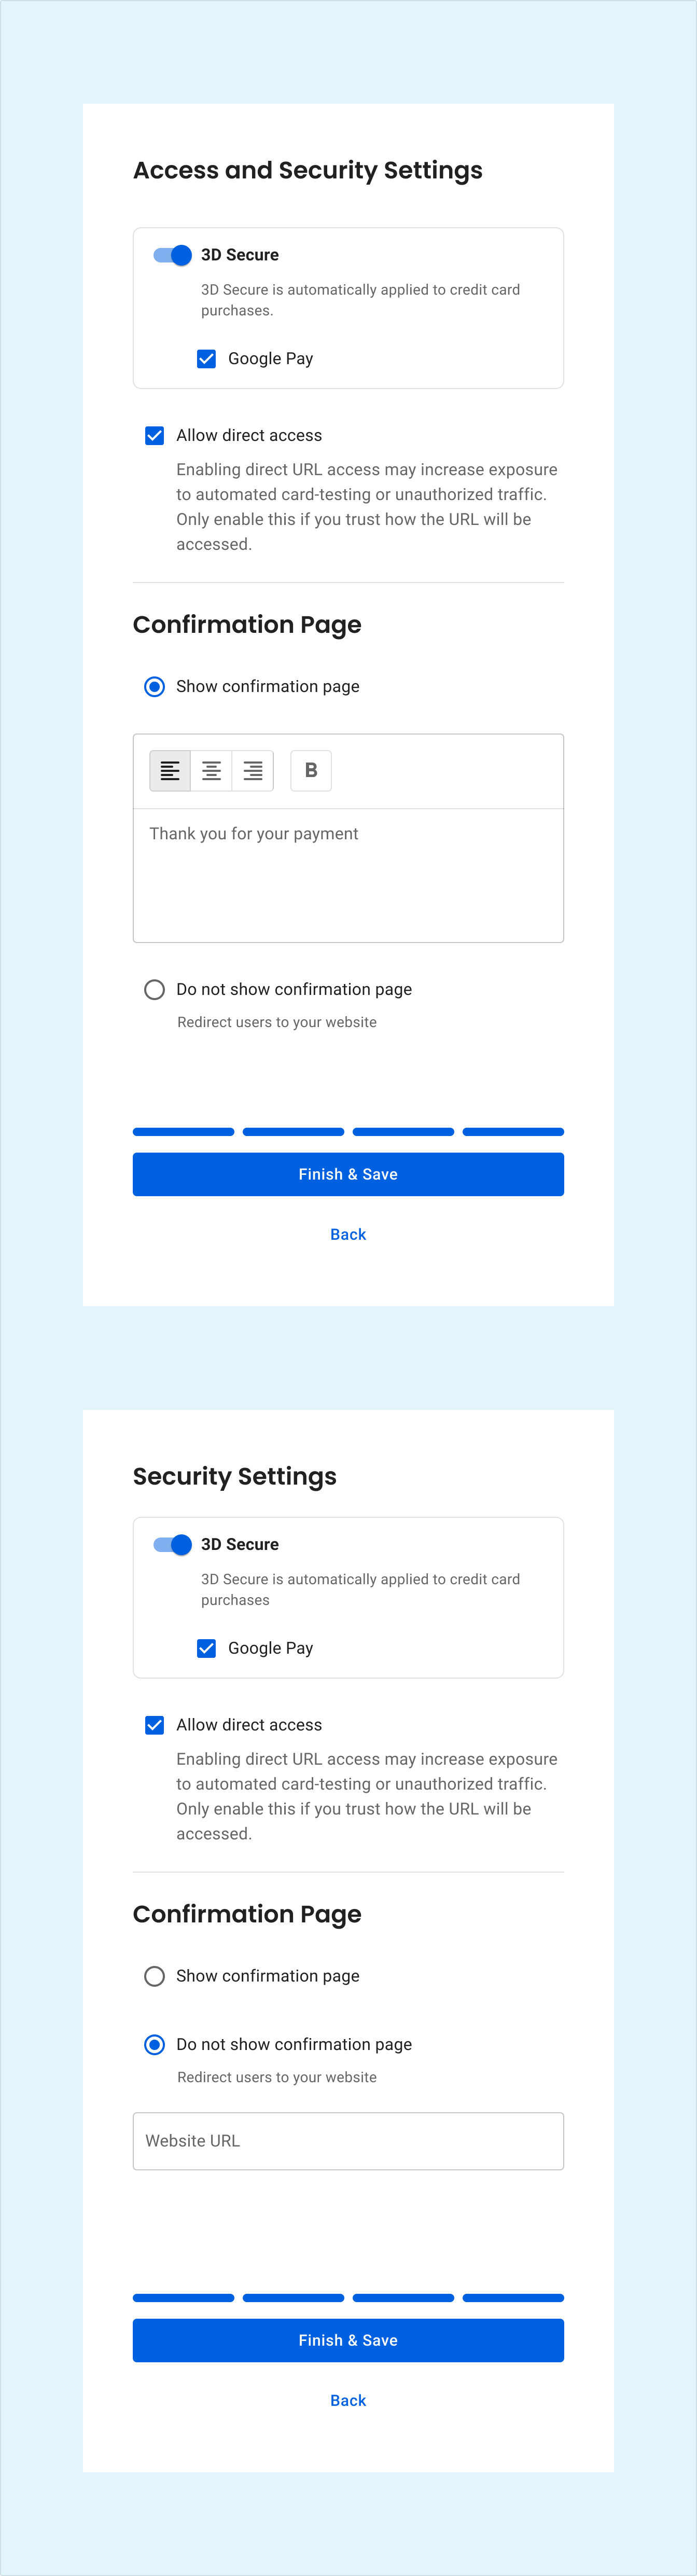
Access, 3-D Secure, Direct Access, and confirmation settings
The final configuration step controls access, security, and the post-payment destination.
10. Save and test
Before sharing a form or integrating it:
- Verify that the amount behavior is correct.
- Confirm that at least one supported payment method is available to the account.
- Complete all required customer and custom fields in Preview.
- Test terms acceptance when enabled.
- Test both the PayConex confirmation and merchant redirect path, as applicable.
- Test invalid data and a declined payment in the appropriate non-production environment.
- If using API initialization, test expiration and attempts to reuse a completed instance URL.
- If using Direct URL Access, verify both enabled and disabled behavior before distributing the link.