Overview
In this section, we explore the different functionalities the PayConex™ user interface provides for managing API keys. This is a good introduction for Using the PayConex™ API as we can visually see a structure of an API Key and how to manage it.
Accessing the API Key Management Interface
After you log into PayConex™, you can access the API management screen by selecting the Settings tab and clicking the Manage API Keys option from the list.
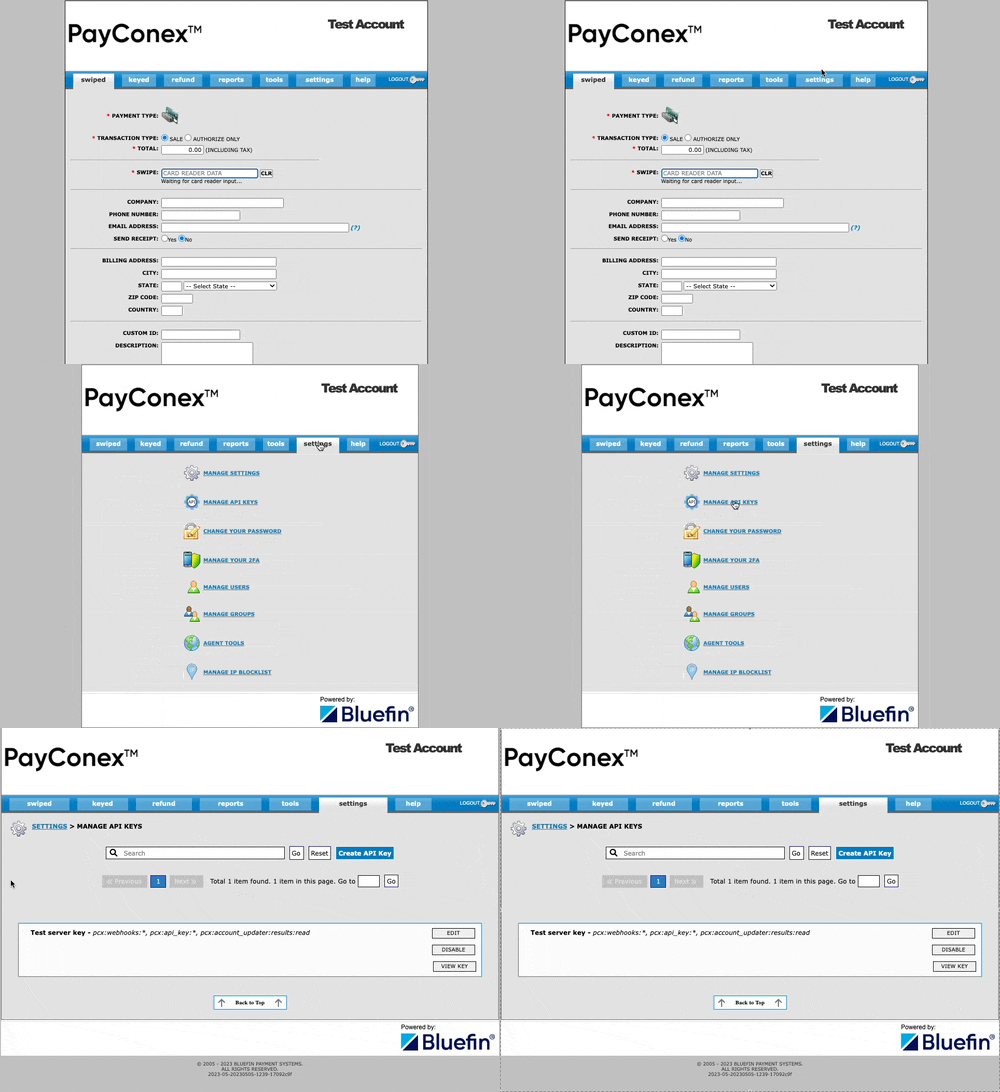
At this point, the user can do any or all of the following:
- Create API keys.
- View a list of API keys.
- Retrieve the
idandsecretfor an API key. - Edit an API key.
- Disable an API key.
Note
Any user who wants to access the API key management page must have administrator privileges to the account.
Creating an API Key
One of the first steps in utilizing many of the newer PayConex™ API features is to create an API key. An API key can be used for successful HMAC API authentication and has the permissions required for the feature(s) being implemented.
Starting the process of creating an API key is as simple as opening the MANAGE API KEYS page and clicking the Create API Key button:
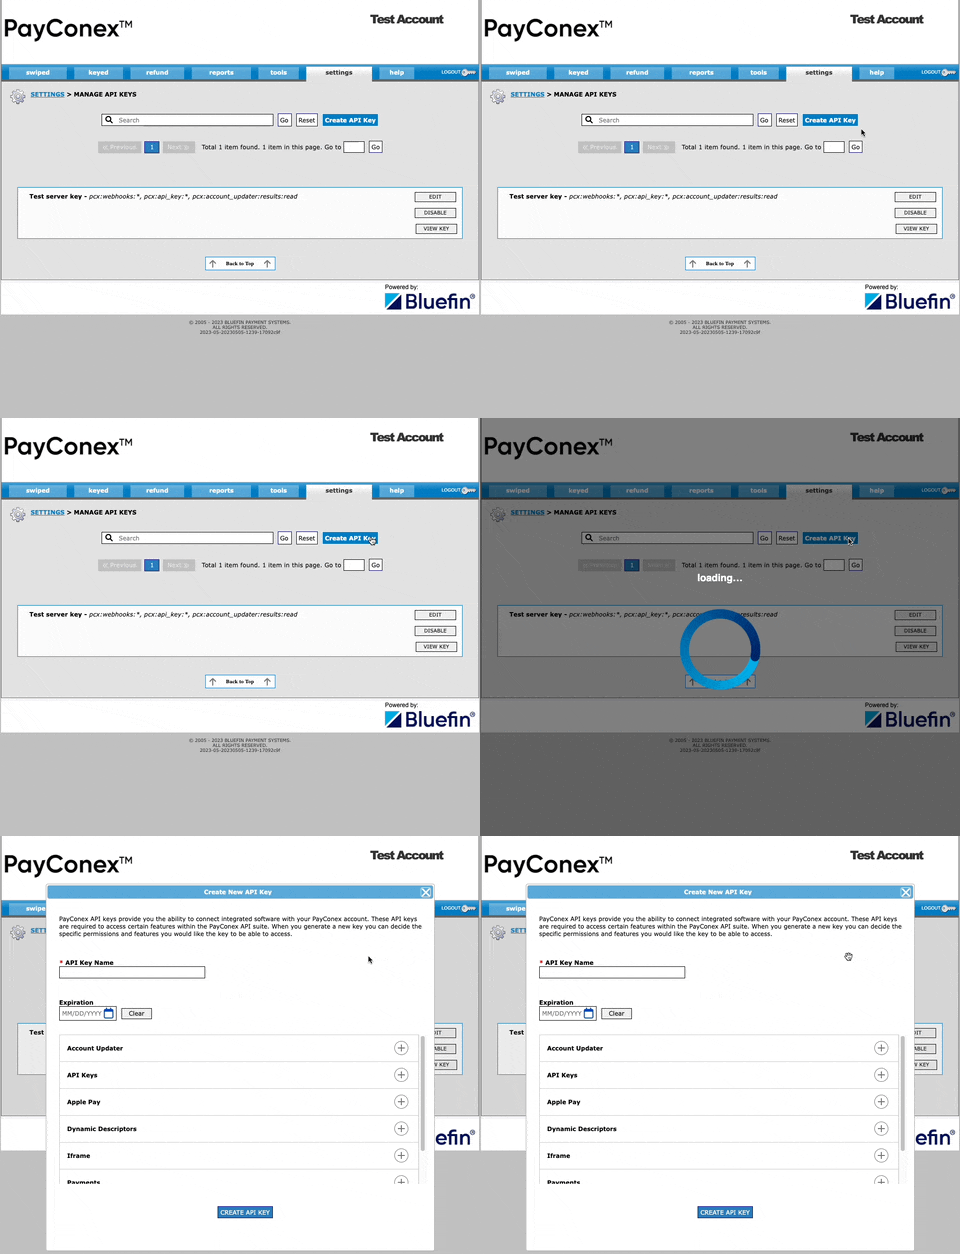
When creating an API key, the user has the option of defining three main components:
- API Key Name. Also known as a label, this value is required and is intended for use by a user as a way to quickly determine which API key is being referenced. Values in this field can contain upper and lower case letters, numbers, underscores, dashes and space characters.
- Expiration. The expiration date controls when the API key
idandsecretexpire. The date must be a date in the future. An expiration date is not mandatory. If no date is provided, the API key never expires. - Permissions. After the first two components comes a list of permissions that can be expanded and selected. These permissions control what functions the API key
idandsecretare allowed to make use of. The summary of these permissions is provided at Scope Definitions.
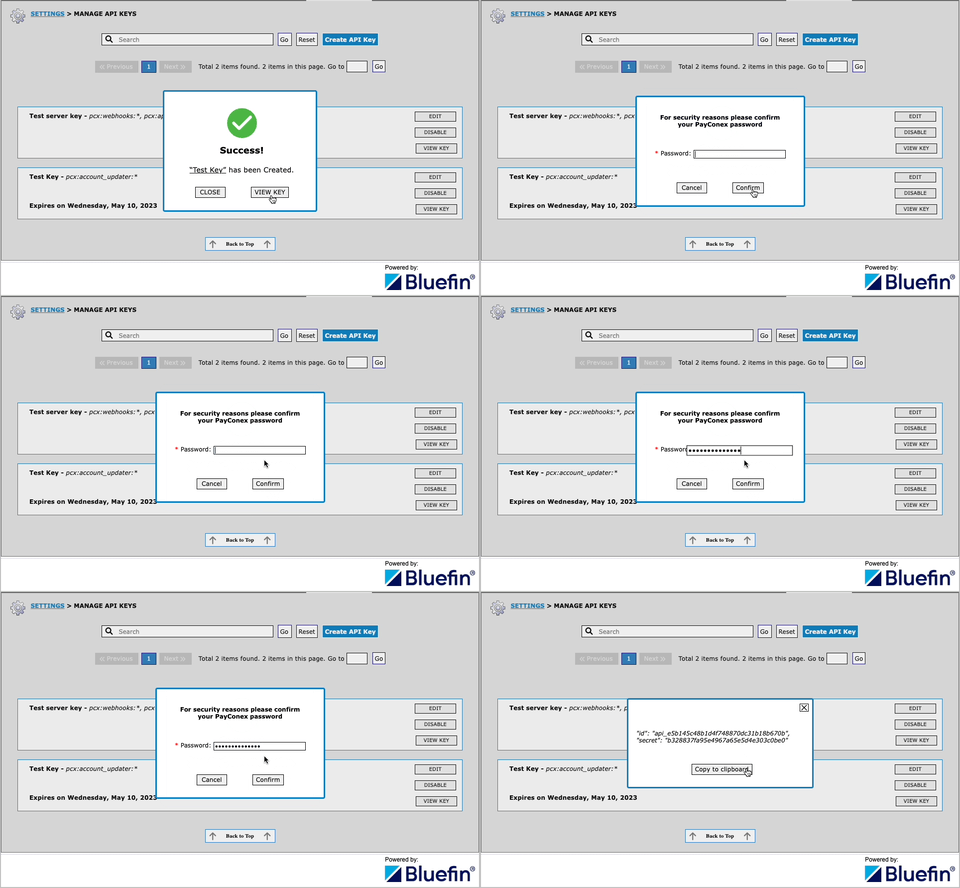
After the user inputs the data for the key and clicks the CREATE API KEY button at the bottom of the form, a message is displayed indicating that the key has been created. The user can close the message or click to view the key id and secret.
If they opt to view the id and the secret, the user first has to confirm their password. After the user inputs the correct password, the id and secret are displayed.
Viewing the API Key List
If the account being accessed has API keys already configured, a list populates on the MANAGE API KEYS page. Each element in the list is displayed as a box that contains the API key label, a summary of the permissions enabled on the key, the date the API key expires (if it is set to expire), and buttons for actions that can be taken for each key.

Retrieving the id and secret of an API Key
id and secret of an API KeyTo retrieve the id and secret of an API key, a user can click the VIEW KEY button on any of the API keys in the list.
For security purposes, the user is required to confirm their password before the id and secret are displayed.
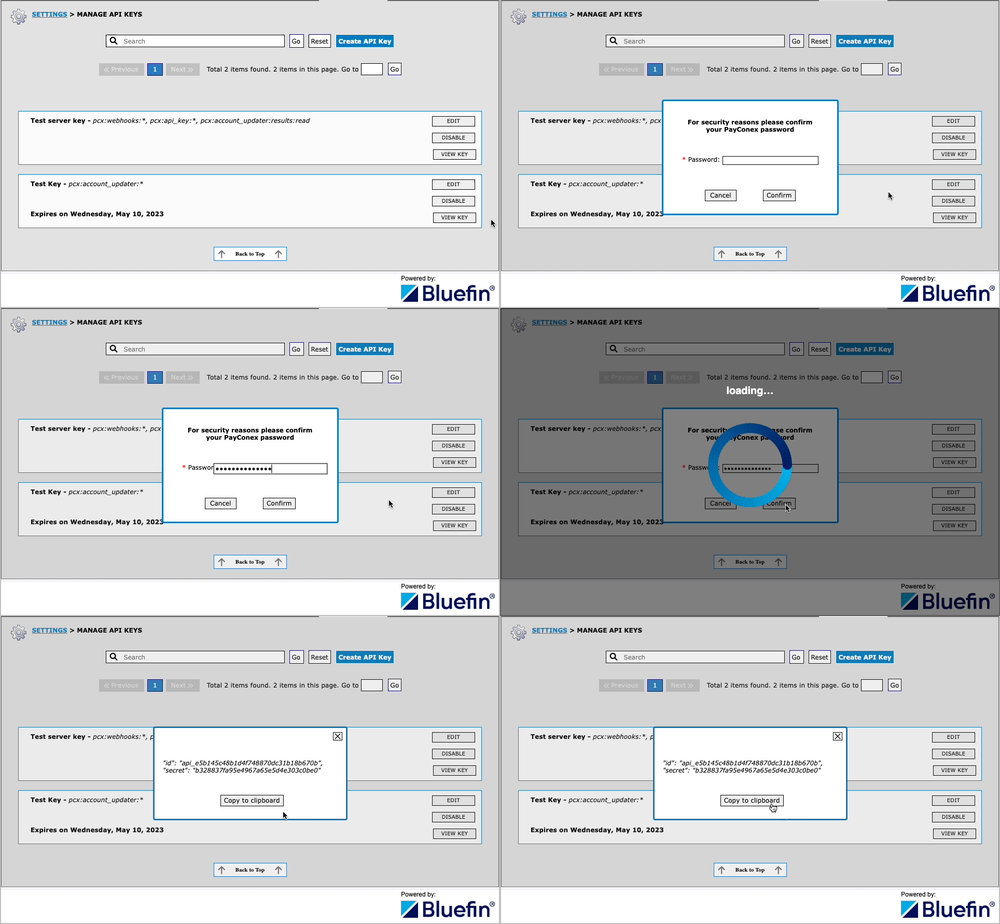
Clicking the Copy to clipboard button copies the id and secret as a JSON object to your clipboard.
{
  "id": "api_e5b145c48b1d4f748870dc31b18b670b",
  "secret": "b328837fa95e4967a65e5d4e303c0be0"
}
Editing an API Key
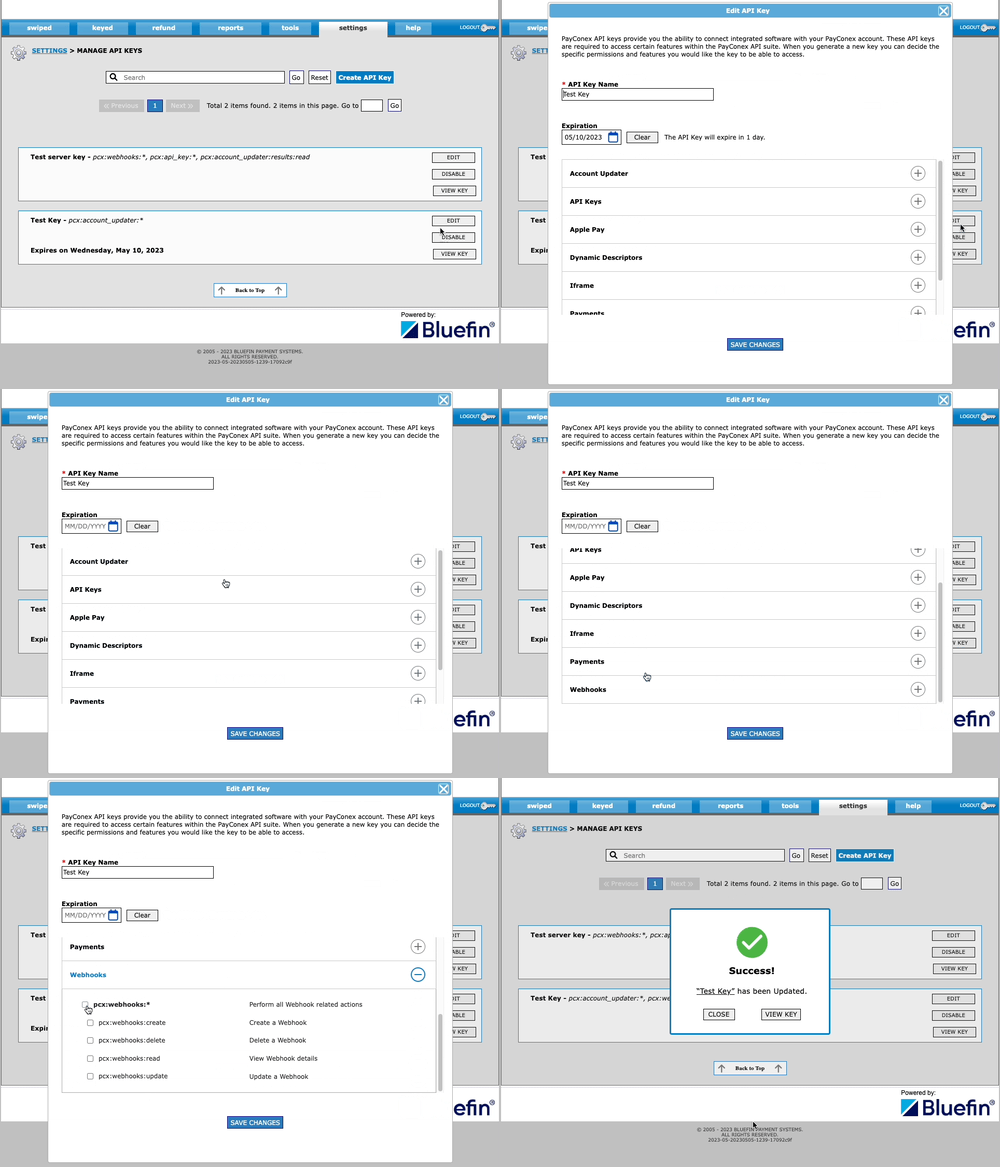
Clicking the EDIT button for an API key presents the same model that is used to create an API key.
Any modifications to the API key settings are saved after you click the SAVE CHANGES button at the bottom of the form.
In the example below, the expiration date of the key is removed and the pcx:webhooks:* permission is granted.
Disabling an API Key
Disabling an API key prevents the id and secret from being used for any PayConex™ V4 API functions.

