Settings
The settings and options that are displayed are based on your role and permissions.
NoteTo change your access level, contact your PayConex Administrator or your Bluefin representative.
The following settings are available from the Settings tab. Refer to the sections below for more detailed information.
| Option | Description |
|---|---|
| Manage Settings | View / Edit the following: Basic Information, Processing Rules, Payment Page Options, iFrame Options, Keyed/Swipe Field Validation, Notification Rules, API Response Handling, QSAPI Options, RSAPI Options and Card Checking / IP Blocking. |
| Change Your Password | Change your own password. Follow the prompts to change your password and click Change Password when you’re done. Password Requirements: Must contain 8-50 characters |
| Manage Your 2FA | Users will only see the 2FA option if this level of security was enabled by account administrators at the account level. Enable / Disable Two Factor Authentication (2FA) by selecting Yes or No. (By default this option is set to No.) When the option is enabled, you will see an authentication key. Use a 2FA Authentication app on your smartphone to set up an authentication account using the code on your screen. |
| Manage Users | Add, edit, delete and unlock users. Reset the user’s password and reset the activation token. Refer to Managing Users in this guide for details. |
| Manage Groups | Add, view, edit and delete groups. Manage (Add, Edit, Manage reportable fields) Refer to Managing Groups in this guide for details. |
| Agent Tools | Manage accounts and run reports (merchant transactions) Refer to Tools > Agent Tools in this guide for details. |
| Manage IP Blocklist | Manage blocked IPs. You can search for blocked IPs, unblock IPs, and manually enter an IP to block. |
Manage Settings
These settings are customized for your account during the onboarding process.
ImportantOnly users with Administrator permissions can edit these settings.
To edit the settings, modify the option and then scroll to the bottom and click Update Settings.
Basic Information
Basic account demographics are displayed here. Required fields are indicated with a red asterisk. For new merchant accounts, these fields will be populated during the onboarding process.

| Account Name | Merchant’s name (legal name) |
| Display Name | Merchant’s name as it should display |
| Billing Address | Billing street address, city, state, zip |
| Billing Phone | Billing phone number |
| Billing Contact Email | Billing contact email address (The maximum number of alphanumeric characters is 255.) |
| Default Page | Options are: Swiped, Keyed, Recurring, Tools |
| API Access Key | Merchant’s API Access Key |
| Time Zone Setting | Merchant’s time zone |
Processing Rules
The options in this section are for managing rules related to transaction processing.

| Field | Description |
|---|---|
| Allow Credit Cards | Yes, No |
| Swipe As Keyed | Yes, No |
| Allow Checks | Yes, No |
| Default Pay Type | Card, Check |
| Allow Swipe | Yes, No |
| ACH Return Email | Optional. Enter the email address that should receive notifications when there is an ACH Return. To enter multiple email addresses, separate them with a comma. |
| Allow Recurring | Yes, No |
| Times to Retry Recurring | Select a number: 1, 2, 3 |
| Recurring On Hold – Max Retries | Yes, No |
| Block Duplicates | Yes, No |
| Block Time (seconds) | Enter time as seconds |
| Max Sale Amount Acceptable | Enter the maximum amount for a single transaction. If the amount is exceeded, customers will see the following error message: Transaction Amount Exceeds Maximum Allowable |
Payment Page Options
If the Hosted Payment Pages option is enabled, merchants can include additional features such as policy text, additional fields, and a tip line.
| Field | Description |
|---|---|
| Show Policy Link | Yes, No |
| Policy Text | Enter your policy text |
| Optional Feature | Select an option as desired: None, Images, Keypad, Whole Number Keypad, Invoice Entry |
| Show Tip Line | Yes, No |
| Show Level 2 Fields | Yes, No |
iFrame Options
Domain Whitelisting is the only configurable option for iFrame. This field is to configure the source URL for iFrame transactions.
| Field | Description |
|---|---|
| Domain Whitelist | Enter the source URL for transactions so PayConex Gateway can accept payments when using iFrame. This is usually the main web application’s URL address. |
NoteIf this is not properly configured, the PayConex Gateway will not allow the iframe to load.
Keyed / Swipe Field Validation
Merchants can configure required fields for processing keyed or swiped transactions within the Virtual Terminal as well as QuickSwipe (QSAPI) transactions. The settings below apply to card present and card not present transactions.
NoteThese options do not apply to Hosted Payment Forms.

| Field | Description |
|---|---|
| Custom ID | Enter label or custom ID and select one: All Characters, Alpha and Numeric, Alpha only, Numeric only |
| Input Group | Enter label or custom ID and select one: All Characters, Alpha and Numeric, Alpha only, Numeric only |
| Description | Enter label or custom ID and select one: All Characters, Alpha and Numeric, Alpha only, Numeric only |
| Group Label | Enter label for groups |
| Custom ID Required | Yes, No. Enter maximum length. |
| Input Group Required | Yes, No Enter maximum length. |
| Description Required | Yes, No Enter maximum length. |
| Group Selection Required | Yes, No |
| Last Name Required | Yes, No |
| Company Required | Yes, No |
| Phone Number Required | Yes, No |
| Email Required | Yes, No |
| Address (AVS) Required | Yes, No |
| City Required | Yes, No |
| State Required | Yes, No |
| Zip Required | Yes, No [The maximum number is 9 alphanumeric digits (123456789) or 10 alphanumeric digits if a dash is used (12345-1234).] Street and Zip are both required for full AVS validation. Otherwise, only a partial match could be the result when checked. If you select Yes, the zip code is required. If you select No, then no input is required. NOTE: If a zip code is entered, it will be passed to the processor for partial address verification. |
| Country Required | Yes, No |
| CVV2 / CCV Required | Yes, No NOTE: For Canadian merchants, the default for this field is Yes. |
| Decline Certain AVS Responses | Yes, No NOTE: If you select Yes, Sale and Auth transactions will be declined based on the options marked. |
| Decline Certain CVV Responses | Yes, No NOTE: If you select Yes, Sale and Auth transactions will be declined based on the options marked. |
Creating Custom Fields
You can customize certain fields, so they are unique to your business. The following fields are customizable: CUSTOM ID, and DESCRIPTION.
From Manage Settings scroll to Keyed/Swipe Field Validation. Customize the names based on your preference and then click Update Settings when you’re done.

From the processing screen, the following illustrates how the changes above would display:

Making Fields Required
You can designate certain fields as required so that entering values in those fields is mandatory to process a transaction.
NoteWhen marking fields required this only applies to processing transactions directly within the PayConex Portal.
From Manage Settings > Keyed/Swipe Field Validation > select Yes next to the fields you want to designate as required.

Required fields are marked with a red asterisk in the PayConex Portal.

Notification Rules
Users can select from a set of pre-configured notification rules for virtual terminal transactions.

| Field | Description |
|---|---|
| Use Group Account Info on Receipt | Yes, No |
| Send Customer Receipt | Yes, No |
| Send Merchant Receipt | Yes, No |
| Send Recurring Customer Receipt | Yes, No |
| Send Recurring Merchant Receipt | Yes, No |
| Receipt Printer Type | Default, Narrow |
| Send Batch Settlement Notice | Yes, No |
Email Notification Settings
You can customize email notification settings in PayConex. From Manage Settings > Notification Rules > select Yes next to the email notifications you want to enable.
NoteIn order to send the customer an email receipt, the email address must be entered when processing the transaction.
API Response Handling
General API settings displayed here can apply to the PayConex API Suite, POSTback, Hosted Payment Forms, or Transparent Redirect.

| Field | Description |
|---|---|
| API Response Format | FORM or JSON. The system default for API responses is FORM. |
| Redirect HTTP Method | GET or POST. The system default for transparent redirect is GET. |
| Pre-Encode Post / Callback (QSAPI) | Enabled, Disabled |
| Pre-Encode Post / Callback (HPF) | Enabled, Disabled |
| Post / Callback | Enabled, Disabled |
| Post / Callback URL | Back-end URL to send POSTBack transaction response data. |
| Redirect Successful URL | Enter the landing page for Approved transactions. |
| Redirect Decline URL | Enter the landing page for Declined transactions. Leave blank if same as Success URL. |
| Recurring Postback Format | FORM or JSON. The system default for recurring responses is JSON. |
QSAPI Options
Configure QuickSwipe API (QSAPI) options here.

| Field | Description |
|---|---|
| Include Card BIN in Response | Yes, No The QSAPI response to a transaction request can include the BIN value (first 6 digits.) You can enable/disable this option. |
| Copy Reportable Field Data on Reissues | Yes, No |
| Copy Reportable Field Data on Refunds | Yes, No |
| Max Simultaneous Transactions | Enter the maximum number of simultaneous transaction requests that one particular hash can be used before disallowing the transaction request. (The default is 5 and the maximum is 999.) |
Manage API Keys
Change Your Password
Manage your 2FA
Two-factor authentication (2FA) adds an extra layer of protection to your PayConex account, ensuring that even if your password is compromised, your account remains secure. By requiring a second form of verification—a code generated by an app on your mobile device—2FA makes it significantly more difficult for unauthorized users to gain access.
In this guide, we’ll walk you through the steps to set up two-factor authentication for your PayConex account using a trusted authentication app. Whether you are new to 2FA or looking to enhance your account security, this guide will provide clear, step-by-step instructions to help you get started.
Two-factor Authentication Applications
Before making any changes to the user account within PayConex you will need a two-factor authentication application installed and set up on your mobile device.
There are a number of these applications available from various software companies, two that we can recommend are:
- Google Authenticator
- Microsoft Authenticator
Updating PayConex Account
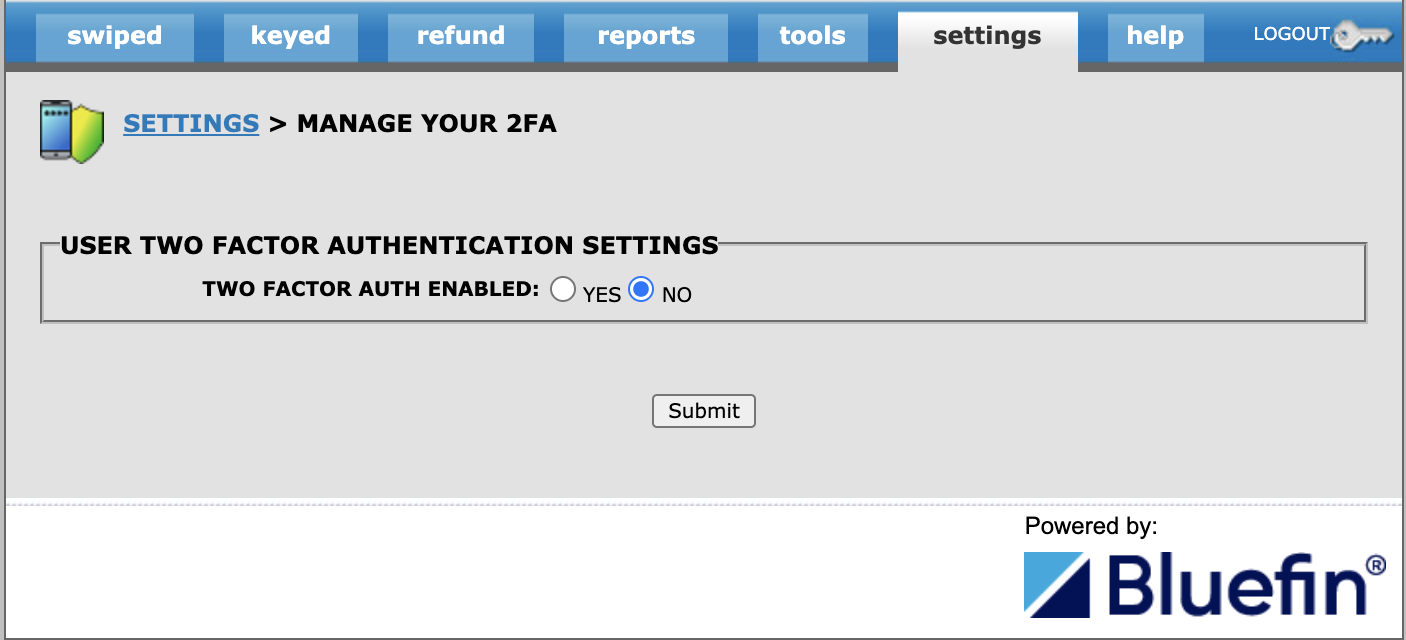
To configure two-factor authentication for your PayConex account you must log in and navigate to the Settings tab. Here you will click the Manage Your 2FA link.
You will then be directed to a screen to turn on 2FA for your account. Select Yes and click Submit.
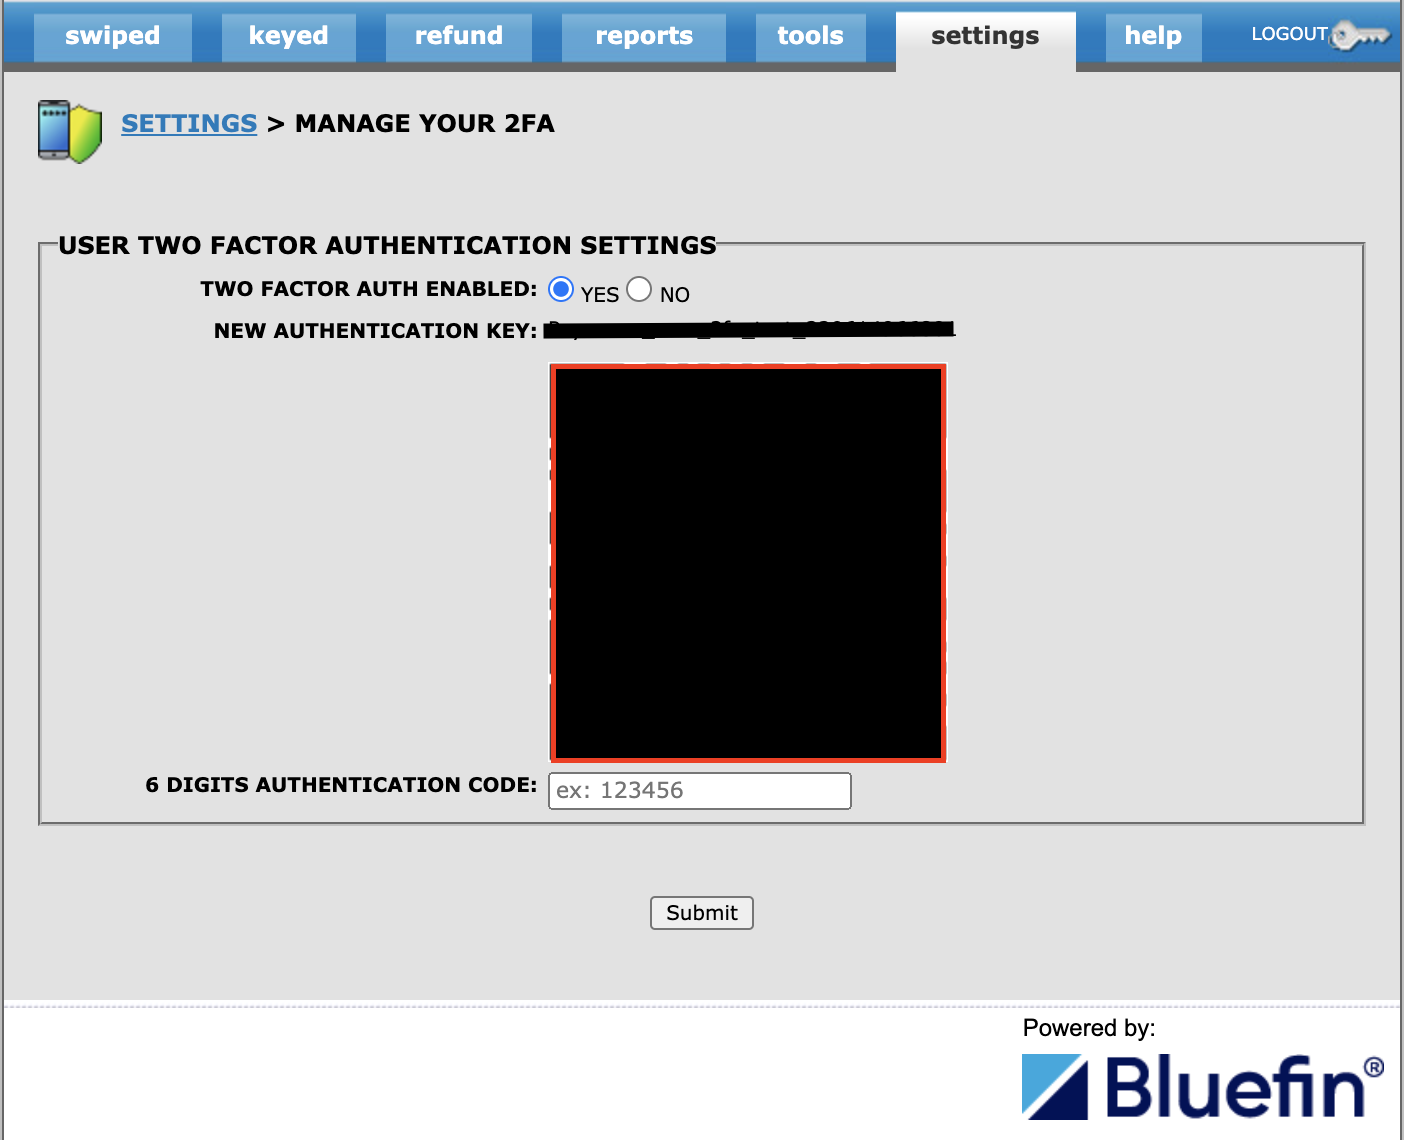
After enabling 2FA a QR code will appear. In the screenshot below it is blacked out for security purposes. Scan this QR code into the google authenticator application, enter the six-digit authentication code that appears in the application, and then click submit.
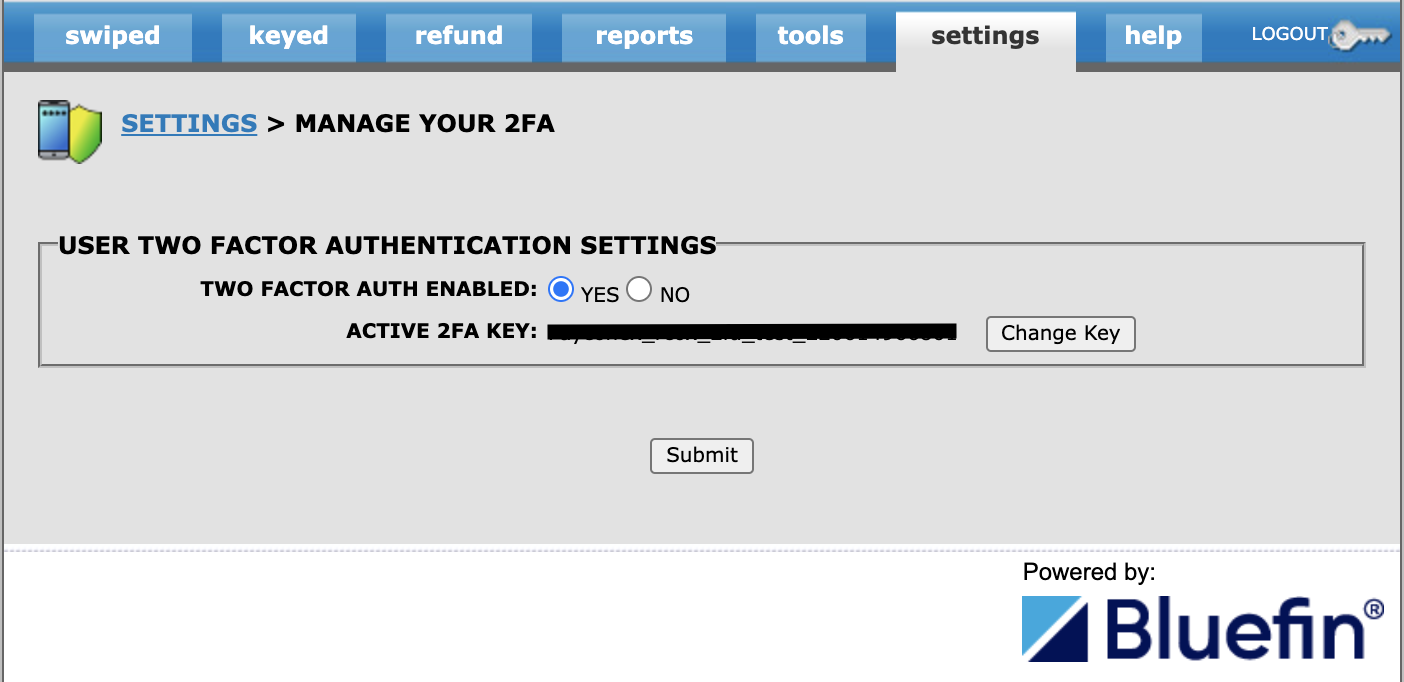
After submitting the code you will see the active 2FA key reflected on the page.
Manage Users
Manage Groups
Agent Tools
Dynamic Descriptors
Updated 4 months ago